Maybe you’ve run into this Android Studio problem lately. You’ve created a brand new project, and when you run it — even if you haven’t made any changes — you get the dreaded Android Gradle plugin requires Java 11 to run error:

Here’s the “quick and dirty” fix. It assumes that you already have JDK 11 installed.
- On Linux and Windows, open the File menu and select Settings… to get to the Settings window (you can also use the keyboard shortcut Ctrl + Alt + s).
- On macOS, open the Android Studio menu and select Preferences… to get to the Preferences window (you can also use the keyboard shortcut ⌘ + , ).
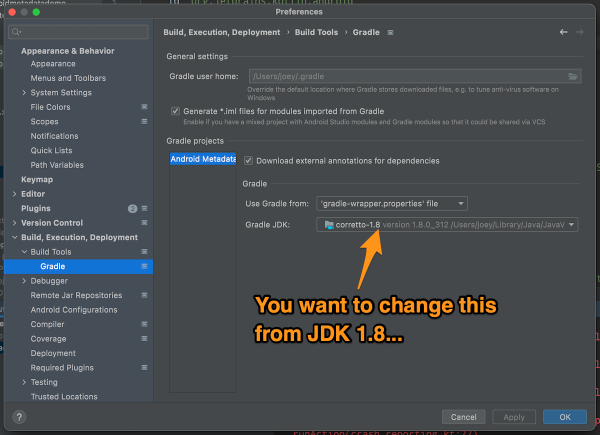
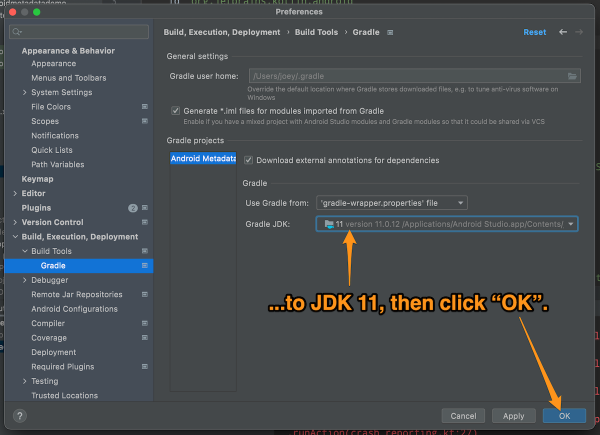
Once the Settings or Preferences window is open, select Build, Execution, Deployment → Build Tools → Gradle from the menu on the left side.
You can change the JDK that Gradle uses in the Gradle projects section’s Gradle JDK menu. Changing the current selection from JDK 1.8 to JDK 11 works for me:


The Android Studio on my Windows machine already defaults Gradle to JDK 11, but on my Mac, it’s still insisting on JDK 1.8. I’m sure there’s some config file floating around somewhere that I need to edit — does anyone know which one? — but in the meantime, I’m using the quick and dirty fix.