What’s Tampa Code Camp?
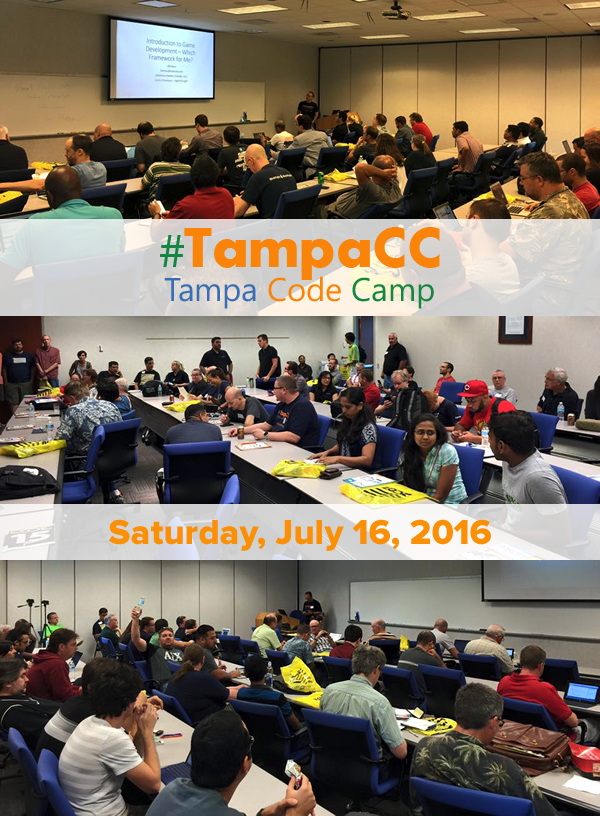
 Tampa Code Camp is an annual community learning event for programmers in the Tampa Bay Area. This year’s edition takes place this Saturday, July 16th at the KForce offices, located just on the edge of Ybor City.
This year, Tampa Code Camp will feature 28 presentations across 4 tracks — cloud, web/mobile, .NET, and miscellaneous and open source — presented by local developers who are volunteering their time to share their knowledge. Tampa Code Camp is free to attend (but you need to register) and provides free donuts in the morning and a free lunch to attendees, thanks to the generosity of its sponsors.
Why should you attend Tampa Code Camp?

Developer and author of AngularJS in Action Lukas Ruebbelke wrote in What I Wish I Could Tell My Younger Programmer Self that the three things he wishes he could tell his younger self are:
- Surround yourself with programmers
- Surround yourself with better programmers
- The community’s success is your success
He’s right. Learning to program is enhanced when conversing and collaborating with other programmers. It’s even better when you can find peers from whom you can learn, and who challenge to become better (Mom was right — you should choose your friends carefully). And finally, the time and effort you invest into the local developer community often pays off with interest.
For Tampa Bay developers, Tampa Code Camp is a great way to follow Lukas’ advice to his younger self. It’s a great way to meet your industry peers, and from my experience at past code camps, you’ll always find people from whom you can learn. The connections you make at code camps can greatly benefit both your personal and professional life. And finally and most importantly, events like this — events that educate, support, connect, and strengthen the developer community — help to build Tampa Bay’s tech social capital and make it a better place for developers to live and work.
What’s being presented at this year’s Tampa Code Camp?
 Tampa Code Camp opens with a keynote by a person of note. Last year, it was Mayor Bob Buckhorn, who talked about the importance of helping grow Tampa’s technological sector, especially for small businesses and startups.
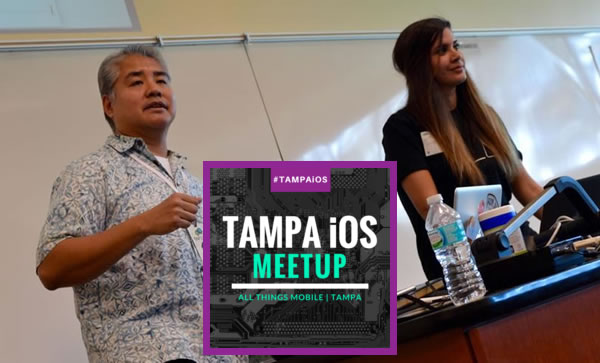
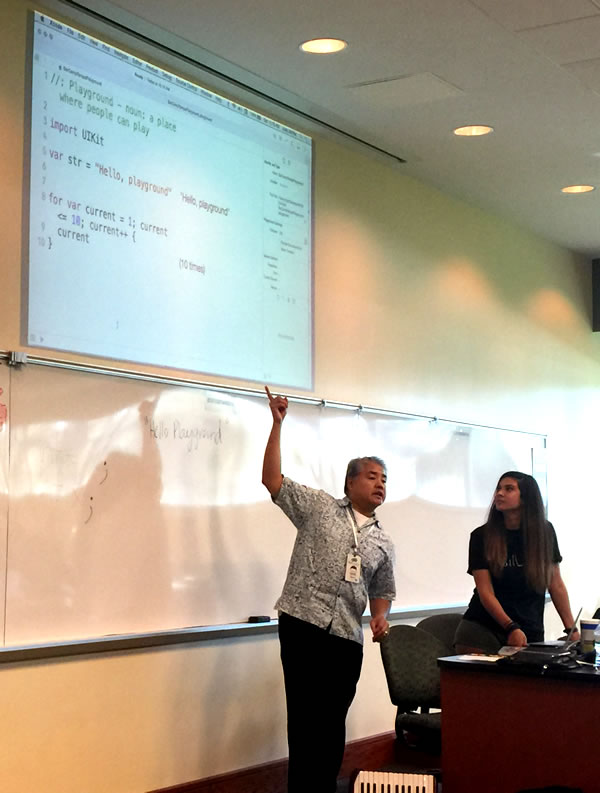
This year’s keynote speaker is Joe Darko (pictured on the right), Program Manager Evangelist with Microsoft. He’ll open this year’s Tampa Code Camp with a talk about community and what it means to Microsoft.
The day’s 28 technical presentations will start at 9:00 a.m. and will be arranged into four tracks:
- Cloud
- Web/mobile
- .NET
- Miscellaneous and open source
A free lunch (usually sandwiches) will be served from 11:50 a.m. to just before 1:00 p.m., and there will be an after-party sometime around 6:00 p.m. at a nearby location to be announced.
Here’s the schedule, broken down by track:
Cloud track
|
9:00 a.m. – 9:50 a.m.
|
Build apps in Azure DocumentDB leveraging your C# and SQL skills – Santosh Hari |
|
10:00 a.m. – 10:50 a.m.
|
A lap around Azure Service Fabric – Keith Wood |
|
11:00 a.m. – 11:50 a.m.
|
Riding Microsoft’s Service Bus, To Azure Cloud And Back –bayer white |
|
1:00 p.m. – 1:50 p.m.
|
Apache Spark on Azure HDInsight – Hands On Lab – Adnan Masood |
|
2:00 p.m. – 2:50 p.m.
|
jQuery and jQueryUI: going beyond .hide() – Colin Borrowman |
|
3:00 p.m. – 3:50 p.m.
|
Developing High Performance Websites in ASP.net –Michael Ritchie |
|
4:00 p.m. – 4:50 p.m.
|
Introduction to REST – John Wang |
Web/mobile track
|
9:00 a.m. – 9:50 a.m.
|
Speed dating with front-end JavaScript MV* frameworks –Tyrone Davis |
|
10:00 a.m. – 10:50 a.m.
|
What’s New in ECMAScript 2015 – Sasha dos Santos |
|
11:00 a.m. – 11:50 a.m.
|
Windows App Studio: Data, Graphics & Installable packages– Russell Fustino |
|
1:00 p.m. – 1:50 p.m.
|
I Hate Managing Servers Web Develop.m.ent with Visual Studio Team Services and Azure App Services – Jeff Ammons |
|
2:00 p.m. – 2:50 p.m.
|
Machine Learning for Non-Data Scientists – Jay Kimble |
|
3:00 p.m. – 3:50 p.m.
|
SharePoint Develop.m.ent in the Cloud – Gary Blatt |
|
4:00 p.m. – 4:50 p.m.
|
A first look at U-SQL on Azure Data Lake – Jason Brugger |
.NET track
|
9:00 a.m. – 9:50 a.m.
|
Real World Software Architecture – Daniel Siebert |
|
10:00 a.m. – 10:50 a.m.
|
Factoring Your Code – Yale Cason |
|
11:00 a.m. – 11:50 a.m.
|
Intro to Dependency Injection – John Callaway |
|
1:00 p.m. – 1:50 p.m.
|
Integration Testing with Citrus Framework – mark lybarger |
|
2:00 p.m. – 2:50 p.m.
|
Migrating an existing WebApi 2 concept to a Node.js concept – Phil DeVeau |
|
3:00 p.m. – 3:50 p.m.
|
Moving Quickly Without Breaking Things in .NET – Matt Wagner |
|
4:00 p.m. – 4:50 p.m.
|
Memory Management Funda.m.entals – IDisposable and the Dispose Pattern – Scott Dorman |
Miscellaneous and open source track
|
9:00 a.m. – 9:50 a.m.
|
YOURS TRULY SPEAKS! Just Enough React to Get You Into Trouble – Joey deVilla |
|
10:00 a.m. – 10:50 a.m.
|
Introduction to Angular2 – Sebastian Castaldi |
|
11:00 a.m. – 11:50 a.m.
|
Introduction to Tools For Apache Cordova ( TACO) – Wael Kdouh |
|
1:00 p.m. – 1:50 p.m.
|
React, Mongo, WebAPI, VSTS, HockeyApp: Building A Web and Native Pipeline Status Application: Part 1 – Donald Bickel |
|
2:00 p.m. – 2:50 p.m.
|
React, Mongo, WebAPI, VSTS, HockeyApp: Building A Web and Native Pipeline Status Application: Part 2 – Donald Bickel |
|
3:00 p.m. – 3:50 p.m.
|
A New UI Era: Electron – Brian Deragon |
|
4:00 p.m. – 4:50 p.m.
|
TypeScript? – BJ Fink |
Who’s behind Tampa Code Camp?
Tampa Code Camp is a volunteer, labor-of-love effort by and for the Tampa Bay developer community. It’s pulled together every year by Greg Leonardo and Kate Leonardo, with the generous help of these sponsors…
- Accusoft
- AgileThought
- Cardinal Solutions
- Chase
- Code Career Academy
- DevEvolved
- KForce
- Mercury New Media
- TampaDev, Inc.
- Webonology
- Wolters Kluwer
…and of course, the presenters and volunteers who help run the event.
How do I sign up to attend Tampa Code Camp?

Go to Tampa Code Camp’s registration page to register. Please do so — it helps the organizers plan for space, food, and other amenities, and it’s the least you can do since the event is free.
I’ll see you there on Saturday!
