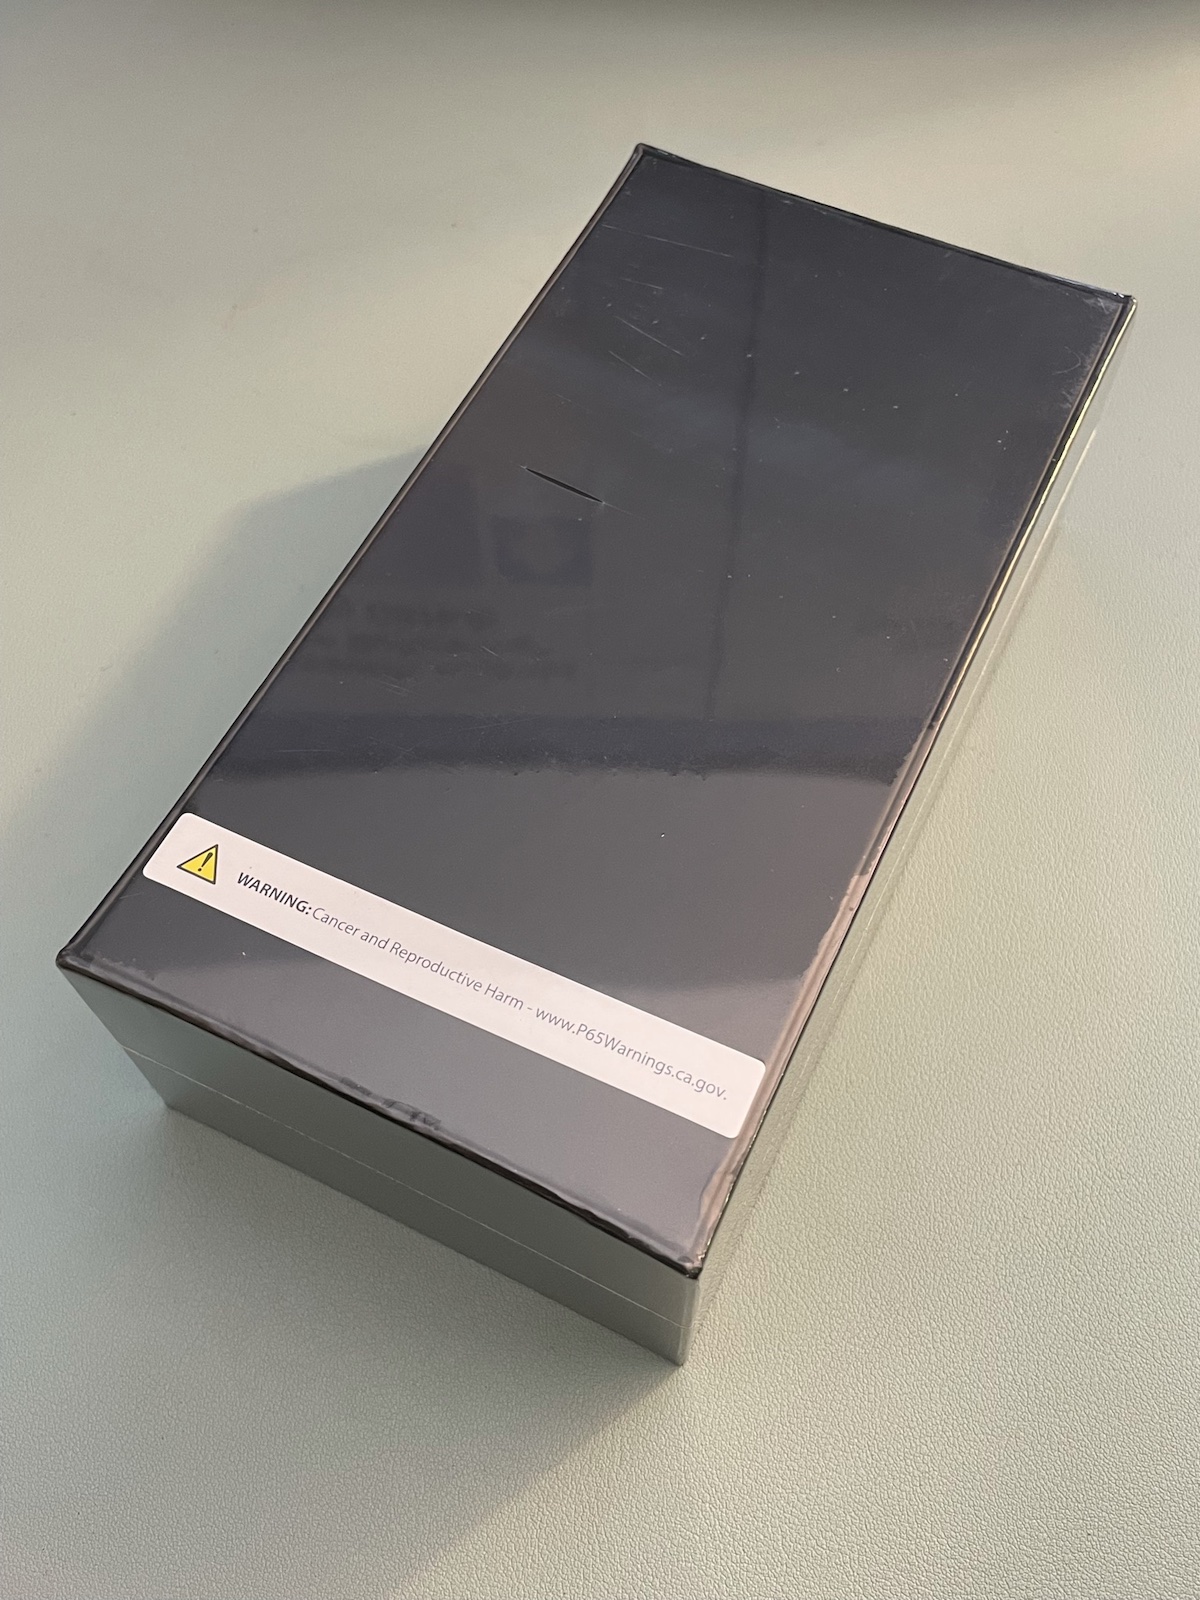
The top of the RedMagic 6R box. Tap to view at full size.
This article is part of the Android August series, in which I’m writing an Android development-related article every day during the month of August 2021.
I write apps for both iOS and Android devices, so I make it a point to own both an iPhone and an Android phone. Since I’m giving my current Android device, a Motorola One Hyper, to my father-in-law so that he has a mobile phone from the current millennium, I needed a replacement. This set of photos is of that replacement: the RedMagic 6R.
The bottom of the RedMagic 6R box. Tap to view at full size.
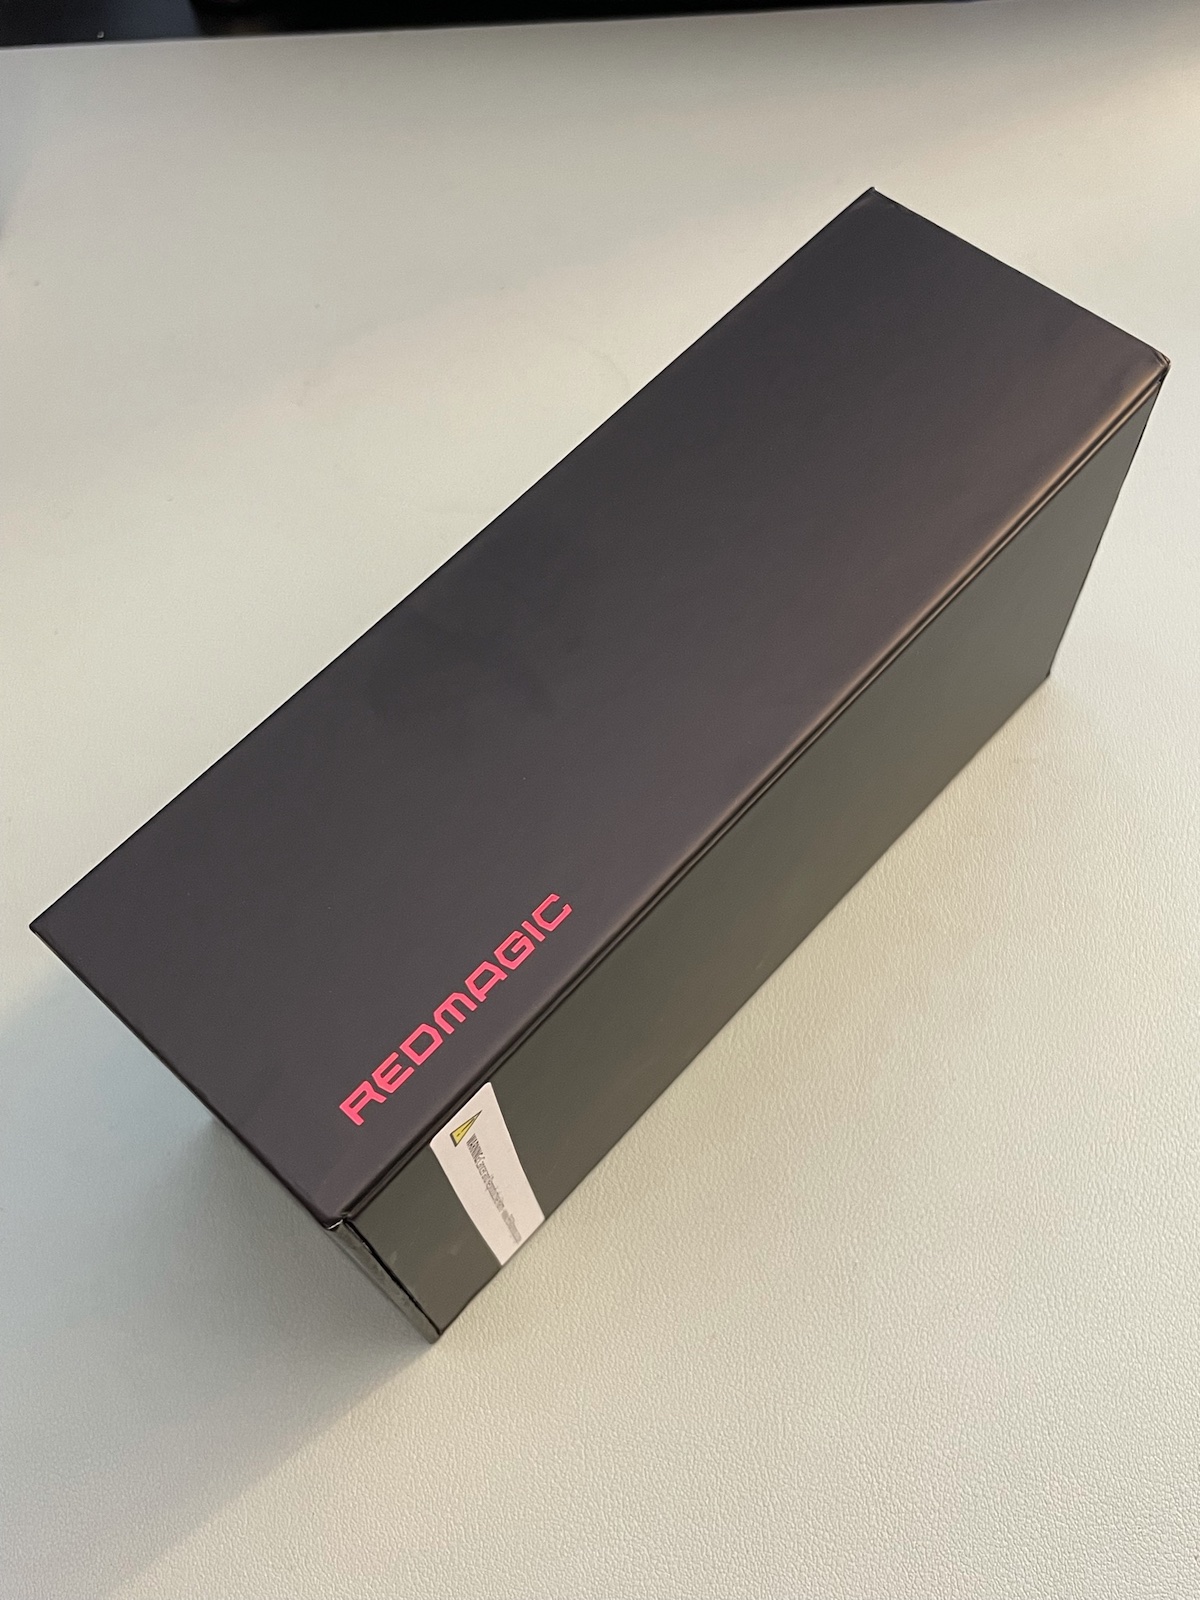
The side of the RedMagic 6R box. Tap to view at full size.
RedMagic, a sub-brand of Nubia, which was originally a sub-brand of higher-end phones from Shenzhen-based phone and telco equipment company ZTE, specializes in gaming phones. In addition to using the better CPU and GPU chipsets required for gaming, RedMagic also does a better job of packaging than you’d expect from many other Chinese phone companies who are competing solely on price.
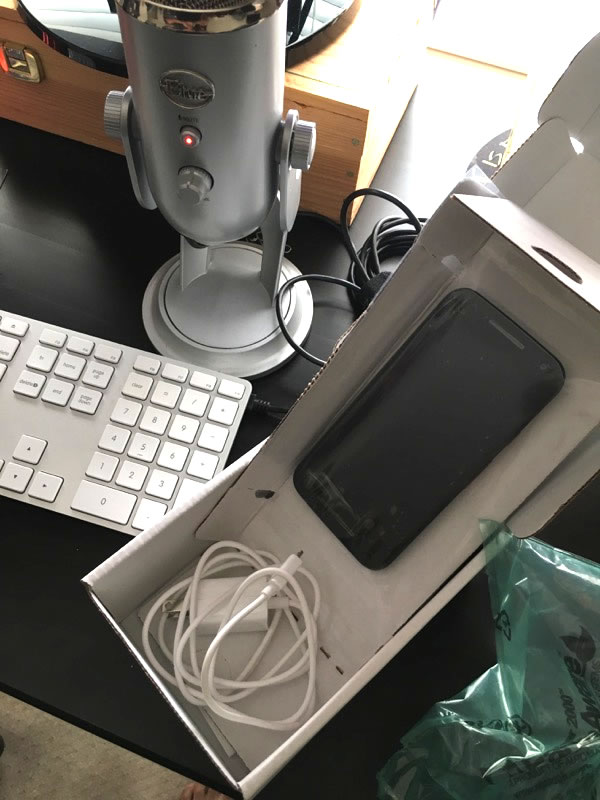
Case in point: Compare the sleek RedMagic packaging you’ve seen so far to the box that my 3rd-generation Motorola G came in:
Tap to read the original article.
I peeled off the shrink wrap and opened the box to see this:
The top layer inside the RedMagic 6R box. Tap to view at full size.
The RedMagic 6R packaging is layered in a manner similar to the iPhone’s. The top layer is a box, which I flipped over to open, as shown below:
Opening the top layer box. Tap to view at full size.
In addition to the SIM tray ejection pin, the top layer box contained the following:
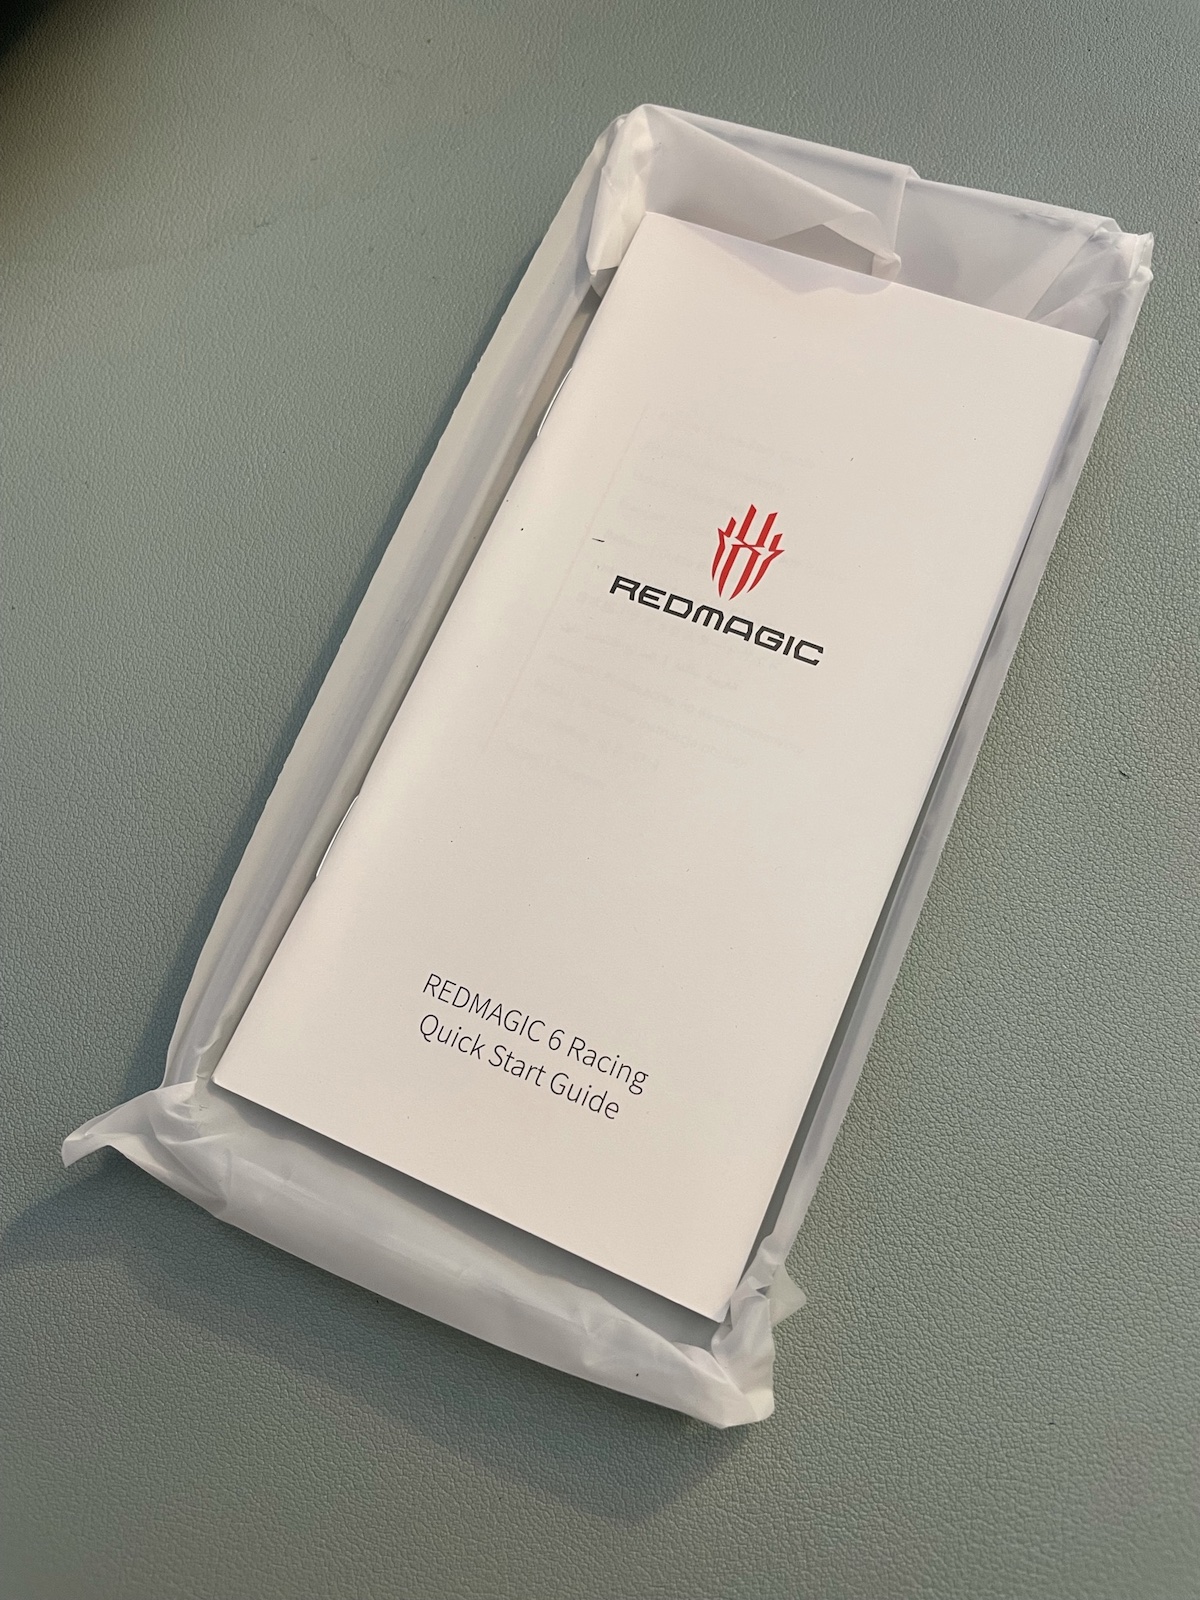
The contents of the top layer box. Tap to view at full size.
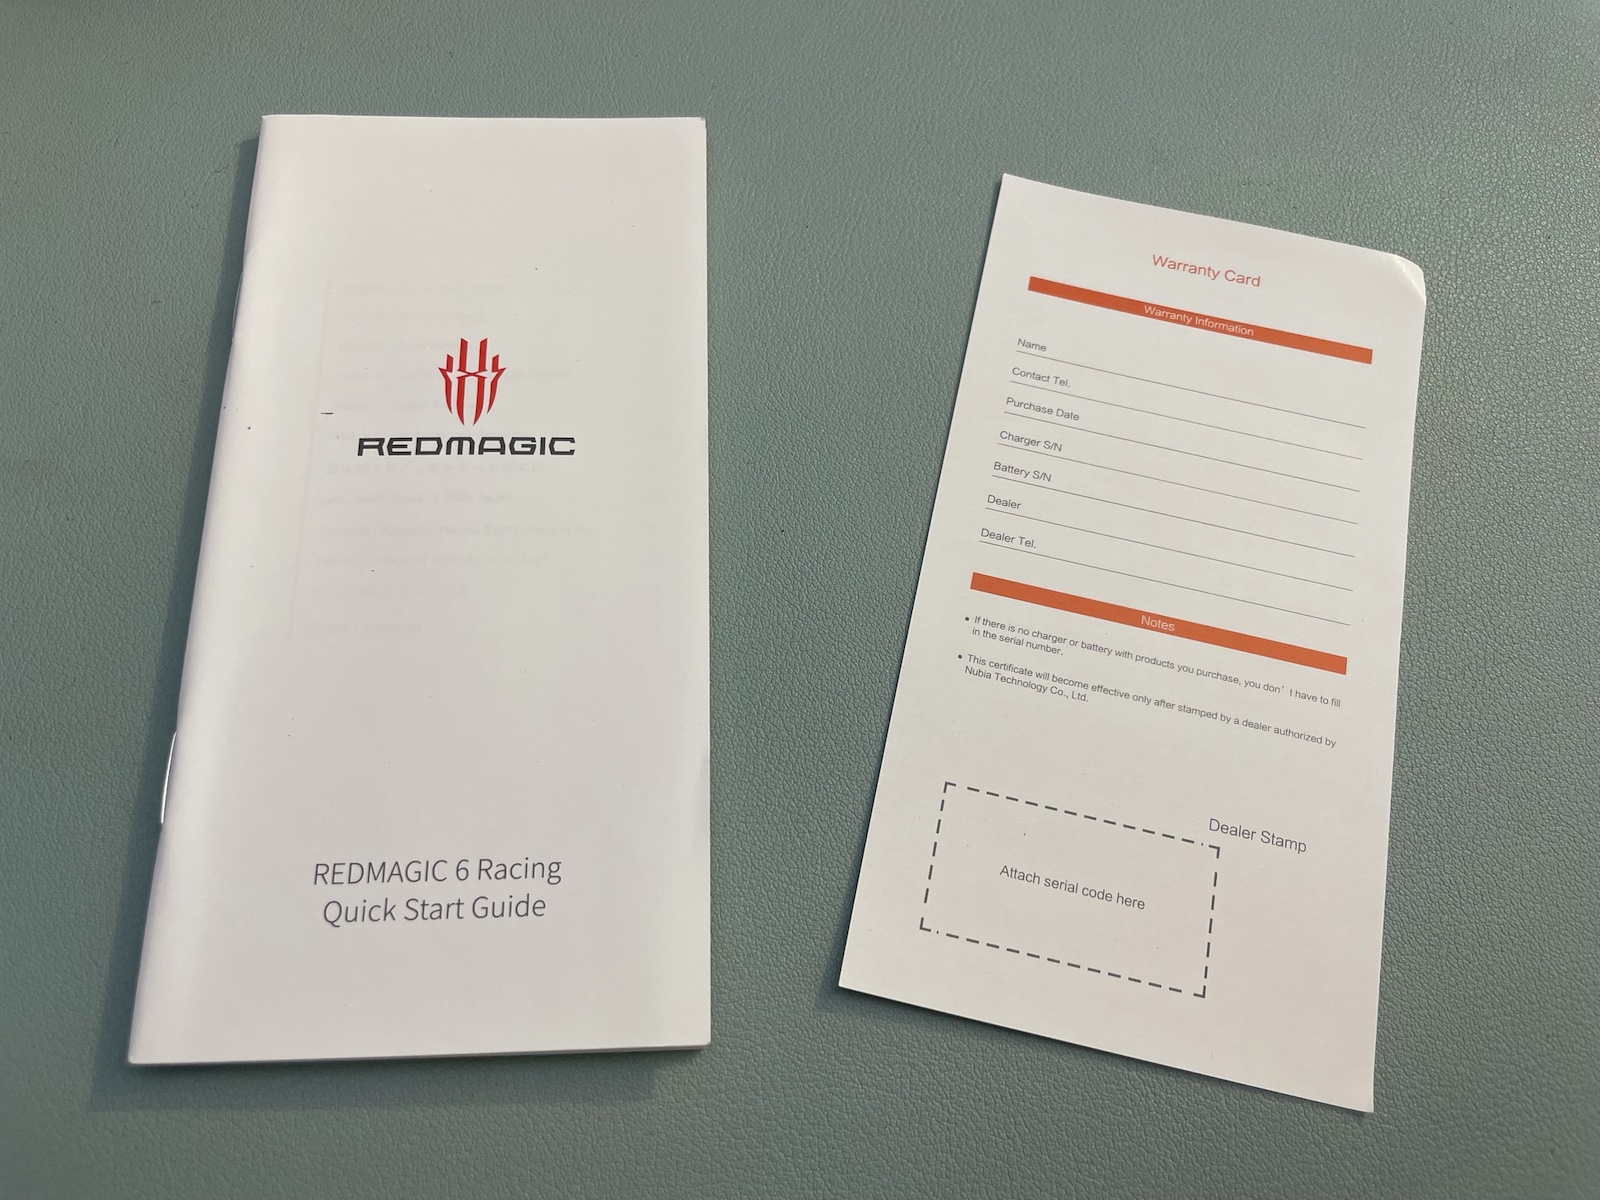
Its contents were the Quick Start Guide, a warranty card…
The Quick Start Guide and warranty card. Tap to view at full size.
…as well as a basic case, contained within a protective envelope:
The included case, still inside its envelope. Tap to view at full size.
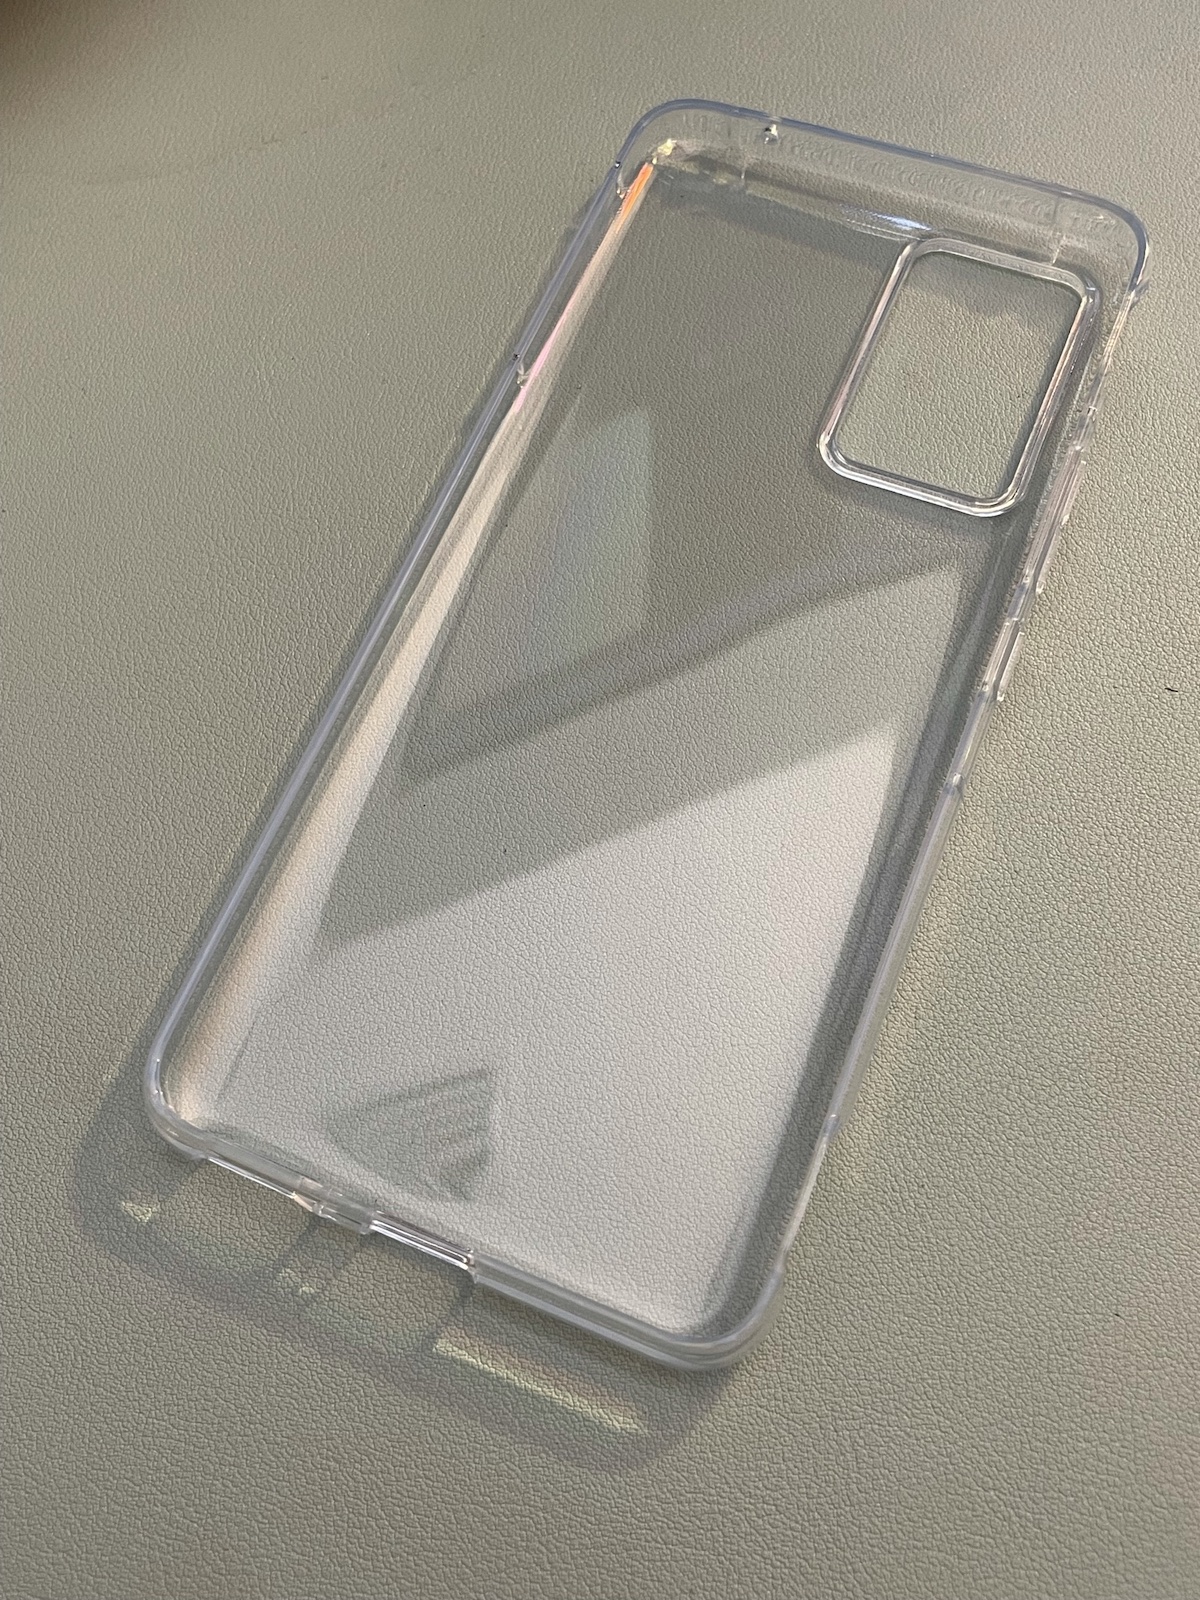
The case itself is one of those clear, pliable, “soft gel” ones:
The case. Tap to view at full size.
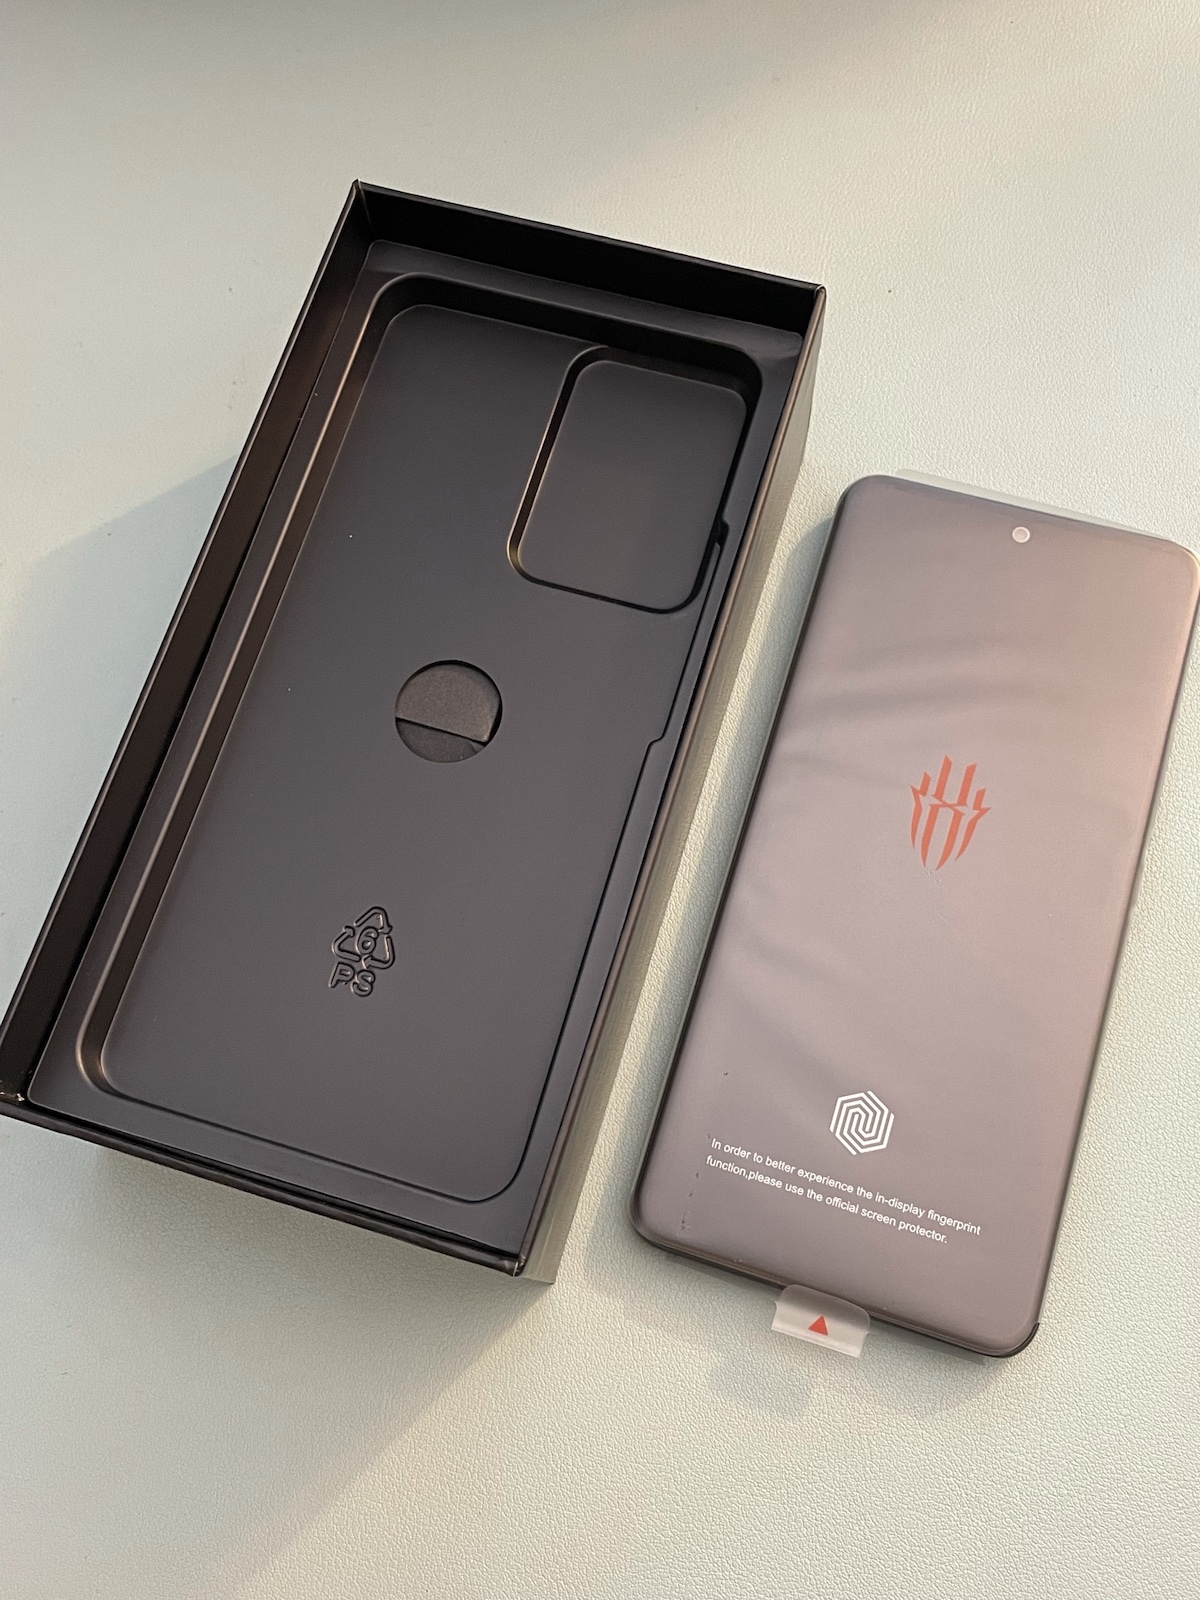
The next layer contained the phone itself:
The phone layer. Tap to view at full size.
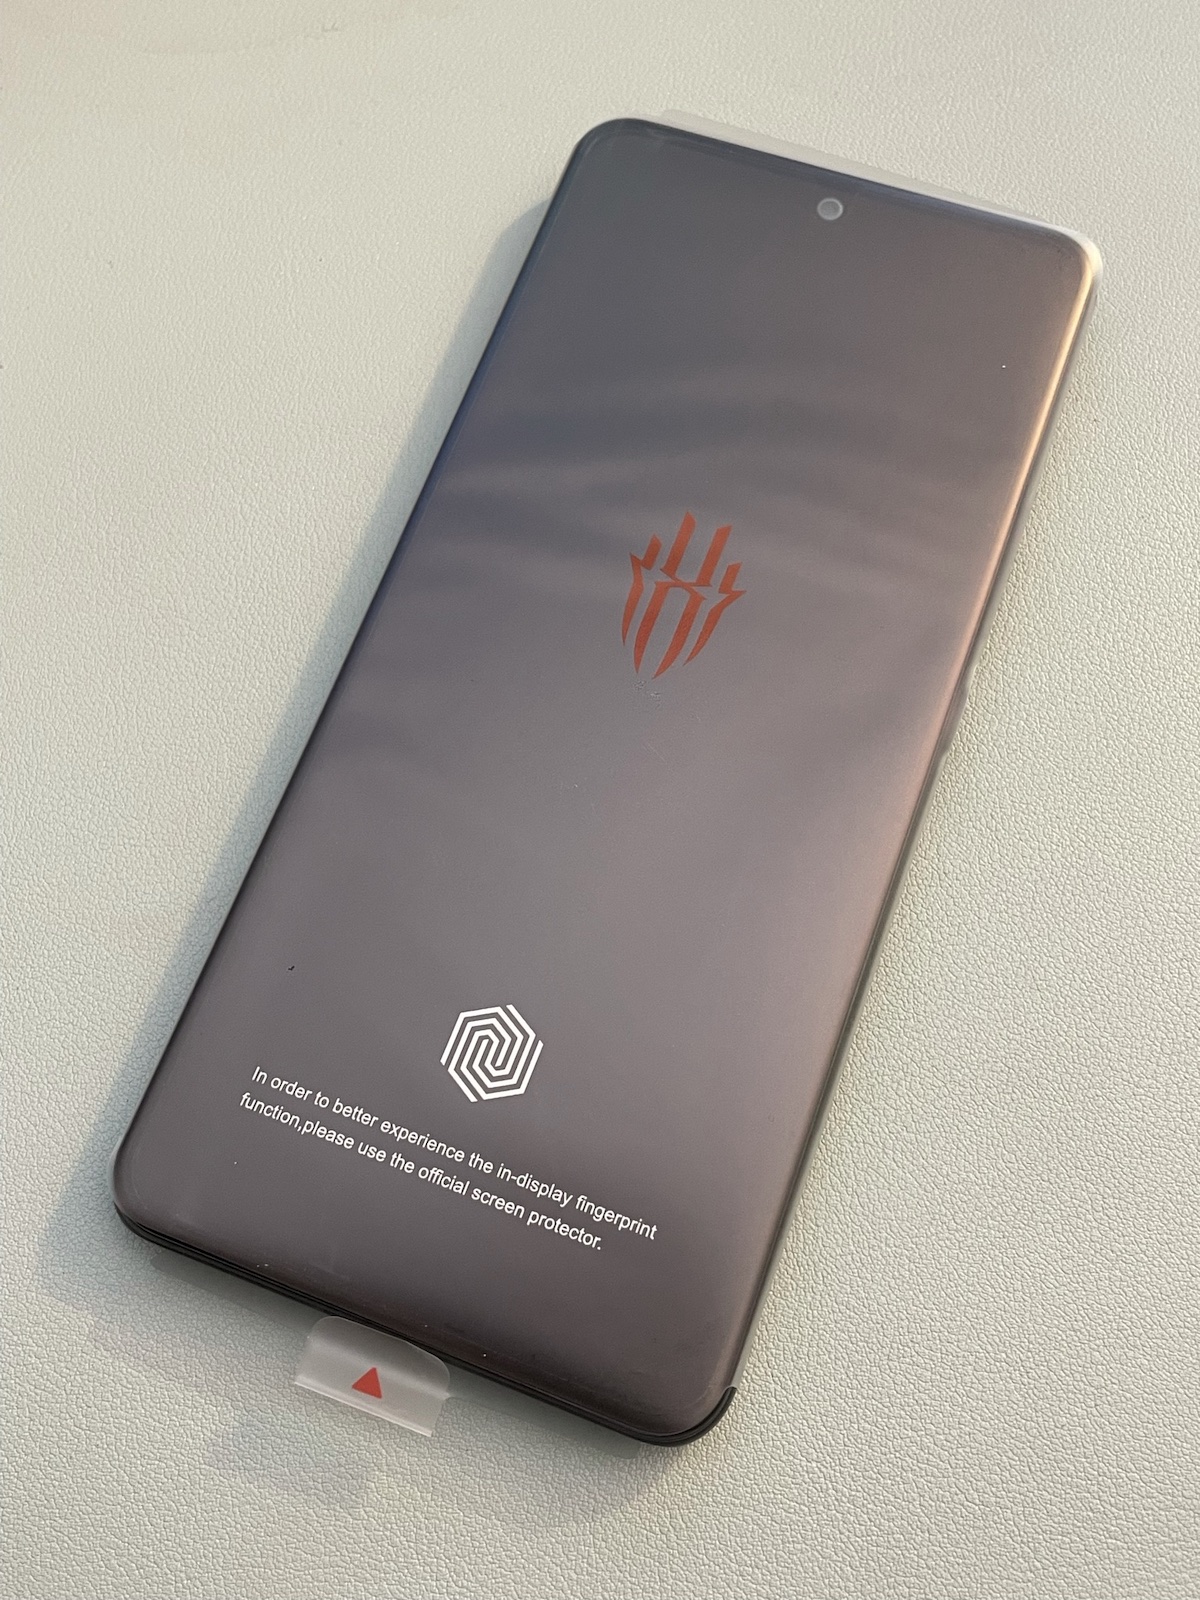
The phone’s thin protective plastic sleeve has a little tab that makes it easy to lift out of the box, which was a nice little high-end touch:
The phone, now out of its box. Tap to view at full size.
Here’s the front of the phone, which is still inside its protective plastic sleeve…
The front of the phone, still in its sleeve. Tap to view at full size.
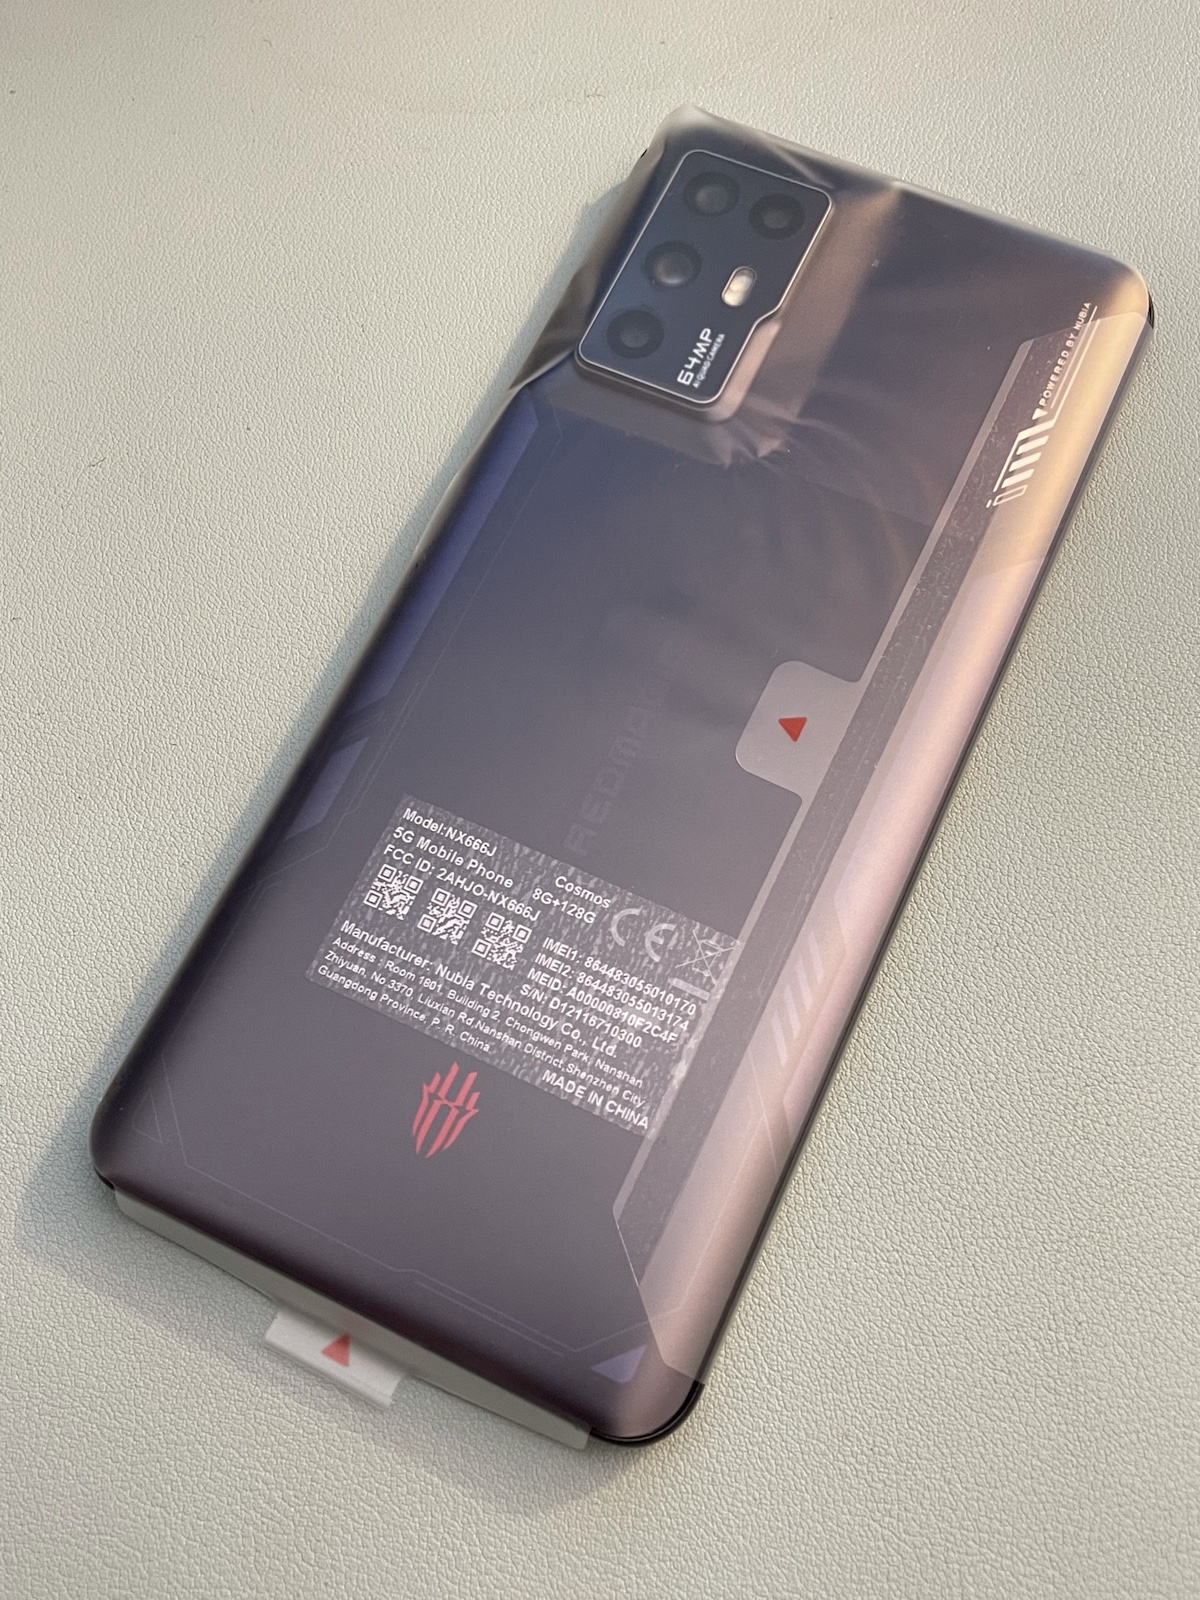
…and here’s the back:
The back of the phone, still in its sleeve. Tap to view at full size.
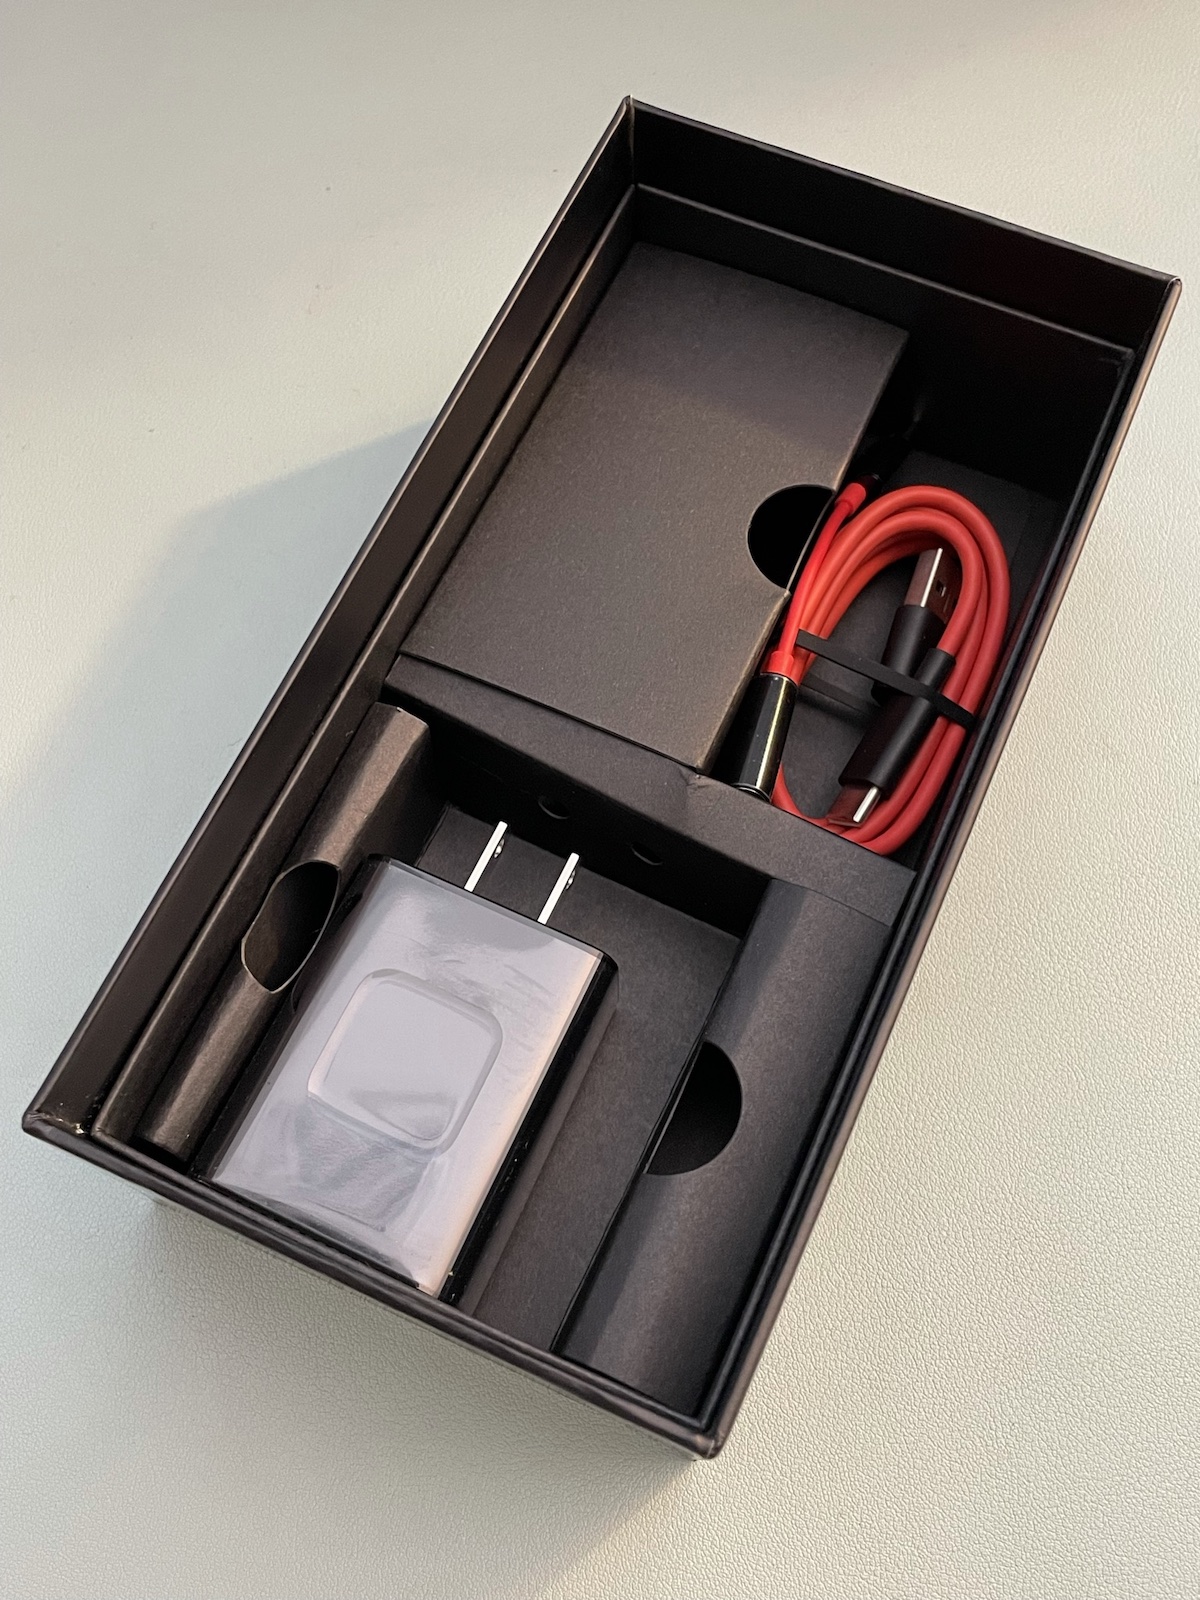
Finally, I hit the bottom layer, which contained the AC adapter, a USB-C to USB-A charging/data cable, and a USB-C to 3.5 mm headphone adapter:
The bottom layer of the box. Tap to view at full size.
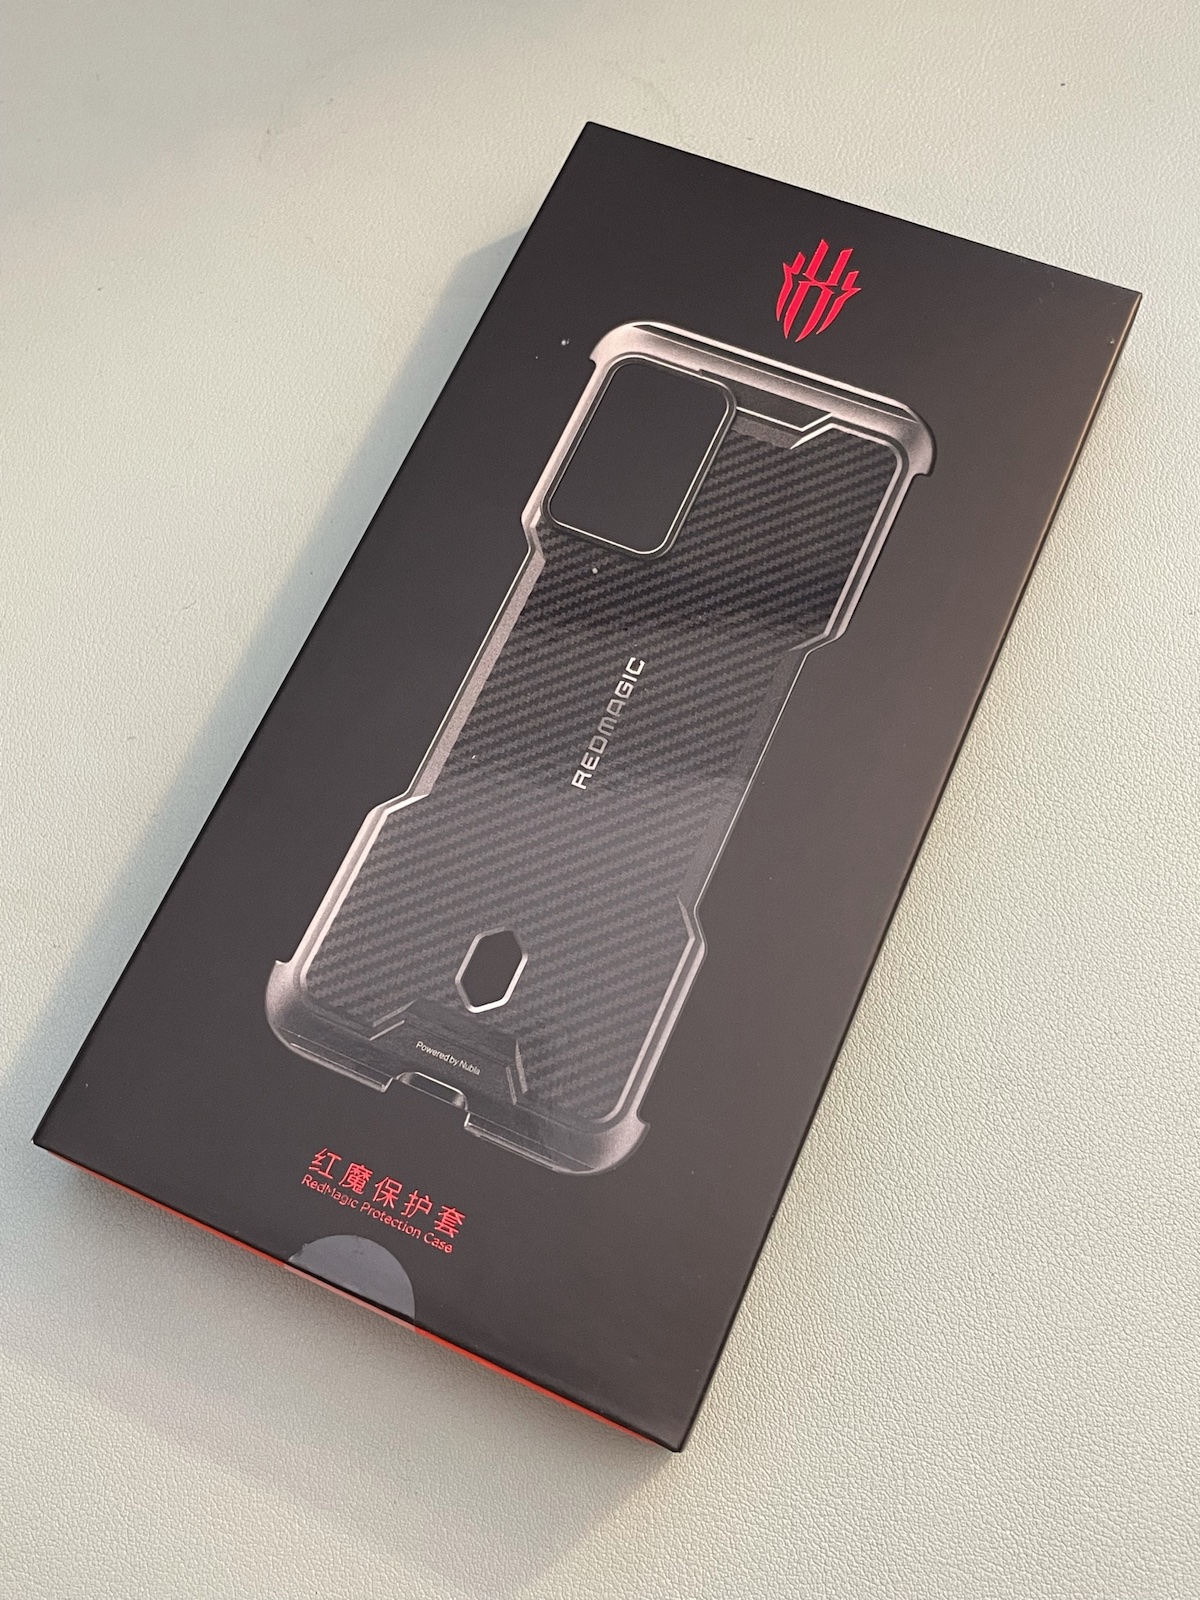
I knew that the RedMagic 6R came with a basic soft gel case, I decided to spend an extra 15 bucks for the hard case, which came in this box:
The box for the RedMagic 6R hard case. Tap to view at full size.
Here’s the case:
The RedMagic 6R hard case. Tap to view at full size.
This may be my favorite Android unboxing experience of all time. It’s certainly a good deal more photogenic than the 3rd-gen Moto G unboxing experience:
I’ll admit it. I’ve been watching my new phone — a RedMagic 6R Android gaming phone, which I wrote about in this article — travel from the factory in Hong Kong all the way to my house in Tampa.
As I write this, it landed in FedEx’s Memphis facility two hours ago.
This article is part of the Android August series, in which I’m writing an Android development-related article every day during the month of August 2021.
This weekend, I placed an order for a RedMagic 6R from Nubia, the high-end branch of ZTE who’ve been making some interesting phones specifically for gaming. For US$500, you get the same processors as those in Samsung’s flagship phone, the Galaxy S21…
Want to know more about the RedMagic 6R? Here’s GSMArena’s video review:
My father-in-law needed an upgrade from his flip phone from the pleistocene epoch, so I decided to give him my current phone, a Moto One Hyper, and get a new one. The original plan was to go with my go-to Android phone vendor, Motorola (who typically give great bang for the buck), and get the G100.
Because I’m not in a complete hurry to get the phone and because I have some serious writing and editing to do this week and don’t want to be distracted by sweet new gear, I decided to be true to my Asian-ness and save about $80 by ordering the phone and a protective case directly from Nubia/ZTE rather than going through Amazon Prime and getting it the next day.
(Besides, I didn’t feel like buying Jeff Bezos more midlife crisis spaceship parts today.)
Tap to view at full size.
The phone left the warehouse in Yuen Long (a town in Hong Kong’s western New Territories), and is currently making its way to me in Tampa via FedEx.
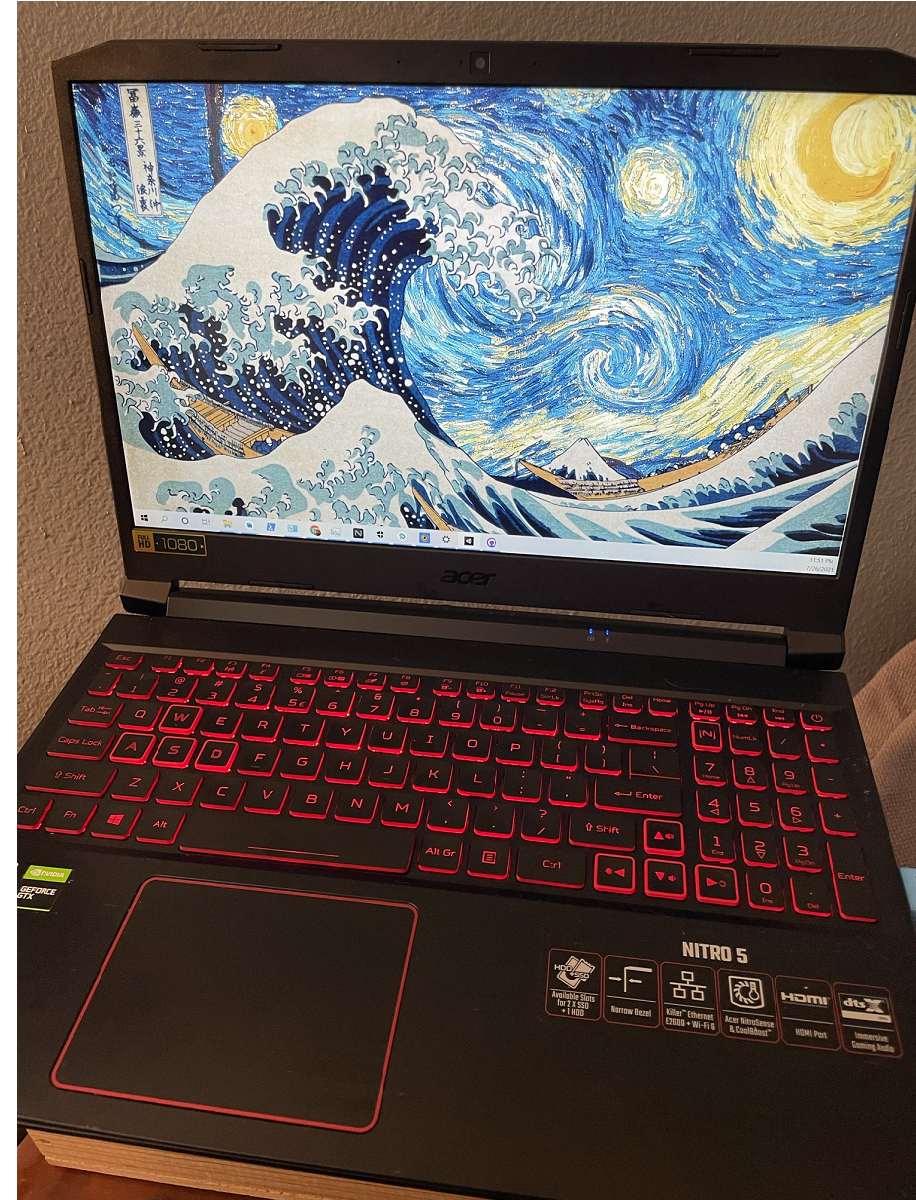
What will I do with a gaming phone? Build apps for it with my newly-purchased gaming laptop by getting more familiar with this development tool:
I’ll post an unboxing video and other notes when it arrives. Watch this space!
There have been times when either I or the scrappy startup where I was working was short on cash but needed one or more computers in short order. This problem was often solved with the judicious purchase of one or more used desktop or laptop computers. Secondhand machines offer lots of bang for the buck, but can be a dicey proposition if you’re not careful.
In this article, I’ll show you how to shop for a gently used machine that’s suitable for software development, will serve you for years to come, and will cost both you and the environment significantly less than buying a new one.
Why buy used?
The obvious reason is saving money, but it’s even more applicable these days because of the global chip shortage, which is a big enough deal to merit its own Wikipedia entry. As a result, inventories for any product with a chip in it have been drying up and prices have been climbing, especially where laptop computers are concerned. Here’s a quick sampling of some current news stories on the topic:
A McLaren P1 on 17 Mile Drive in Monterey, which is probably more car than most of us need. Creative Commons photo by “Axion23” and Tony Patt; tap to view the source.
Yes, the newest machines are quite often the fastest, most powerful, and have the latest features, but you have to ask yourself “How much of that do I actually need?” A computer with decent specs that was made sometime in the last few years can be a decent developer machine, or upgraded into one.
A secondhand computer is also a computer that’s not taking up space in our rapidly-growing junk piles. Let’s not contribute to our already huge e-waste problem — and when it’s time to really retire a machine, bring it to a place that recycles electronics!
(Hey, Tampa Bay techies: Your go-to place for electronic recycling is Urban E Recycling, who don’t charge for their service, and will even arrange to pick up your old gear.)
Why buy used and local?
Buying a used computer from someone in town has one major advantage: It gives you a chance to try it out before you buy it. Whether you’re buying from a store on an individual, you can look at it up close to check for wear and tear, confirm that all the keys and controls work properly, check to see that the ports are operational, and make sure that you’re about to buy a working unit.
There’s also a bigger-picture view: If you’re buying a used computer from someone local, you’re putting money back into the community, and more importantly, in the pocket of someone who needs it. If we really want to make Tampa Bay a tech hub and keep seeing stories about how techies are moving here and how we’re attracting technology workers in droves, we have to make the area a nice place in which to live. That means supporting the community — not just with lip service, but with what really helps: Your money.
Why buy used, local, and on Facebook Marketplace?
People have been buying used machines locally through Craigslist for nearly three decades, but these days, I’d rather buy stuff through Facebook Marketplace. It has a major advantage over Craigslist, and here’s what that advantage is:
Unlike Craigslist users, Facebook users have profiles. You can get a feel for the person you’re buying from or selling to, all before you even ask them a single question. You can see if they’re blank slates or people with an online history in words and pictures. You can even see what their friends are like. If they’ve sold on Facebook Marketplace before, they have a rating.
Facebook Marketplace also makes it quite easy to attach multiple photos for an item being sold, and provides you with a map of the general area where the seller is based. It also has the benefit of having a seller base that dwarfs Craigslist or any other platform.
While a Facebook profile isn’t a foolproof way for figuring out what kind of person is selling a used computer, it provides considerably more information than you’ll get from Craigslist before making contact.
Safety
I grew up in the era when teaching “stranger danger” was standard, so I was pretty amused when this joke started making the rounds:
In an age where it’s not unusual to get a ride or place to crash from a stranger, where the term “gig economy” is part of everyday parlance and everyone seems to have a side hustle, the idea of buying a used computer from a stranger doesn’t seem so weird anymore.
Still, as with Uber and Airbnb, you should take some safety precautions. Here are some recommendations from Yours Truly, who’s been buying stuff from local online people for twenty years:
Meet in a well-lit public place with power outlets and wifi that can by used by customers. It’s just safer, if maybe a little inconvenient, to meet someplace where other people are rather than at their place or yours.
You’ll want to take the computer for a test run, which is why the meeting place must have power outlets and wifi that you can use. If you’re based in the U.S., consider using Starbucks or McDonalds for your meeting place; I’ll explain why these are good places to meet in a moment. If you’re fortunate enough to live in an area with a friendly independent “third place” (cafe, restaurant, or other business where people meet up) that has power and wifi handy — especially one where the staff know you — choose to meet there.
If you can, bring a friend along for the purchase. It’s a “safety in numbers” thing, and it’s even better when the friend has some expertise in the thing you’re buying. I’ve been “the friend” for these sort of purchases about a dozen times.
See what kind on “data trail” the seller has. As I said beofre, one of the reasons I like Facebook Marketplace is that you can check the seller’s Facebook profile. Check other sources too — Twitter, and LinkedIn, and see if they participate in local Meetups. Get a feel for them, and trust your gut.
See if you can pay using a payment app. Apps like Venmo, Cash App, and Zelle are relatively easy to set up, and it means that you’re not walking around with a big wad of cash.
If you have to pay with cash, don’t break it out until it’s time to pay. Waving around the kind of money needed to buy a computer can attract the wrong kind of attention, so don’t break out the cash until it’s time to pay.
The computer that I’m replacing
I’ve had “Stinkpad”, my personal/side-hustle Wintel machine, for the past eight years. It’s a trusty ThinkPad T430, the most popular computer in the ThinkPad line, which which was first released in 2012, and which I got brand new in 2013. I’ve since replaced its dying hard drive and upgraded its RAM to the maximum 16 GB four years ago. Despite its age, it’s still a decent office computer (which you can still buy new from Walmart for $300).
Over the years, it has performed yeoman service as Windows/Linux development system, playing a key role in all my jobs based in the U.S., from a brief gig teaching Verizon developers how to program in C#, all the way up to teaching Python and JavaScript on behalf of Computer Coach during the pandemic and my current role as a Senior Developer Advocate at Auth0. In fact, I wrote much of the technical exercise project of the Auth0 job interview process on that computer (you can read all about it in How I landed my job at Auth0).
It’s still quite usable for putting together documents, surfing the web, watching streaming video, and even doing some basic web development, but as Android Studio, Unity, and other tools have grown, they’ve been demanding more processor power. I’m going to wipe ol’ Stinkpad clean and set it up for my in-laws, who are due for a new computer anyway.
I’d been keeping an eye on a specific marketplace (namely, Facebook Marketplace) for a specific kind of computer that appears every couple of months, almost like clockwork (namely, sub-$1000 gaming computers that are no more than a year or two old). They often come with the original packaging, were used very little, and are typically the object of buyer’s remorse. If you live in or near a reasonably large-ish metro area, don’t need a computer right away, and are willing to do a little legwork, you can find a good deal.
Research
Windows 11 compatibility
If you’re looking for a used Windows machine, you should keep compatibility with the upcoming Windows 11 in mind. Its installer will do a compatibility check prior to putting Windows 11 on your system, and if it doesn’t meet the operating system’s new, stricter standards, it will refuse to install.
It would take an entire article to cover what makes a computer Windows 11 compatible, so I’ll just give you the broad-stroke requirements and point you to a few articles that go deeper into the details.
Judging from the list of processors supported by Windows 11 (here are the lists of compatible AMD, Intel, and Qualcomm processors), a good general guide is that any computer manufactured in 2018 or later should be compatible. If you’re looking at Intel-based systems, 8th-generation or later chips will run Windows 11.
Microsoft provides these general Windows 11 hardware requirements:
A display that with at least 720p resolution, 8 bits per color channel
The computers I considered
Although I could get more power by choosing from desktops, portability is very important in my line of work, where I’m often doing presentations at different venues. That why I limited my search to laptops. I used to ignore gaming laptops, but the new-ish category of “budget gaming laptop” is turning into a great place to look for portable Windows-based developer machines.
Here are some computers that I considered buying:
Laptop candidate 1.
This one is an HP Pavilion 16″ gaming laptop with a 10th-gen i5 CPU and NVIDIA GeForce GTX 1660 Ti GPU that the seller wanted $1000 for. It sells for $1000 brand new at Best Buy, but the seller upgraded the drive from 512 GB to 1TB, and the RAM from 8 GB to 16 GB. The seller has since reduced the asking price to $950.
It’s nice, but I decided to look around for a better deal.
Laptop candidate 2.
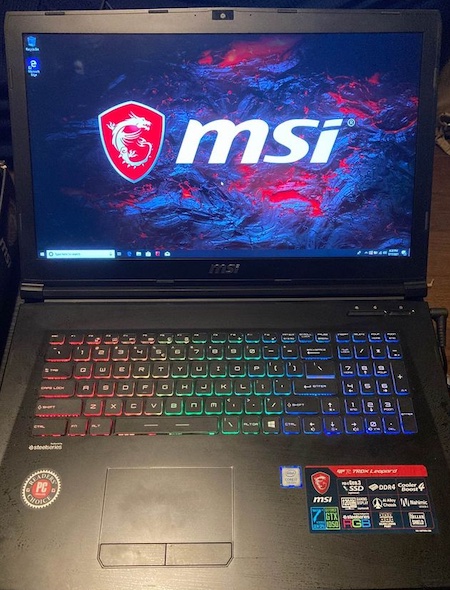
If you’re in the Tampa area, are just getting started on your coding career, and need a good development machine, you might want to check out this deal on an MSI GP72 Leopard Pro gaming laptop, for which the seller is asking $400. It has great specs for that price: 7th-gen i7 CPU, NVIDIA GeForce GTX 1050 GPU, and 16GB RAM. This machine will move easily from React Native to Android Studio to GTA V, but the 7th-gen CPU rules out Windows 11 compatibility. It’s still a decent machine, especially for the price, but I wanted to see what I could get if I spent a little more.
Like Loki, this laptop has many variants. Luckily for me, the seller was pretty good about posting the exact model number of the computer: AN515-55-55SD, which made it easy to look up its specs.
Here are the specs I cared about the most:
Processor: Intel Core i5 10300H (10th generation) running at 2.5 GHz with 4 cores and 8 threads.
Memory: 8 GB DD4 RAM running at 2933 MHz, occupying one of two available slots. My plan was to replace it immediately.
Storage: 512 GB Western Digital SN530 solid-state drive. I might replace this at some later date. The laptop also has an empty space for an additional 2.5″ drive.
Video reviews
I consulted a lot of reviews, including the following video reviews.
The most helpful and thorough video review was one by “Meanpooh”, who did a fantastic job covering a lot of details about the machine:
If you understand Tagalog (Filipino) — or more accurately, “Taglish” (Tagalog peppered with a lot of English), you might find the video below helpful.
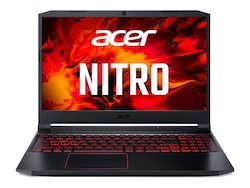
This first one is titled Ok ba ang presyo?, means “Is the price OK?”. He’s not so impressed by the Nitro 5, but keep in mind that he’s thinking of it primarily as a gaming machine, while I’m thinking of it as primarily for coding. He’s also keeping in mind that it sells for 50,000 Philippine pesos (about $1000 U.S.) when the average salary there is 860,000 pesos (about $17,200 U.S.) — or for the average Filipino, 6% of their salary.
Here’s one by Laptop Factory’s Dustin Kwan, who’s a little more impressed, as I am:
https://www.youtube.com/watch?v=0Si_GHaiYFE
Pricing
The seller was asking $600 for their Acer Nitro 5. A quick look around showed that I’d be saving at least a third by buying from him rather than retail:
The coffee trick (or: Why I recommend doing the inspection and purchase at McDonald’s, Starbucks, or your local cafe)
You’ll want time to properly inspect the computer, which means you’ll need to “buy some patience” from the seller. The reason I tend to hold the inspection and purchase session at places like McDonald’s, Starbucks, or a local cafe is so that I can buy the seller a coffee or snack. This will keep them occupied while you conduct a thorough inspection of the computer.
You want to spend at least 15 minutes with the computer running. This is enough time to get the computer up to its regular operating temperature and catch any sign that something is wrong with its hardware, such as the cursor turning into the “hourglass” or “beach ball” too often, or sudden restarts and freezes.
The inspection process
The process of inspecting a used computer could take up its own article, and perhaps I’ll write it up in more detail later.
I brought the following to help me with my inspection:
Wired mouse
USB-C-to-A adapter
Wired earbuds
HDMI cable
I’ll explain how I used each of these below.
Here’s a quick run-down of my inspection:
✅ Visual inspection of the chassis for scratches, dents, and other damage. I looked at the top, bottom, and sides for signs that the laptop had been dropped, or for excessive wear and tear around the ports.
✅ Visual inspection of screen for damage, scratches or dead pixels. With the laptop off, I checked for scratches on the screen using my phone’s flashlight. I checked for dead pixels by quickly entering the following into Notepad, saving it as test.html and opening the file in a browser in full-screen mode:
✅ Opening and closing the screen hinge. I opened and closed the screen a couple of times, checking to see that the motion was smooth and noiseless. This is a laptop’s biggest moving part, and it contains the connections between the main board and the screen, webcam, and often the microphone. You want to be sure that this hasn’t been damaged.
✅ Getting system information about the computer. On macOS, About This Mac is your friend. On Windows, System Information and Device Manager applications are your friends. They let you know what the computer thinks its specs are, and can point out any parts that might not be working or have missing drivers.
Use these utilities to check the processor in the computer as well as the installed RAM.
✅ Check the OS version. This is less important, as you should completely install a fresh copy of the OS if you buy the computer. For macOS, you should be concerned if the computer is running anything older than “Mojave” (macOS 10.14, released in September 2018). With Windows, be concerned if the computer is running anything pre-Windows 10.
✅ Check the system monitor. On Windows, you’ll want to open the Task Manager and open the Performance tab. On macOS, you’ll want to open the Activity Monitor app. In either case, you want to look at the CPU utlization when nothing other than a browser is running. If it’s significantly higher than 10%, something’s wrong — the CPU is laboring for reasons that can include malware.
✅ Keyboard. I opened Notepad and pressed on every key to confirm that they were all working. I checked the travel on every key to ensure that it was smooth. Sticky keys or “bouncy” ones (that’s where you press on a key once, but the character gets entered twice or more) are a sign that someone spilled liquid on the keyboard. I also confirmed that the metakeys (alt, ctrl, and shift) worked. They keys hadn’t been used much.
✅ Trackpad. I tested the trackpad for reponsiveness to regular “mouse” motions, as well as responses to swipes and clicks.
✅ Wifi. I connected to wifi and ran a speed test.
✅ USB ports. I brought a wired mouse to confirm that the USB ports were working. People may get concerned if you try and plug in a USB drive, but nobody objects to a mouse. I plugged the mouse into all the USB-A ports, and used a USB-A-to-C adapter to test the USB-C port. The fit in all these ports was tight, meaning that they hadn’t been used much.
✅ HDMI port. I brought an HDMI cable just to plug it into the port to confirm that it wasn’t damaged or obstructed. I should’ve borrowed my wife’s tablet-sized HDMI monitor, which fits easily into a laptop bag.
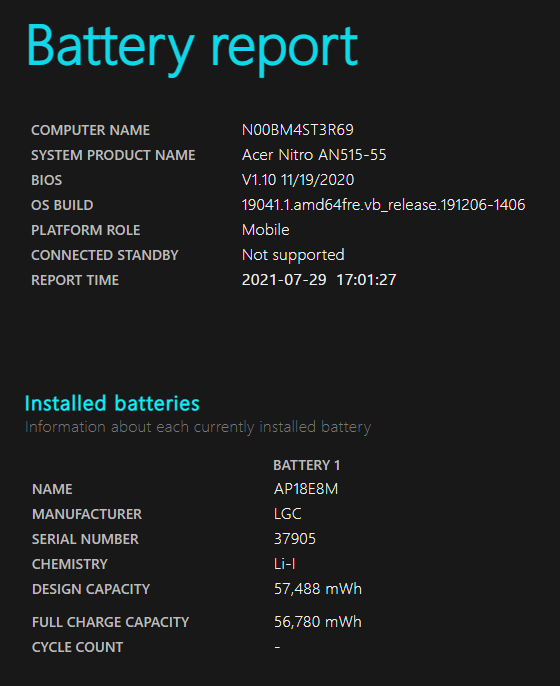
✅ Battery. I have such a low opinion of Windows battery management that I didn’t even bother to check the battery. When I use a laptop on a plane (and hopefully, that will happen again), I use a Mac. That being said. I should have opened up PowerShell and run the command powercfg /batteryreport. That runs Windows’ built-in battery reporting utility, which generates a report in web page form and saves it to your user directory. I ran the utility while writing this article, and here’s a screen capture of it:
As you can see from the report, the battery hasn’t been cycled very much — it can still charge up to 98.8% of its design capacity.
If you want to see battery info about a used Mac or iOS device, I recommend using the Coconut Battery app.
✅ Speakers. I simply opened a browser and pointed it a YouTube to confirm that the speakers were in working order.
✅ Headphone port. I brought a pair of wired earbuds with me. It turned out that the headphone port wasn’t working, but a quick look at Device Manager told me what I suspected: A driver was missing. One quick driver installation later, it worked.
✅ Run some apps. Run whatever applications are on the computer and look for unexpected slowdowns or other unusual behavior.
✅ Use your ears. Listen to the sounds that the computer makes. Do you hear a mechanical hard drive whirring? Be careful — these are slower, and being phased out. A mechanical hard drive can be used as a point for negotiating for a lower price. Listen for clicks or a grinding sound; both are indicators of a mechanical hard drive on its last legs.
Listen to the fans. Are they always spinning at top speed, or do they speed up or slow down as you start and stop using applications? Note that gamer laptops typically provide applications that let you control their fans, as their CPUs and GPUs tend to generate a lot of heat.
The only “hiccup” in my tests was the non-working headphone port, and that was resolved pretty quickly.
On the issue of money
💰 Ask for proof or purchase for the machine. If they can’t provide it, you’re going to have to make a judgement call on whether you still want to buy it or not. To be fair, I myself would be hard-pressed to find the receipt for the MacBook Pro I bought at the end of 2015, and the flea market guy who sold me my newest accordion didn’t give out receipts. But try to get that receipt.
💰 If you’re paying in cash, which I did in this case, count it out in front of them. Don’t rely on the seller to count it. There are all manner of sleight-of-hand tricks where a con artist can count bills and claim that you gave them less than you actually did.
Making it mine
A fresh copy of Windows
I was lucky that the seller had all the drivers for the laptop gathered into a directory. I backed up that directory onto a cloud drive, and then “paved over” the hard drive with a fresh copy of Windows 10 from a disc image.
Once I’d installed Windows 10 and confirmed that it was running, I reinstalled the drivers.
Ordering and installing RAM
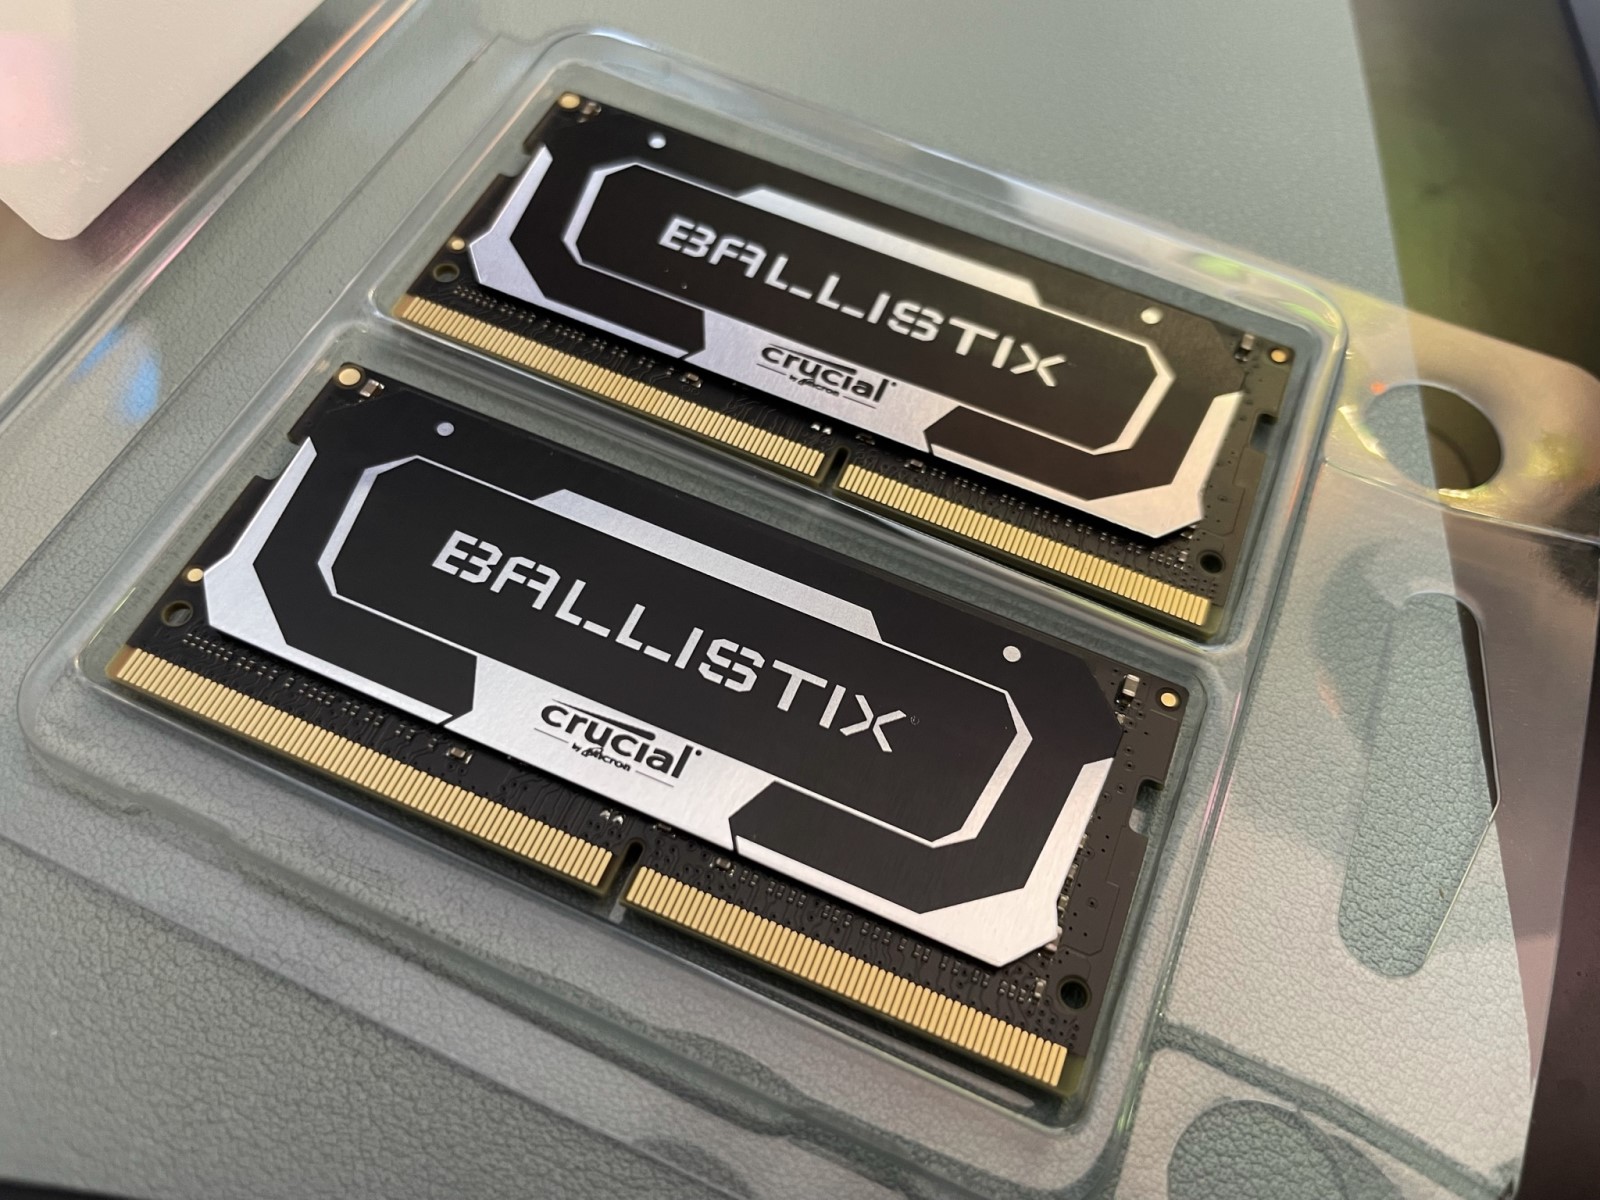
It even has that new RAM smell!Tap to view at full size.
Tampa Bay isn’t like my old stomping grounds of Toronto, which seems to have plenty of little computer shops with all kinds of RAM on hand. On the other hand, it’s pretty close to an Amazon fulfillment center, who could deliver a 32 GB gaming RAM kitthat afternoon. I had enough gift card points to get it for “free”.
I placed the order at about 10:00 a.m., and the RAM arrived at my front door by 3:00 p.m.. I wasted no time in pulling out a precision Phillips screwdriver, a spudger, and an anti-static wrist strap and got to work.
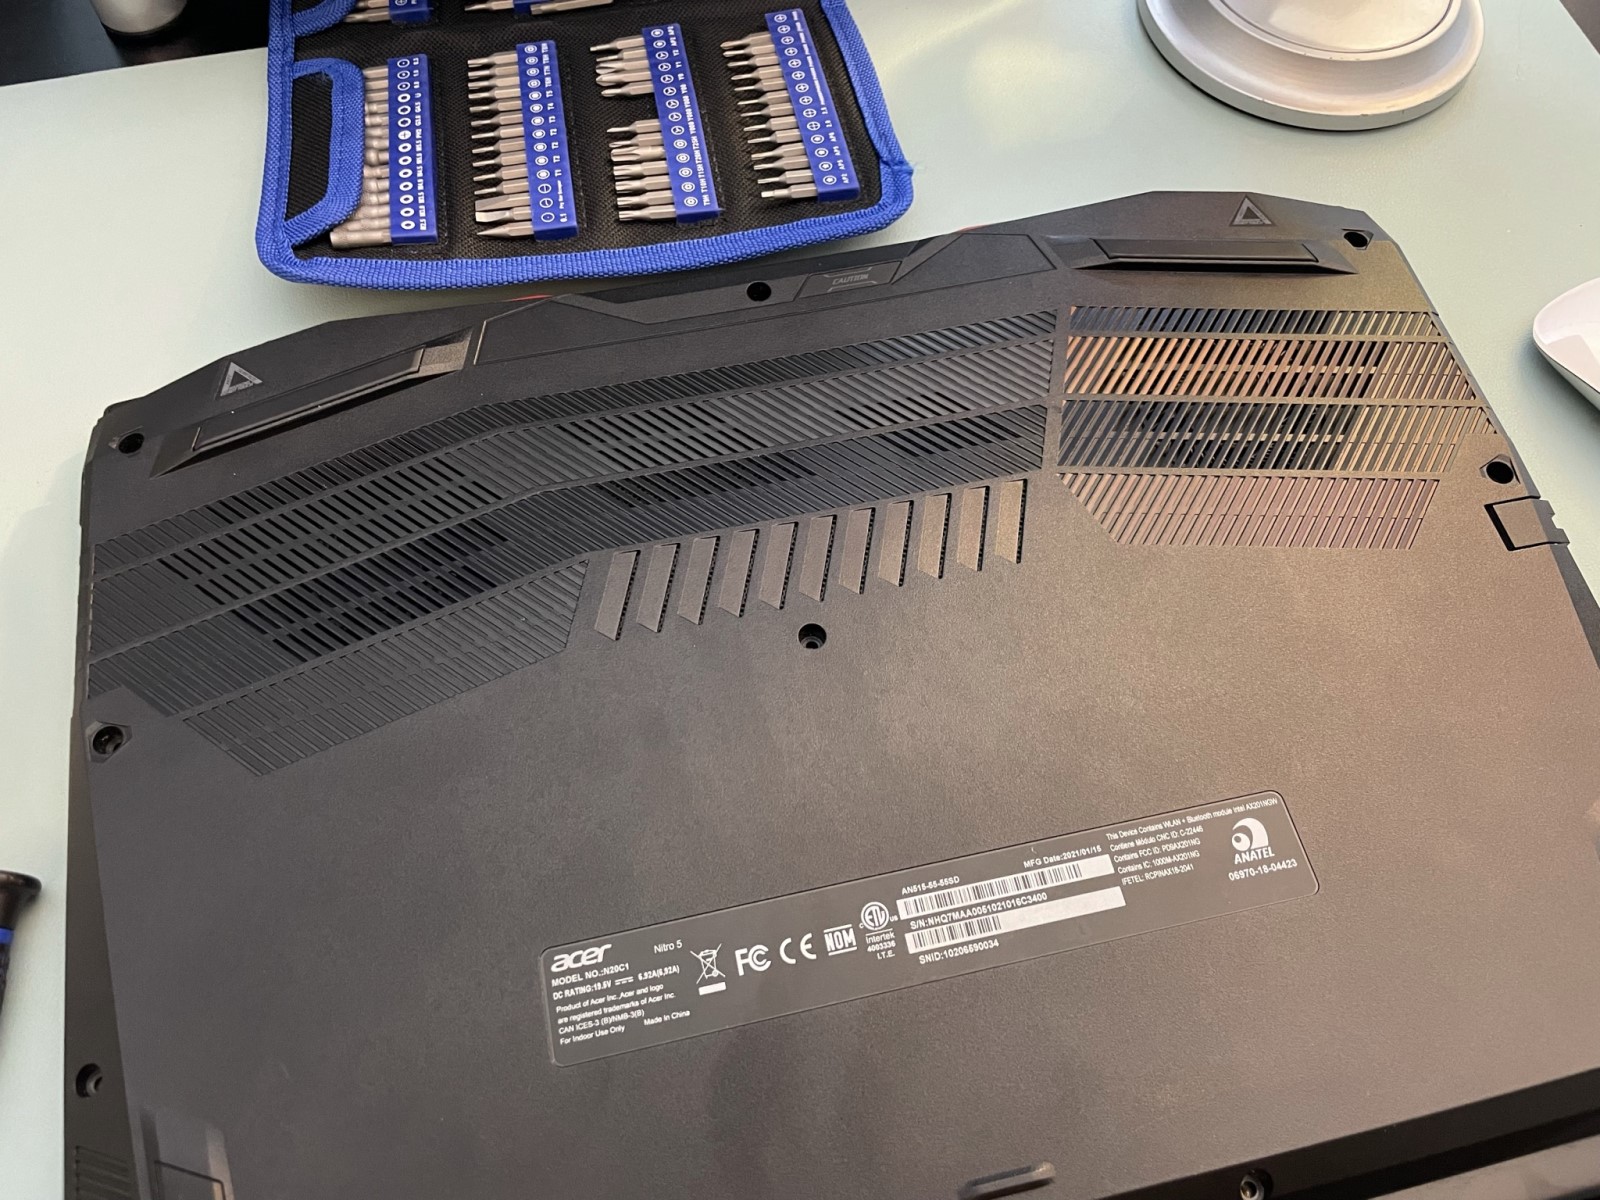
The dark underbelly of my laptop. Tap to view at full size.
I removed the screws from the bottom of the laptop pretty easily. The spudger came in handy for removing the bottom panel, as its fit is pretty tight.
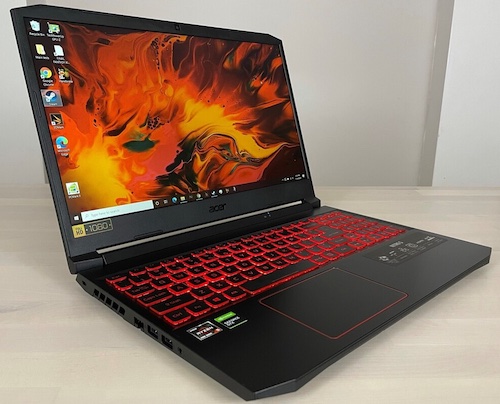
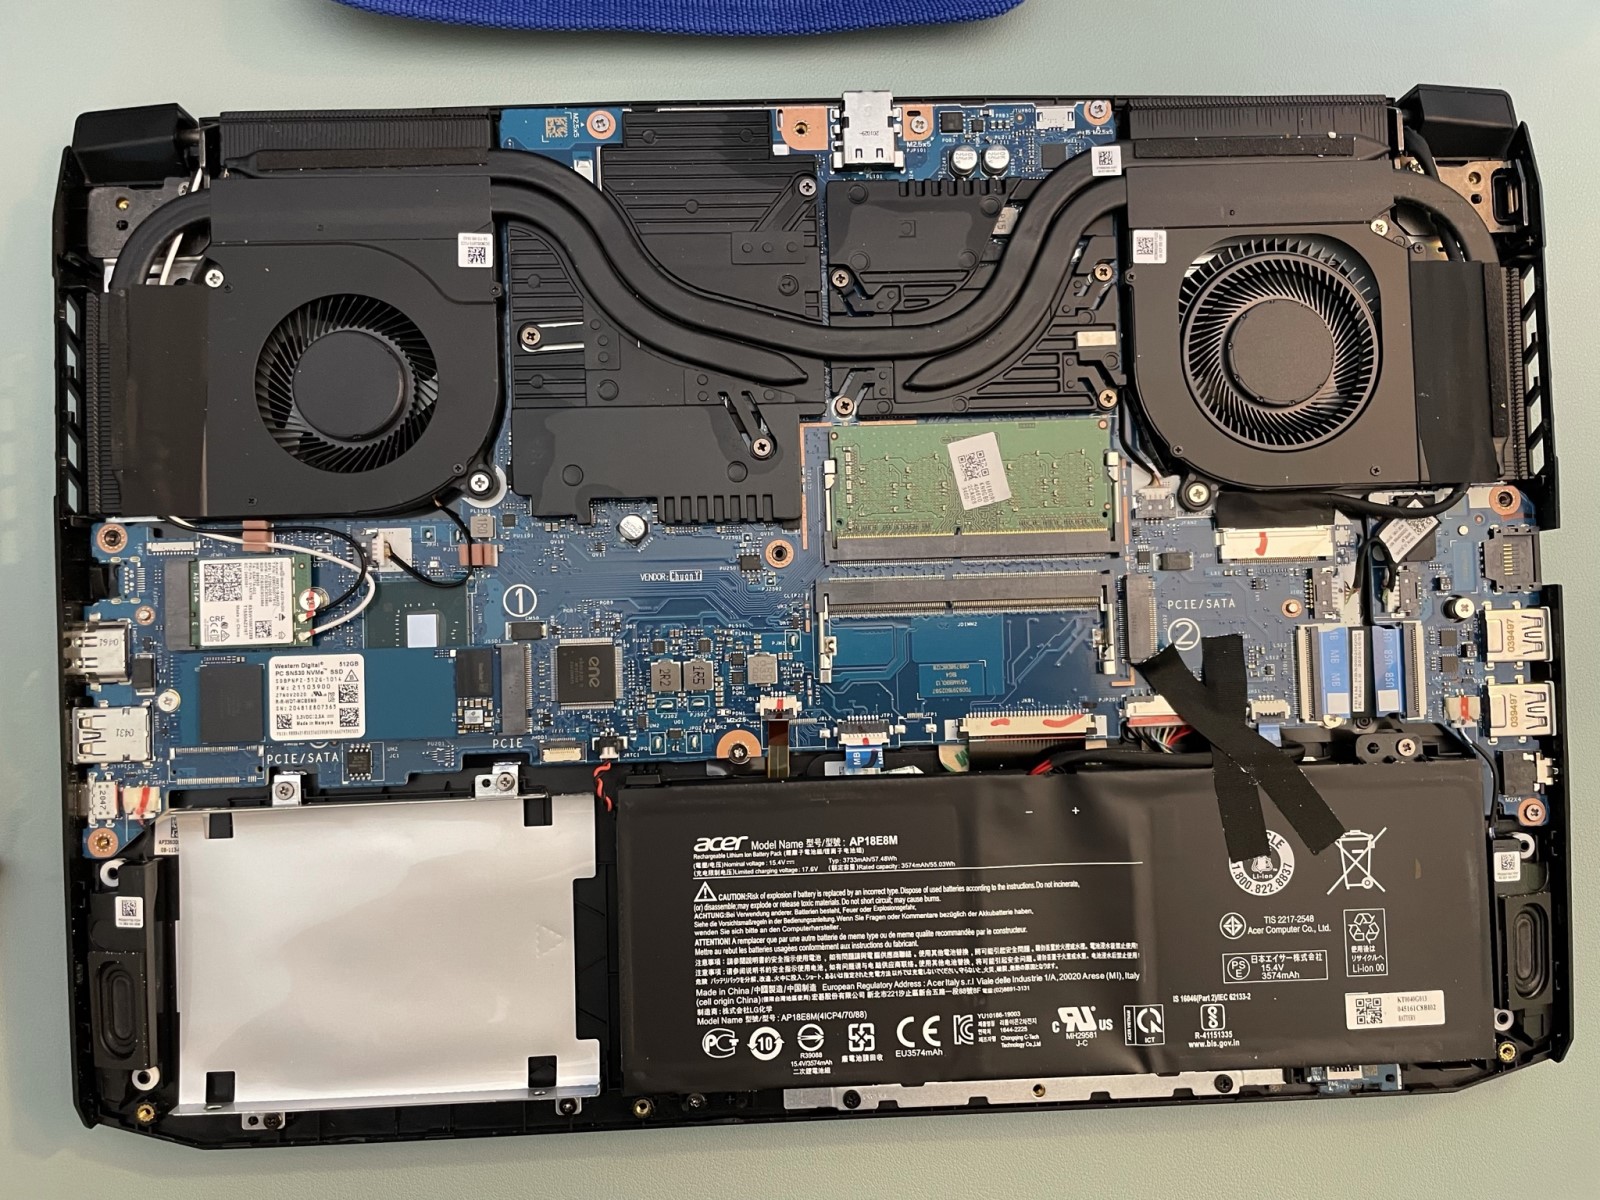
The Nitro 5 has some pretty serious fans, as you can see. They’re controlled by Acer’s Nitrosense application:
The guts. Tap to view at full size.
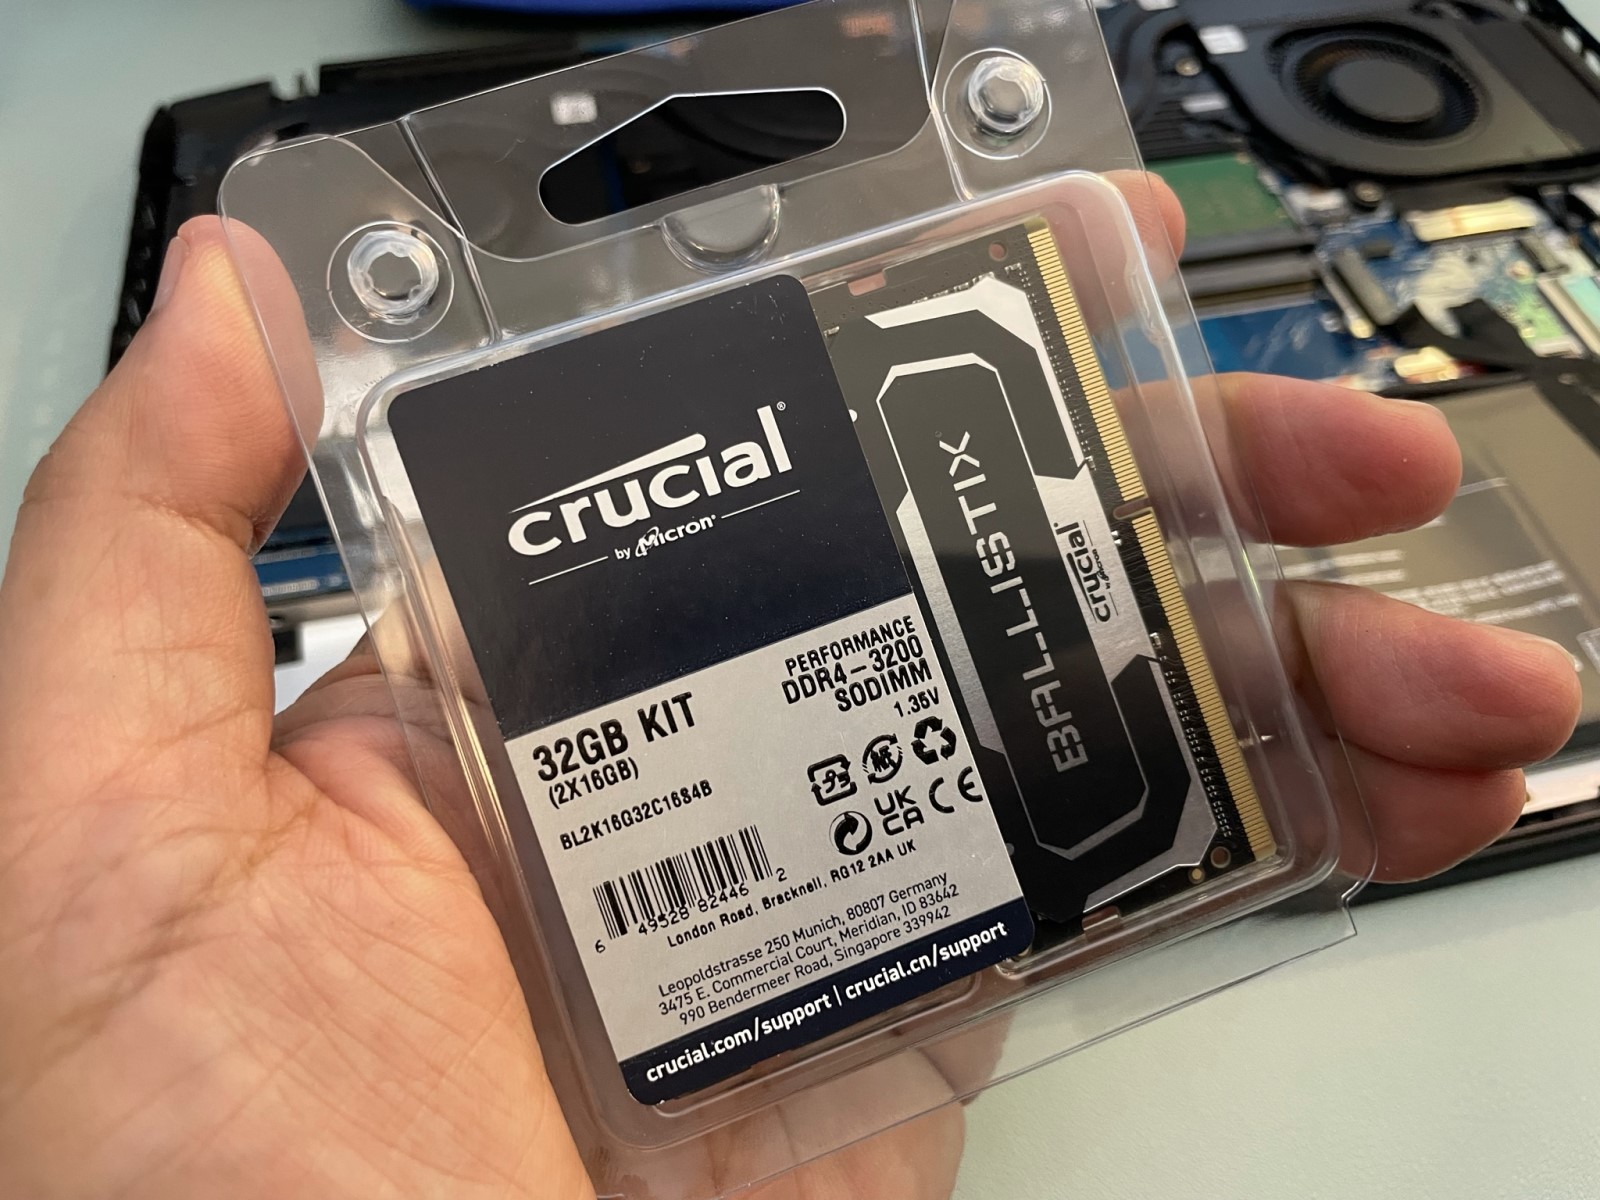
Here’s the RAM I ordered: 2 16GB SODIMMs, which bring the laptop up to its maximum supported 32 GB of volatile memory:
The new RAM. Tap to view at full size.
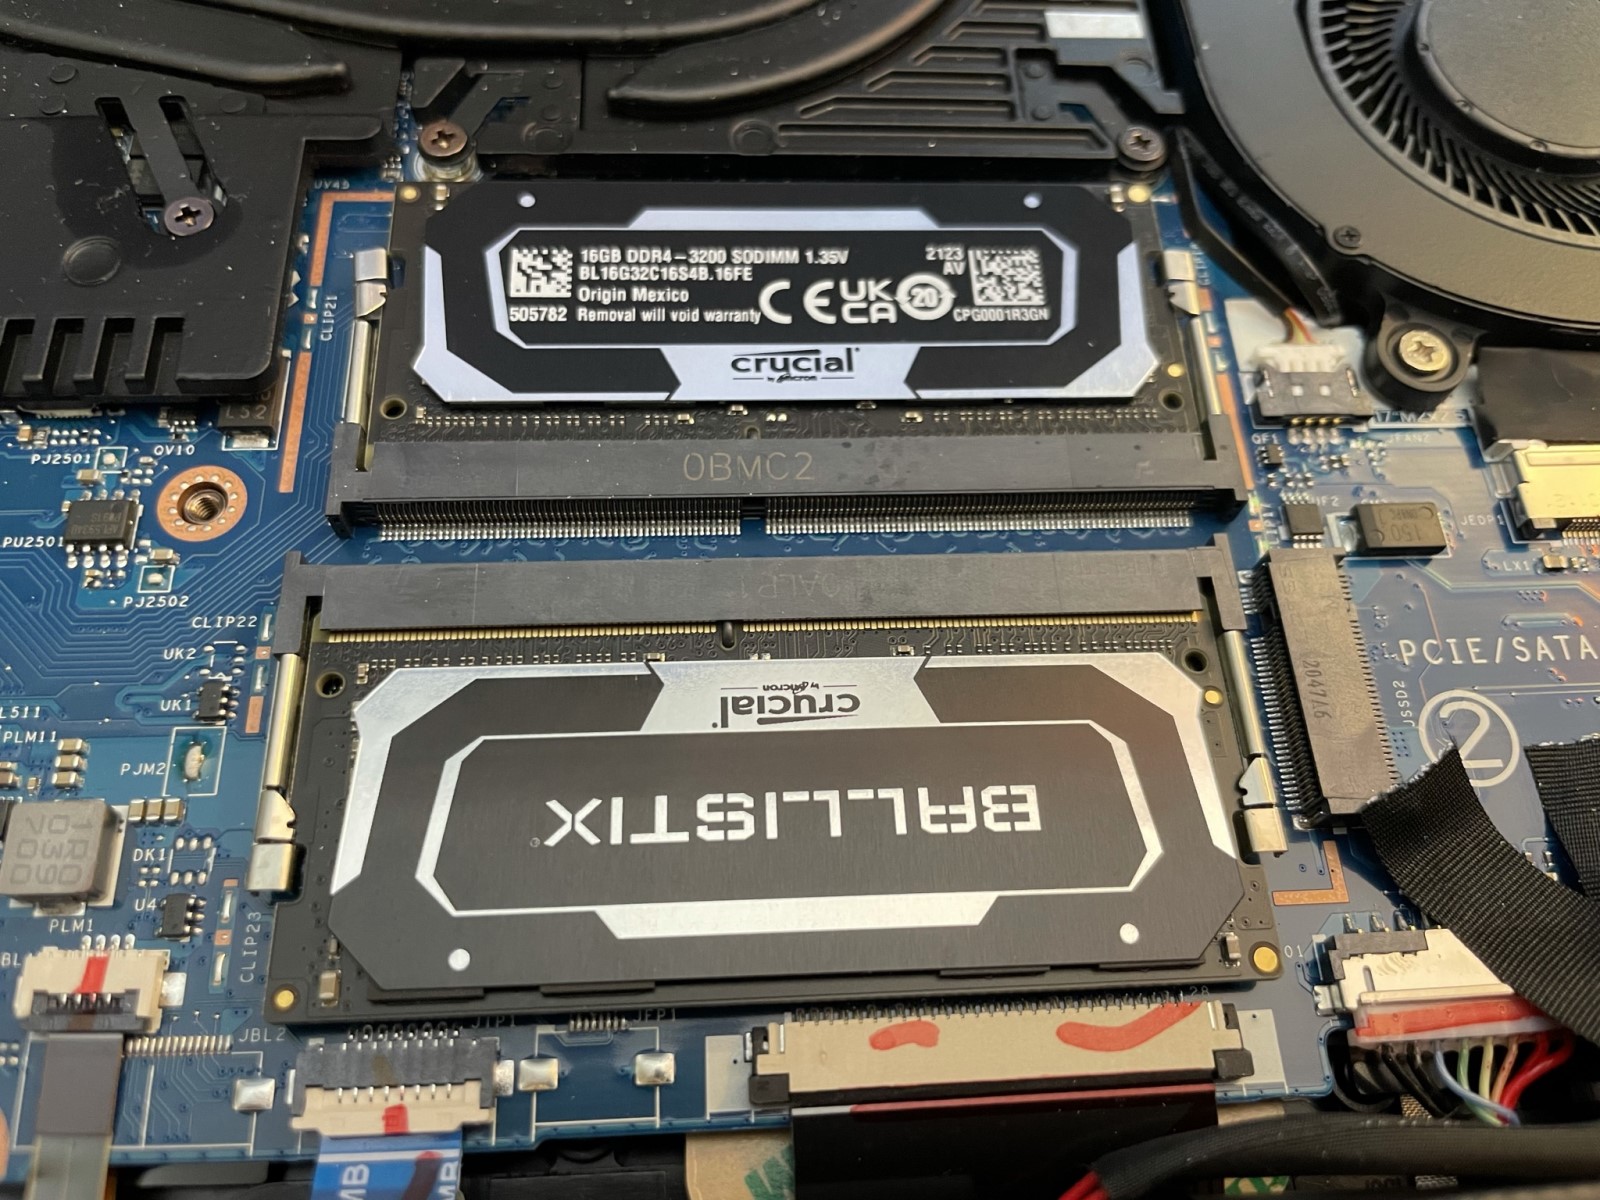
I removed the original 8GB SODIMM and replaced it with the 2 16 GB ones. This was the simplest part of the process:
Installed and ready to boot.Tap to view at full size.
With the new RAM installed, it was time to fire up the computer, open the System application and confirm that the computer could access it. The operation was a success:
And now, it’s my primary Android / Flutter / Unity development machine!
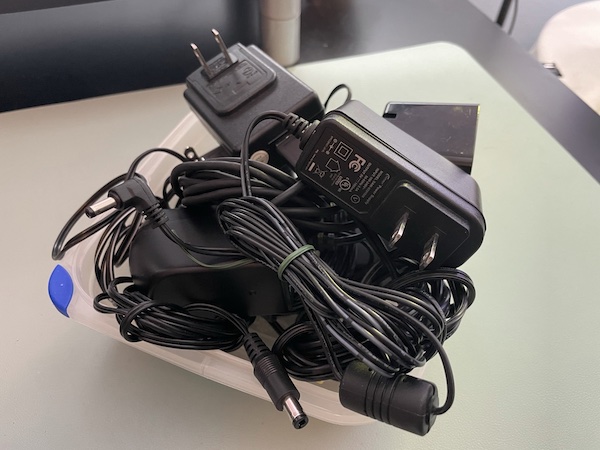
If you’re like most people, you probably have a collection of old power adapters and chargers that you’ve held onto, even though the devices they used to power are long gone. You probably thought that someday, one of them might come in handy:
This article will help you figure out if an adapter is compatible with a given device.
A little terminology
Before we begin, let’s make sure we’re using the same words to refer to the different “plugs” on an adapter or charger…
By plug, I mean the part of the adapter or charger that you plug into the wall.
By connector, I mean the part of the adapter or charger that you plug into the device.
With that out of the way, let’s begin!
How to tell if a power adapter or charger is right for your device
Step 1: Is the adapter’s polarity correct for your device?
Although you could do steps 1 and 2 in either order, I prefer to get the “device killer” question out of the way first. That question is: Does the connector’s polarity match the device’s polarity? Simply put, you want to find out which part of the connector is positive and which part is negative.
In DC current, which is the kind of current that an adapter provides, the polarity determines the direction in which current will flow through the device. You do not want current to flow into your device in the reverse direction.
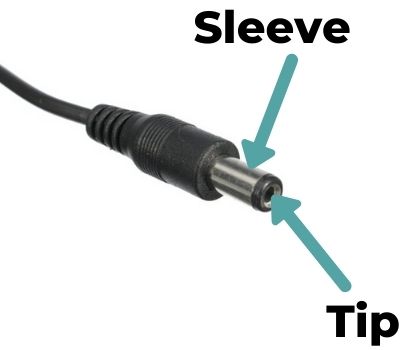
Here’s a connector and its parts. The sleeve is the outer metal part, while the tip is the inner metal part:
Both your adapter and device should have some kind of label or tag that indicates their polarity. It should be either negative sleeve/positive tip, which is indicated by this symbol…
…or positive sleeve/negative tip, which is indicated by this symbol:
Are the polarity markings on both the adapter and the device are the same?
Yes: If the polarity markings on both are the same, you can proceed to the next step.
No: If the polarity markings are different, DO NOT proceed to the next step, and definitely DO NOT plug the connector into the device.
If the are no polarity markings on the adapter: See the SPECIAL BONUS SECTION at the end of this article.
Step 2: Does the adapter’s connector fit into your device?
With the adapter’s plug NOT plugged into an outlet, can you plug the connector into the device?
Yes: If the connector fits, you can proceed to the next step.
No: If the connector doesn’t even fit, you can be pretty certain that this adapter isn’t going to work for the device.
Step 3: Do the voltage and current coming from the adapter match the voltage and current required by the device?
If you’ve reached this step, you’ve now taken care of the simple matches: The adapter will push current into your device in the right direction, and the connector fits.
Now it’s time to look at the numbers, namely voltage and current.
Look at the voltage (measured in volts, or V for short) and current (measured in amperes, or amps or A for short) marked on the adapter.
Look at the same values marked on the device.
Do the voltage and current values on the adapter and device match?
Yes: If the numbers match, you’re good! You can use the adapter to power the device.
No, both numbers don’t match: Don’t use the adapter to power the device.
No, one of the numbers matches, and one doesn’t:If only one of the numbers doesn’t match, don’t write off the adapter as incompatible yet. Consult the table below:
…and it’s LOWER than what your device needs
…and it’s HIGHER than what your device needs
If the voltage (V) doesn’t match…
MMMMAYBE.
Your device might work, but it also might work unreliably.
Simpler devices, where electricity is converted directly into some kind of result (such as a light, or a speaker) are more likely to work than more complex ones (such as a hard drive, or anything with a processor).
NO! WILL PROBABLY RUIN YOUR DEVICE.
Your device might work. The additional voltage may overheat and damage your device.
If the current (A) doesn’t match…
NO! WILL PROBABLY RUIN YOUR ADAPTER.
Your device might work. Your device will attempt to draw more current than the adapter is rated for, which may overheat and damage the adapter.
GO FOR IT!
The adapter’s current rating states the maximum that it’s capable of delivering.
Your device will work. It will draw only the current it needs from the adapter.
SPECIAL BONUS SECTION:
What if the adapter doesn’t have polarity markings?
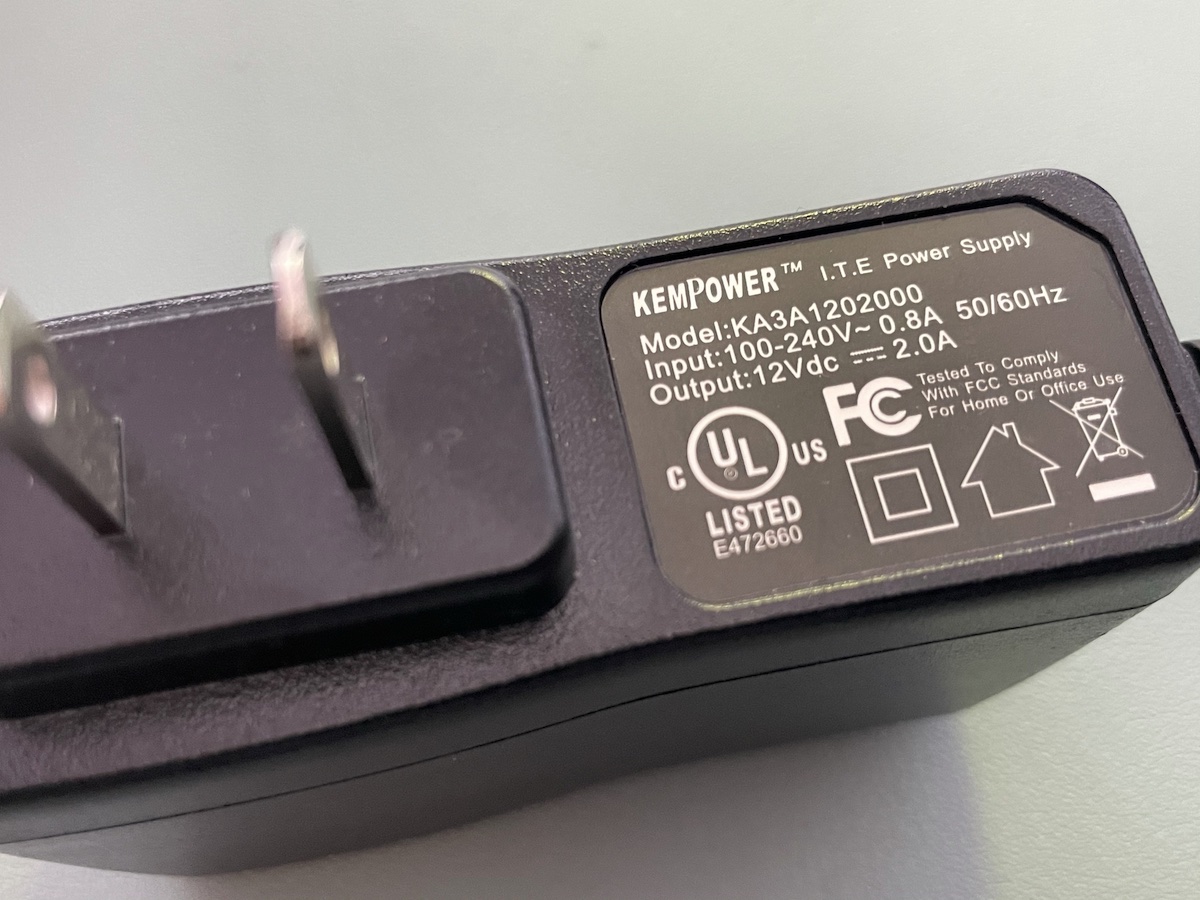
Believe it or not, it happens. In fact, I have one such adapter, pictured below:
No polarity markings. Not helpful at all. Tap to view at full size.
As you can see, its label section lists a lot of information, but not the polarity. This means you’ll have to determine the polarity yourself, or you can take a leap of faith.
If you want to determine the adapter’s polarity yourself
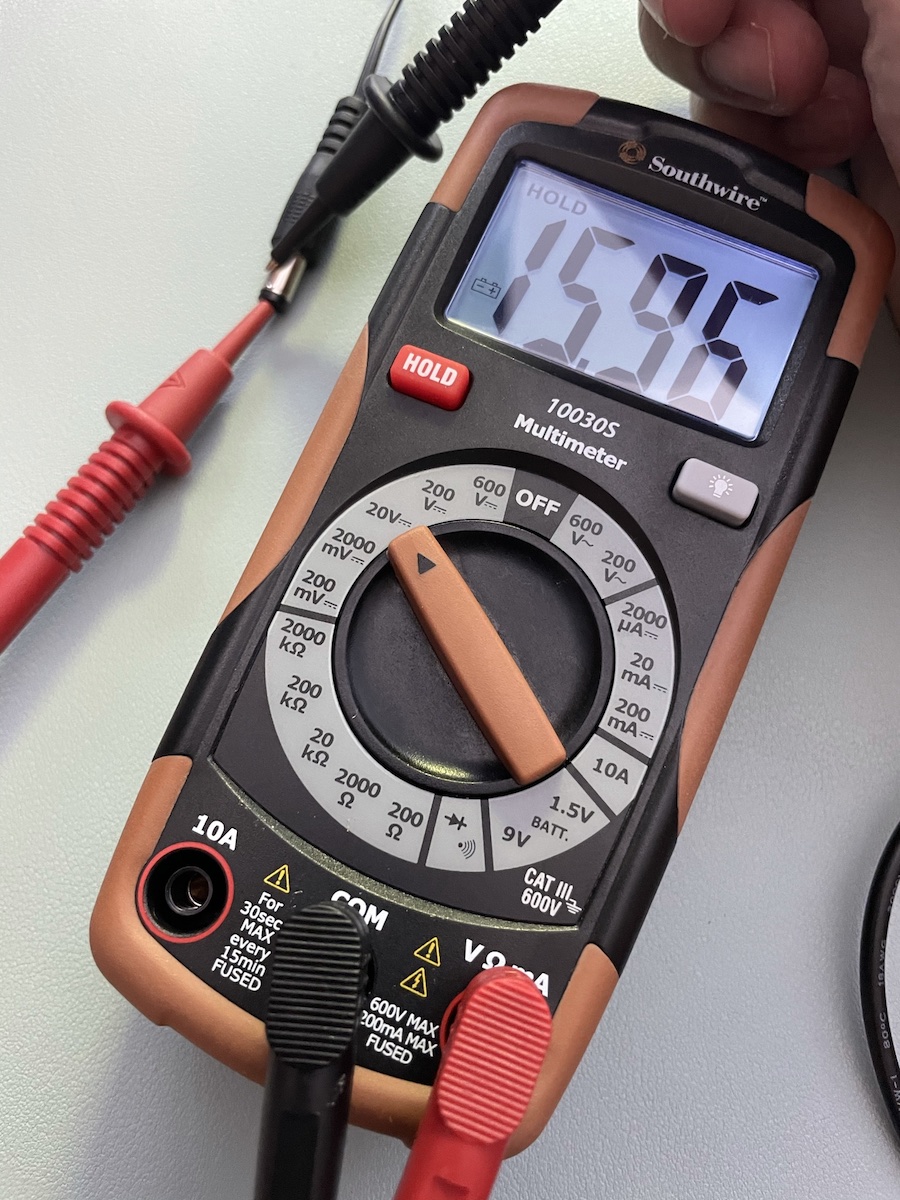
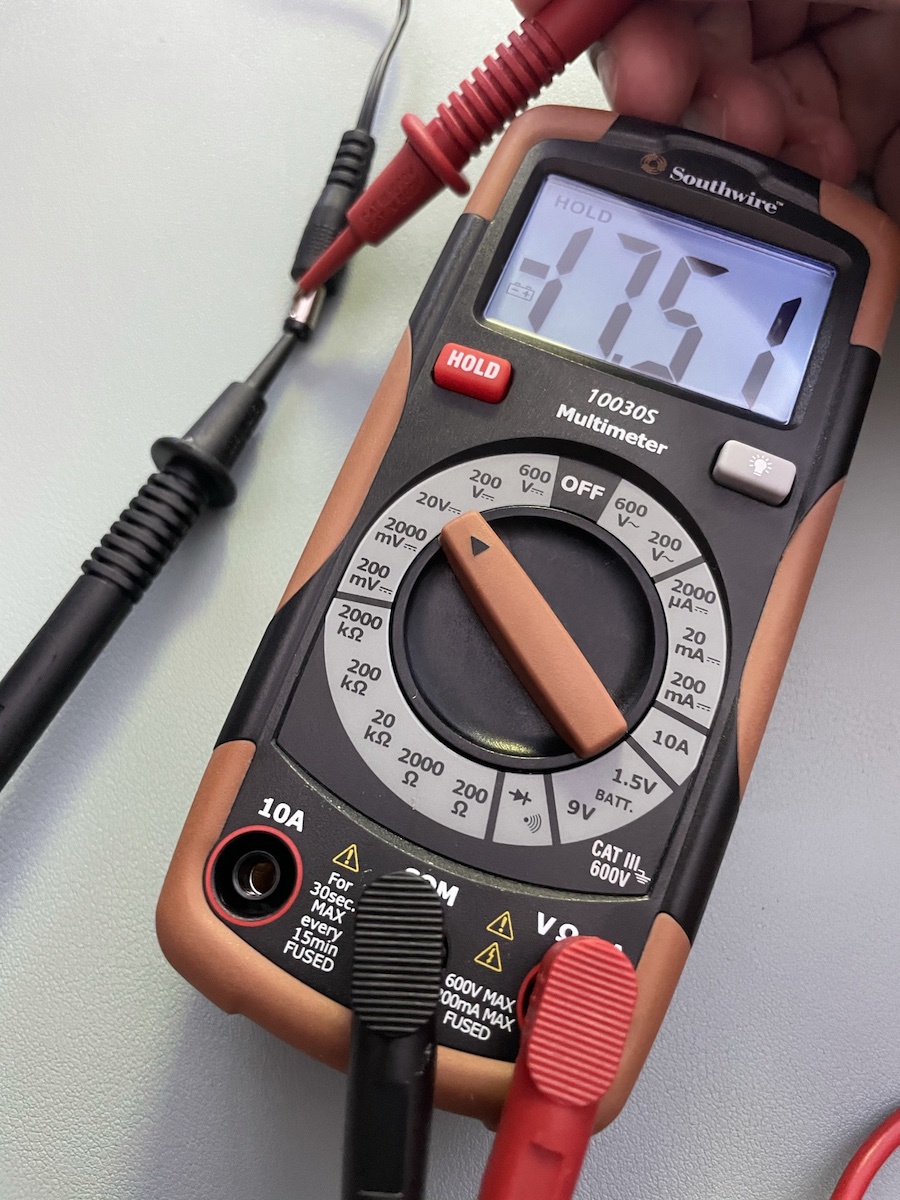
If you want to determine the polarity yourself, you’ll need a voltmeter. Set it up to read DC voltage in the range of the adapter. In the case of the adapter above, it’s rated to output 12 volts (V), so I set my meter to read a maximum of 20 V. I put the positive probe inside the connector so that it made contact with the tip, and touched the negative probe to the sleeve. A positive number appeared on the display:
With the positive probe touching the tip and the negative probe touching the sleeve, a positive voltage means that current is flowing from the tip to the sleeve, which in turn means that the tip is positive and the sleeve is negative.
If the number were negative, it would means that current was flowing from the sleeve to the tip, which in turn means that the sleeve is positive and the tip is negative.
In fact, when I put the positive probe on the sleeve and the negative probe on the tip of the same adapter, this is what happened:
Note that the voltage reported is negative. In other words, the current appears to be flowing backwards — from the negative probe to the positive probe —because I had the probes backwards. Once again, this indicates that current is flowing from the tip to the sleeve, which means that the tip is positive and the sleeve is negative.
If you want to take a leap of faith
If you don’t have a multimeter handy, you can always take a leap of faith and assume that your adapter has a positive tip and a negative sleeve, which is how most adapters are designed. The tip is well-protected and difficult to touch by accident. Since current flows from positive to negative, you prevent accidental shorts and electrocution by making the hard-to-reach tip positive and the easy-to-reach sleeve negative.
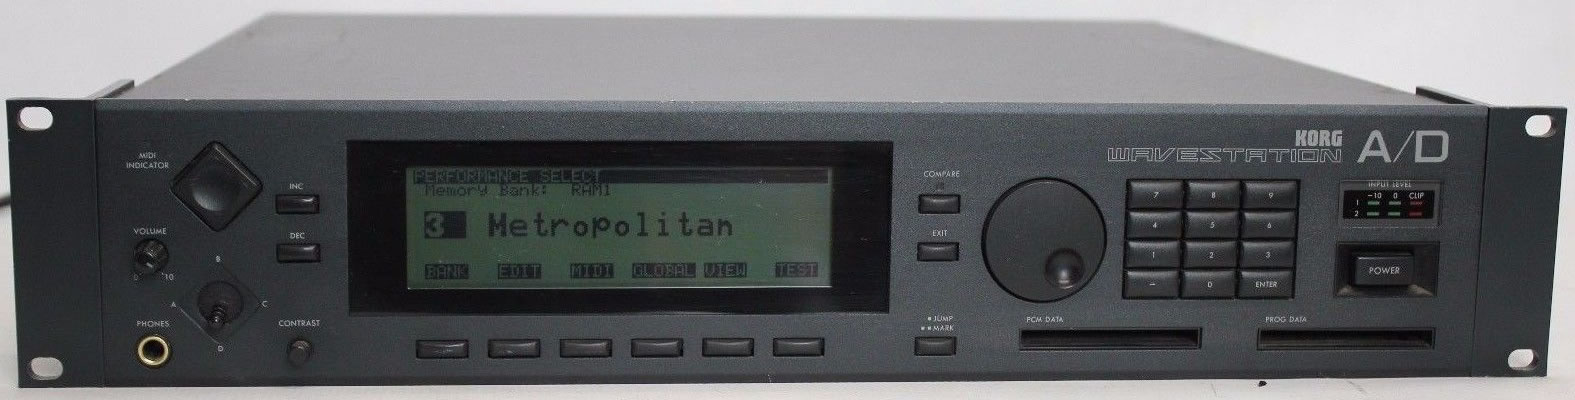
The best damned synth of 1991. Tap to view at full size.
Long before I became an accordion player, I was a synth player. Over the years, I’ve bought and then sold or given away a number of synths, but there’s one that I kept: A Korg Wavestation A/D.
The Korg’s Wavestation A/D is the rack-mount version of the Korg Wavestation EX keyboard synth, which in turn is a revised and expanded model of the original Korg Wavestation. The Wavestation series of synths set itself from the other synths of the era by using a technology called wave sequencing, which could be described as building sounds by pasting sequences of different waveforms together, in a way similar to George Martin’s cut-and-paste approach to the calliope sounds on the Beatles’ Being for the Benefit of Mr. Kite!.
I bought the Wavestation from my friend, Canadian TV/film composer Stephen Skratt, back in 1993, when I was playing keyboards in a band with my schoolmates at Crazy Go Nuts University…
Me, circa 1992.
…and I’ve done other live gigs with it (that’s me in the pink wig)…
Stephen Skratt, me, and Karl Mohr jamming on keyboards in 1999.
…and I’ve even used it for some multimedia software projects:
My first software deliverable after graduating from University: A multimedia promo for family album software.
I’ve held onto it ever since, having taken it from Kingston to Toronto, then San Francisco during the dot-com bubble and back, and it’s now at my current home in Tampa.
Simply put, the Wavestation is a beautiful-sounding synth, and even 30 years later, it still sounds great. If you’d like to hear what it sounds like, check out this video by Espen “I am the 80s” Kraft:
Bringing the Wavestation back to active duty
One of my plans for this year is to create a series of videos covering software development and other tech topics including security. Those videos will include music, and I thought that while there’s nothing wrong with licensing some music, why not write my own?
With that in mind, I pulled the Wavestation out of its closet, where it had been sitting, plugged in my small MIDI keyboard controller (the original version of the M-Audio Axiom 25), hooked it up to powered speakers, and turned it on:
The good news was that it still worked. The screen came to life, and pressing keys resulted in those rich Wavestation sounds:
Tap to view at full size.
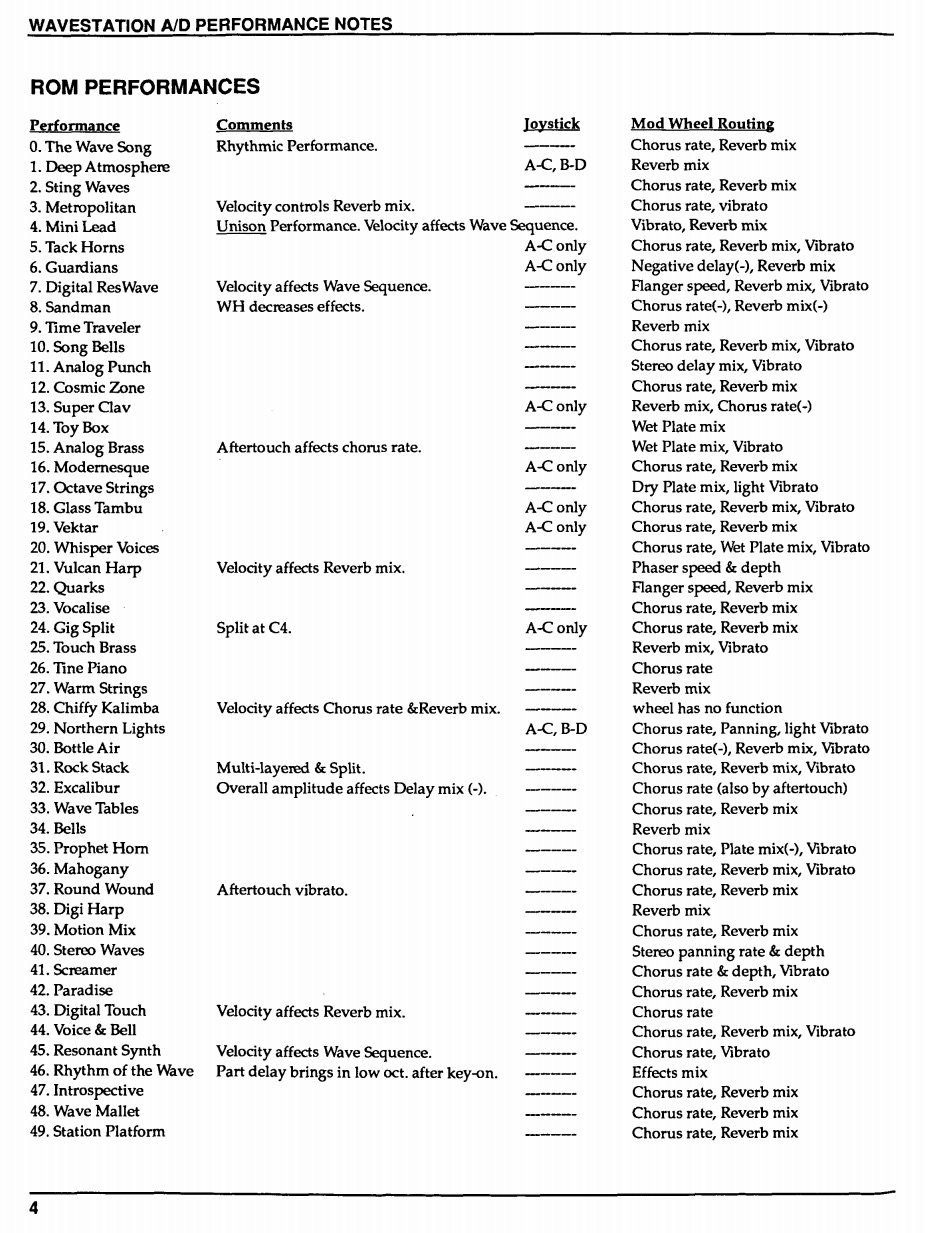
The bad news, which I was expecting, was that while the built-in sounds in ROM remained, all three RAM banks which held the sounds that I had lovingly created so very long ago were gone. They had been replaced by copies of the ROM sounds. I no longer had a synth with 200 sounds (or in Wavestation parlance, “performances”, or in general synth terms, “patches”) — I had four identical banks of 50 sounds:
Page 4 from the Korg Wavestation A/D Performance Notes manual. Tap to view at full size.
I suspected that the battery that maintained the contents of the Wavestation’s RAM had died long ago. I confirmed this theory by tweaking the settings for one of the sounds in RAM, turning the synth off and back on again, then checking my edited sound. It had reverted to a copy of the ROM sound on which it was based.
I’ve done RAM battery replacements on numerous devices over the years, so I felt comfortable with going inside the Wavestation to see how big a chore replacing the battery would be.
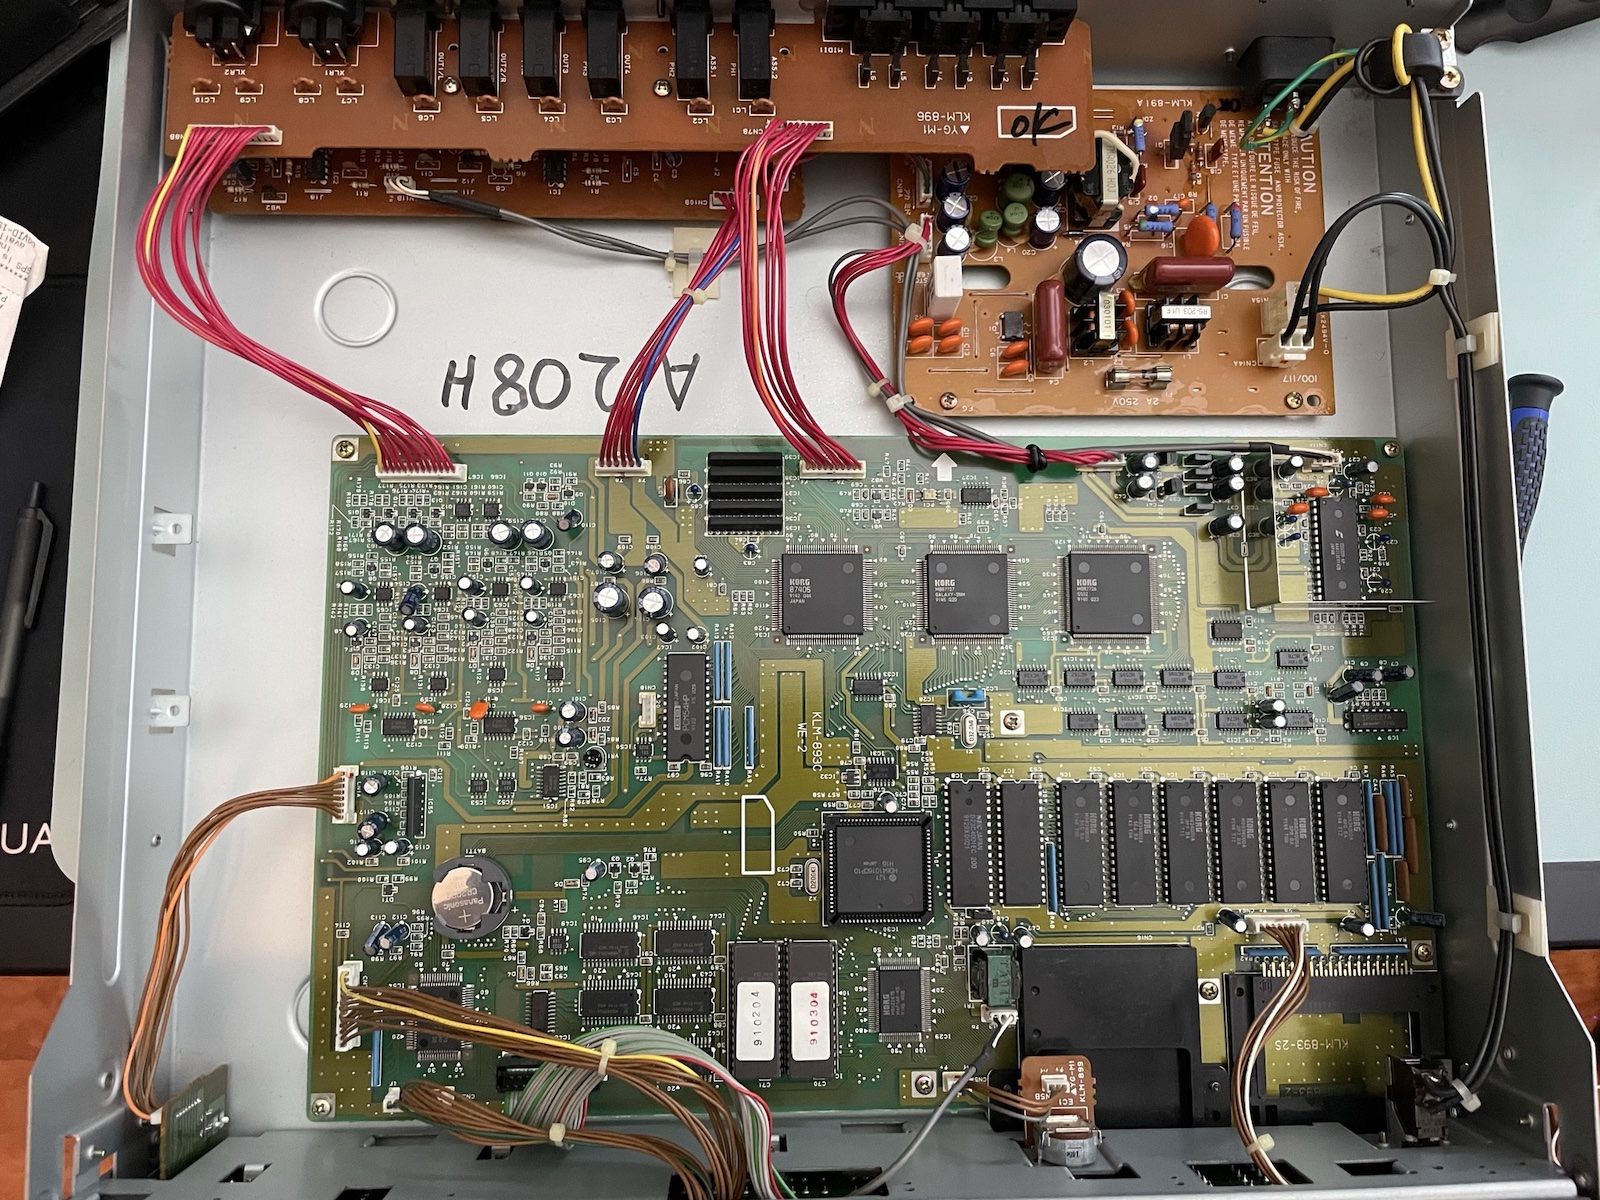
The first step was to pop the top panel from the Wavestation. It’s a pretty simple process where you remove six screws — two on each side, and two on the back. Here’s what the inside looks like, as viewed from the front panel:
Tap to view at full size.
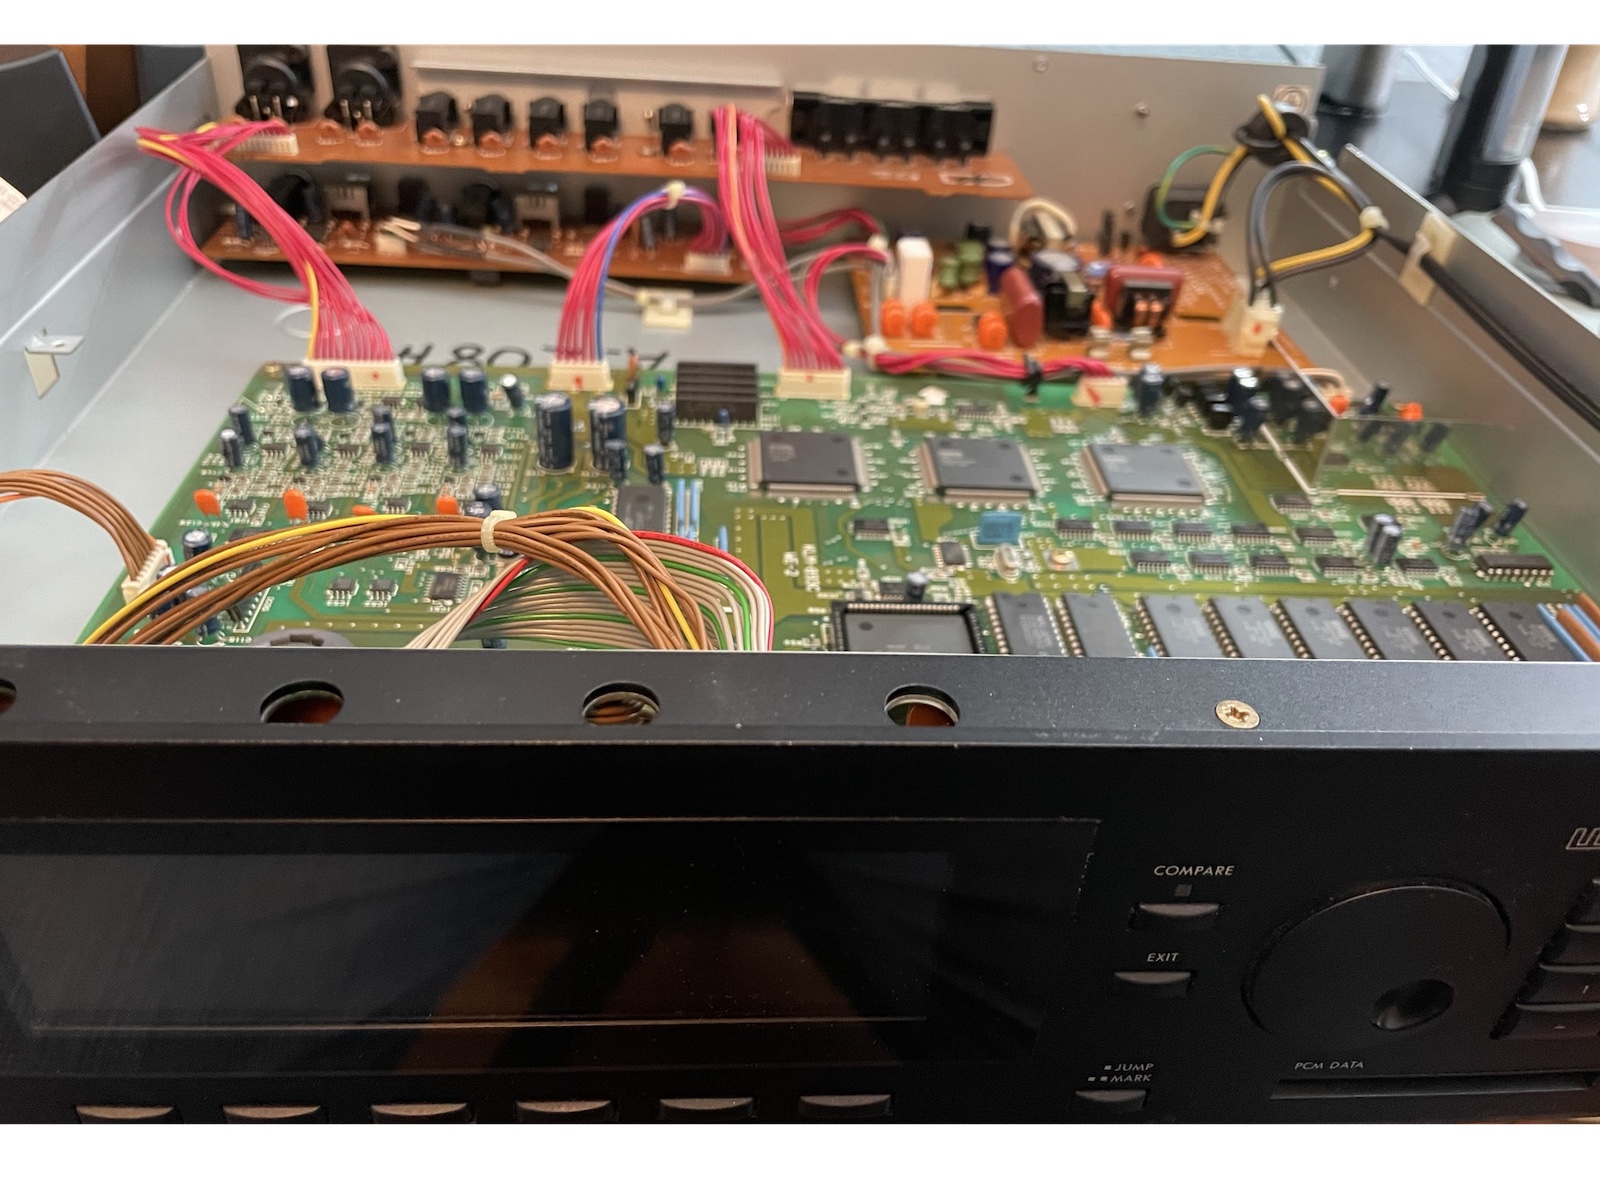
Here’s what it looks like from above:
Tap to view at full size.
If you’ve ever had to replace the battery of an early- to mid-1980s synthesizer with battery-backed memory, you’ve probably dealt with the annoyance of that battery being soldered in. This was probably a cost-cutting measure (compared to today’s prices, synths in the ’80s were quite expensive), and manufacturers probably believed that we’d all upgrade to later models long before those batteries died.
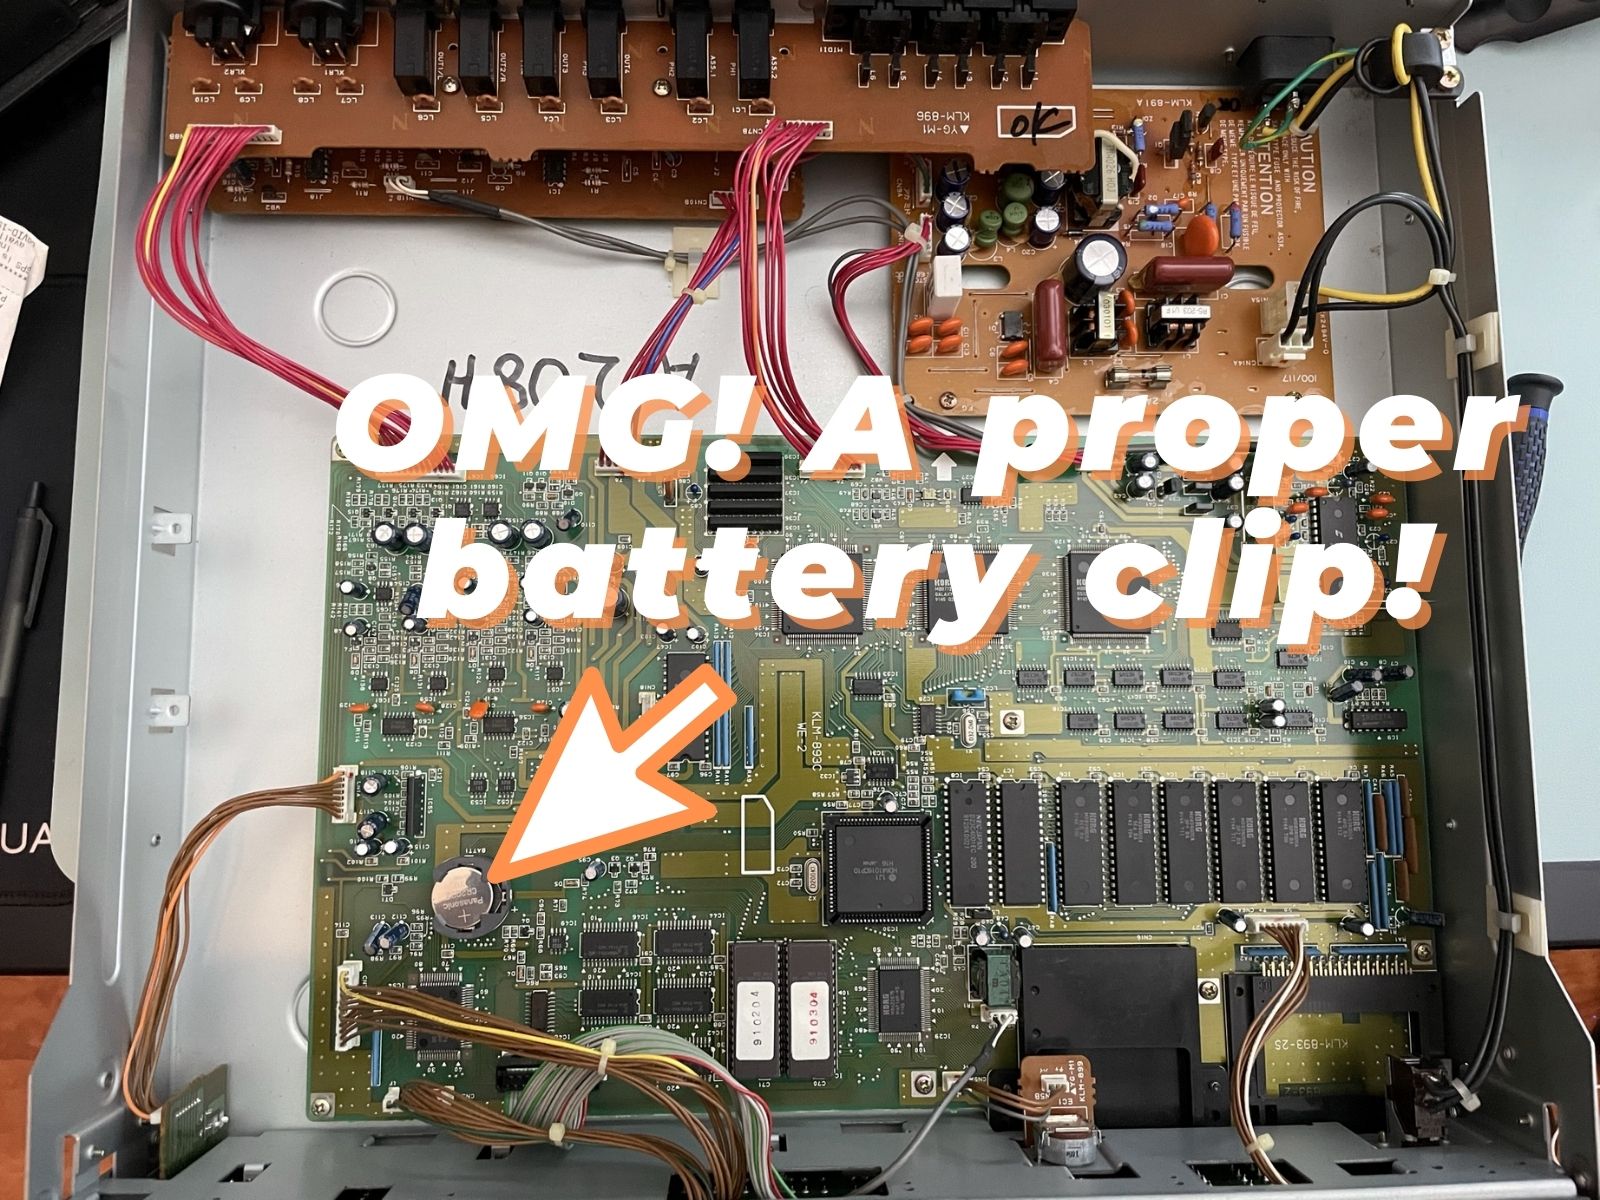
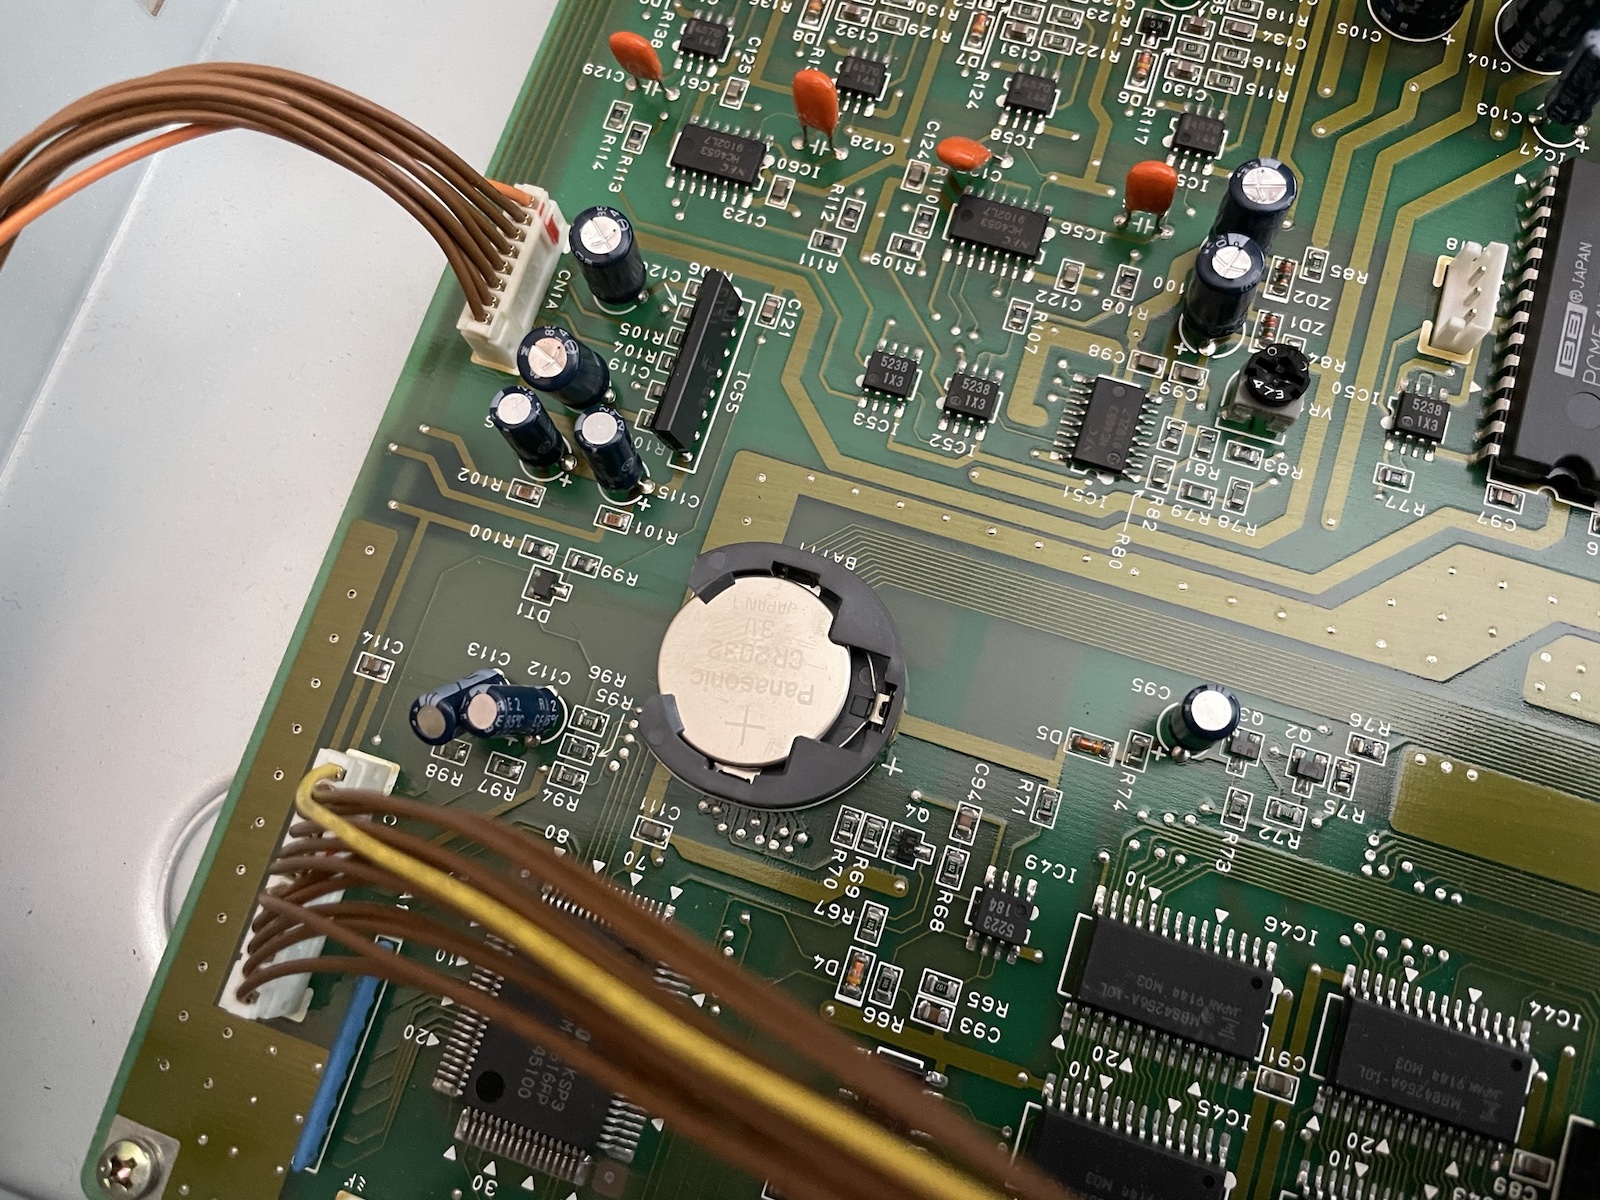
I found a pleasant surprise waiting for me on the Wavestation’s main printed circuit board:
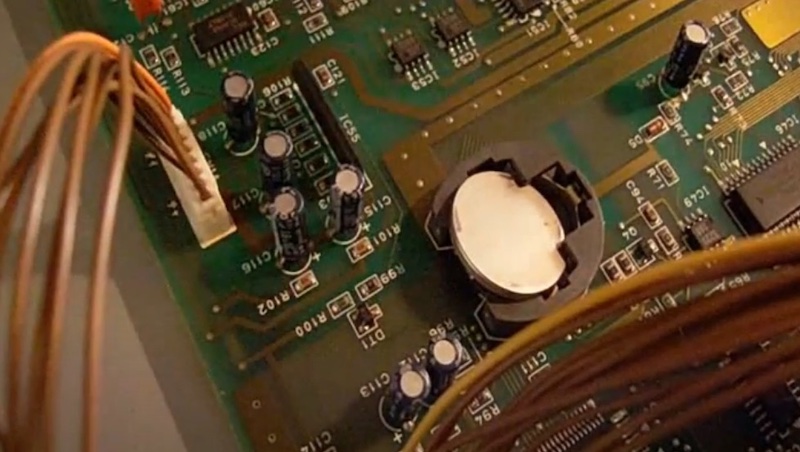
The clip makes it easy to swap out the battery. Pressing against the spring pops the battery out:
Tap to view at full size.
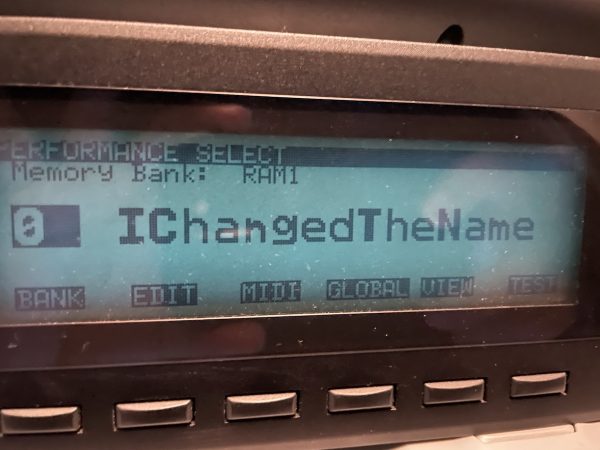
With the battery replaced, I put the top back on the Wavestation, powered it up, changed the name of one of the sounds in RAM, and powered down and unplugged the Wavestation. I plugged it back in and powered it up, and yes, the change remained in RAM!
Tap to view at full size.
In case you were wondering what the Wavestation sounds like, here’s a sample:
This recording isn’t of me playing a tune, but just holding down one or more keys. It shows the sort of complex sounds that the Wavestation can make.
Next step: Restore those factory RAM sounds
Even with a new battery, I still have 3 banks of 50 sounds that each are a copy of the 50 sounds in ROM. I’d like to start off with a straight-out-of-the-box 1991 experience and get those factory RAM sounds back. In order to do that, I’ll need a couple of things:
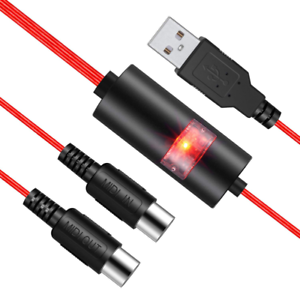
The sound data, which thankfully has been preserved by Wavestation enthusiasts and can easily be found online, and
A USB to 5-pin DIN MIDI interface to move that data from a computer to the Wavestation:
The SysEx Librarian macOS application to transfer the sound data to Wavestation.
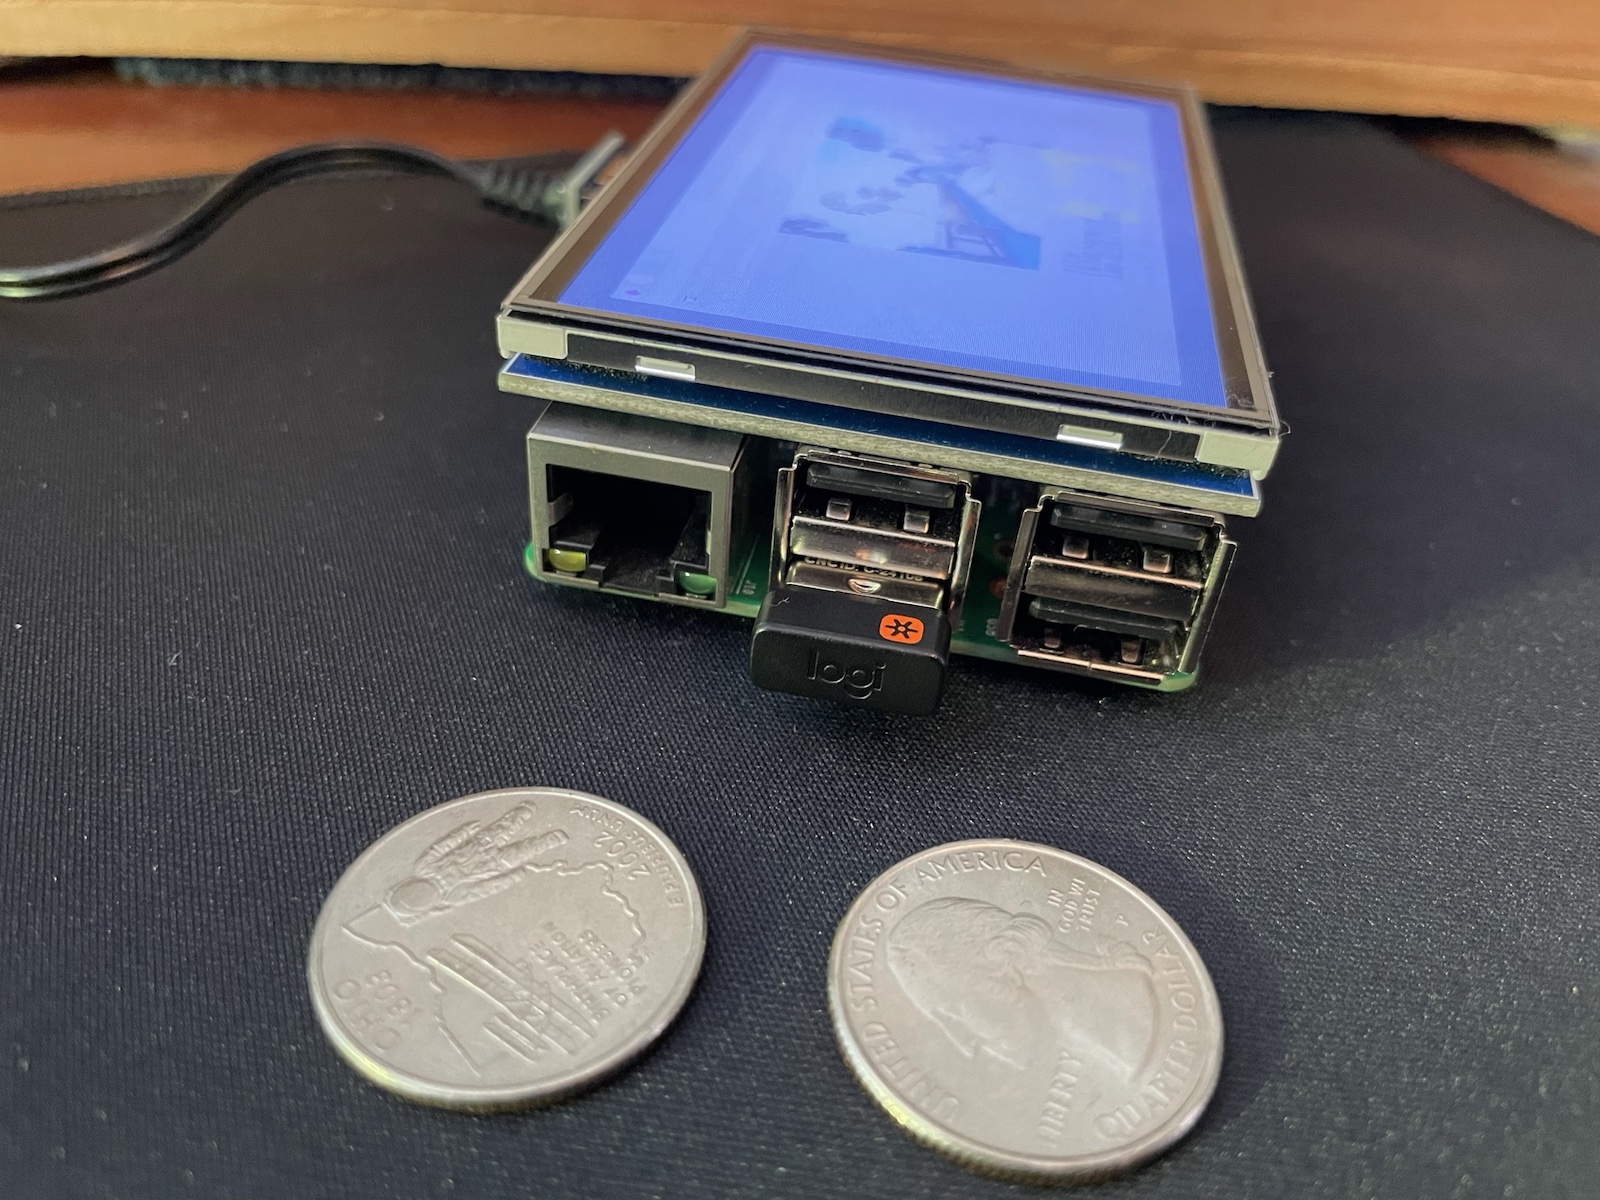
That all changed when I finally unboxed my Kuman 3.5″ LCD display, (a steal at $20) which my in-laws gave to me for Christmas (they went through my Amazon wishlist for gift ideas). They had no idea what it was, but figured I’d like it, which I do!
Tap to view at full size.
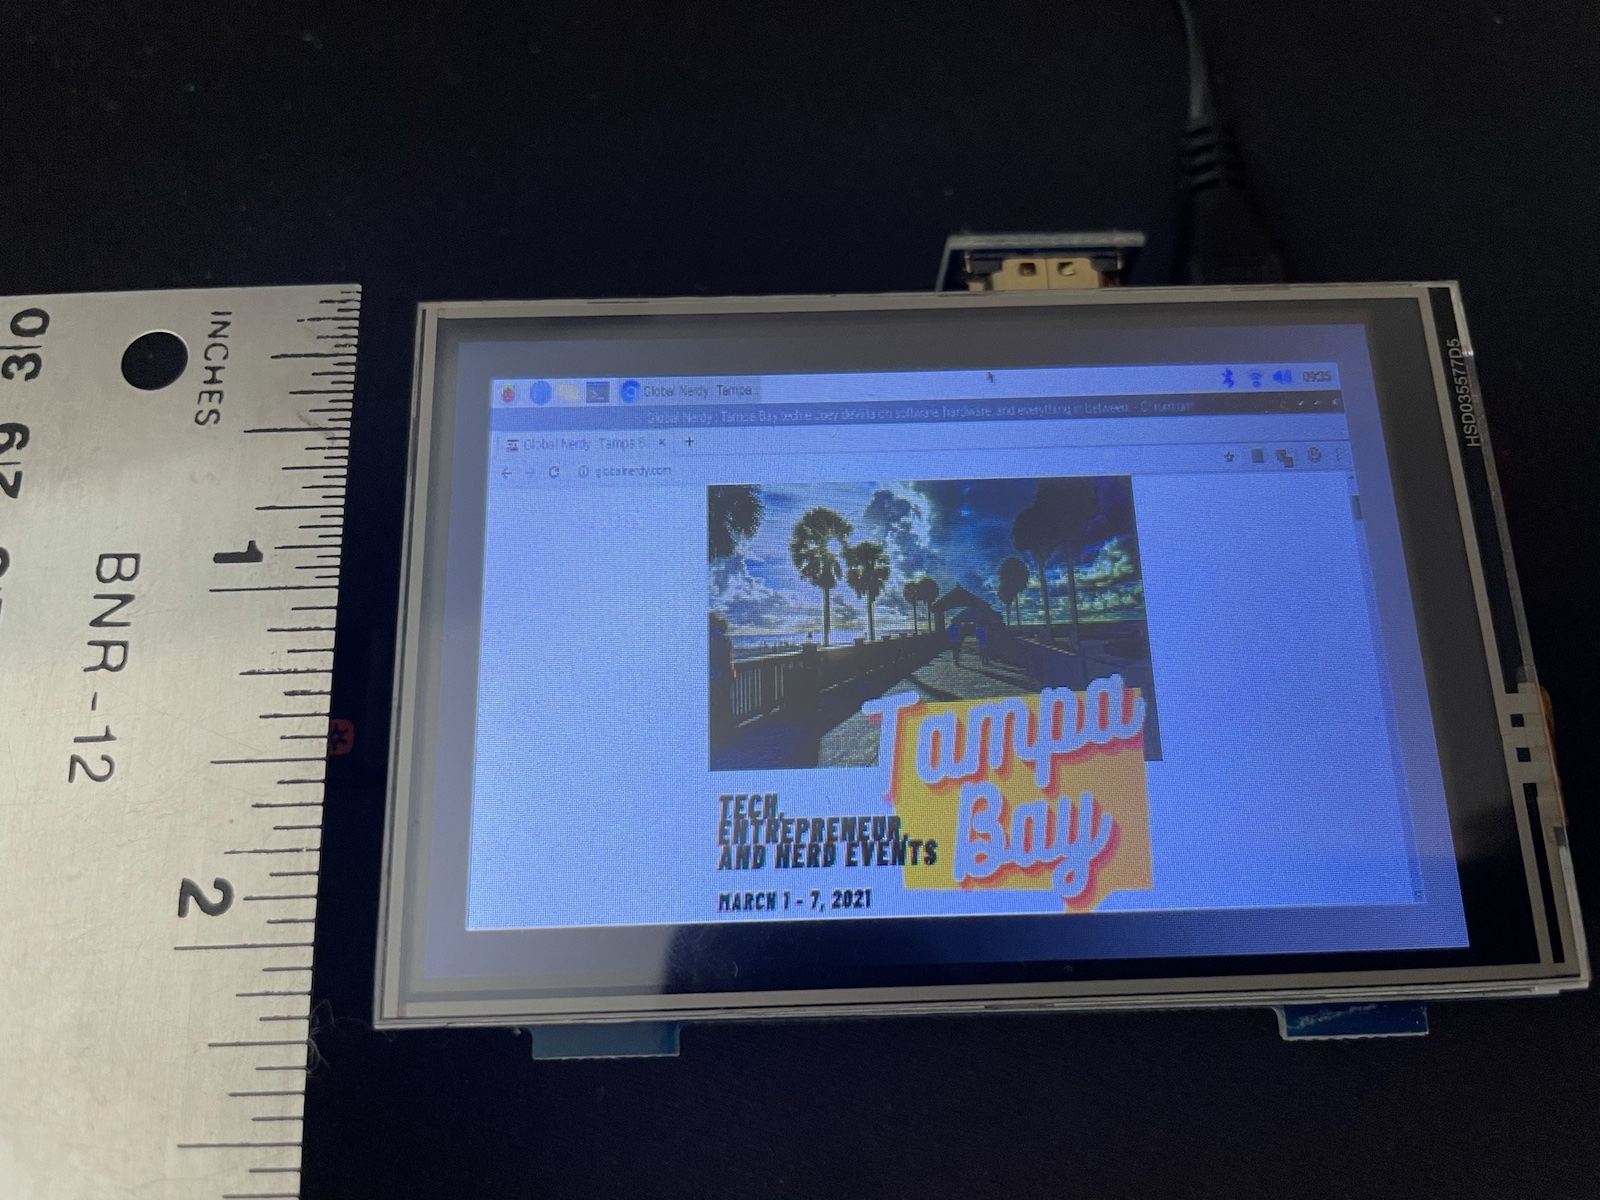
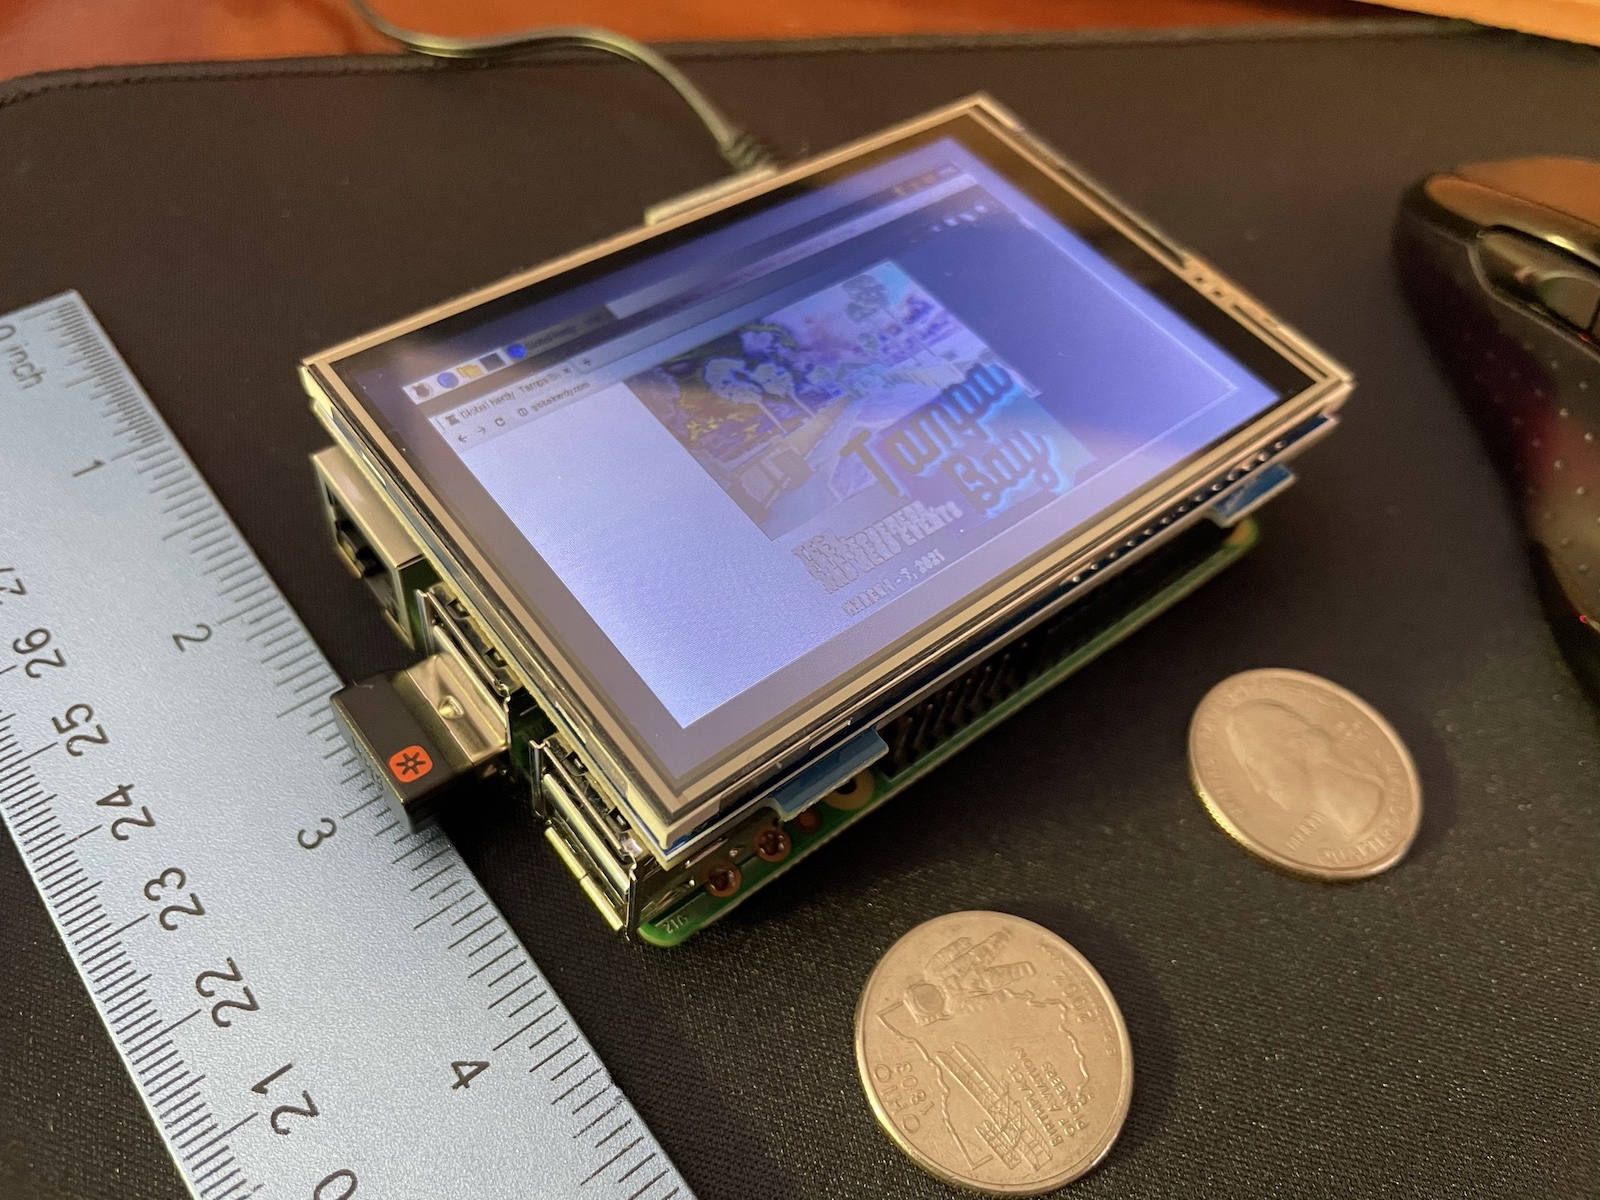
With a 3.5″ diagonal and 480 by 320 resolution, this screen isn’t meant for reading web pages or PDFs or writing code, documents, or spreadsheets. It’s meant to be a display for an IoT project that doesn’t need to display a lot of information, such as a weather app, smart thermostat, or even low-res videogames.
Tap to view at full size.
The screen’s not just an output device, but an input device as well, since it’s touch-sensitive. Once you’ve installed the driver, the Pi treats the screen as if it were another mouse, treating taps as mouse clicks, and the location of your tap as mouse coordinates.
Tap to view at full size.
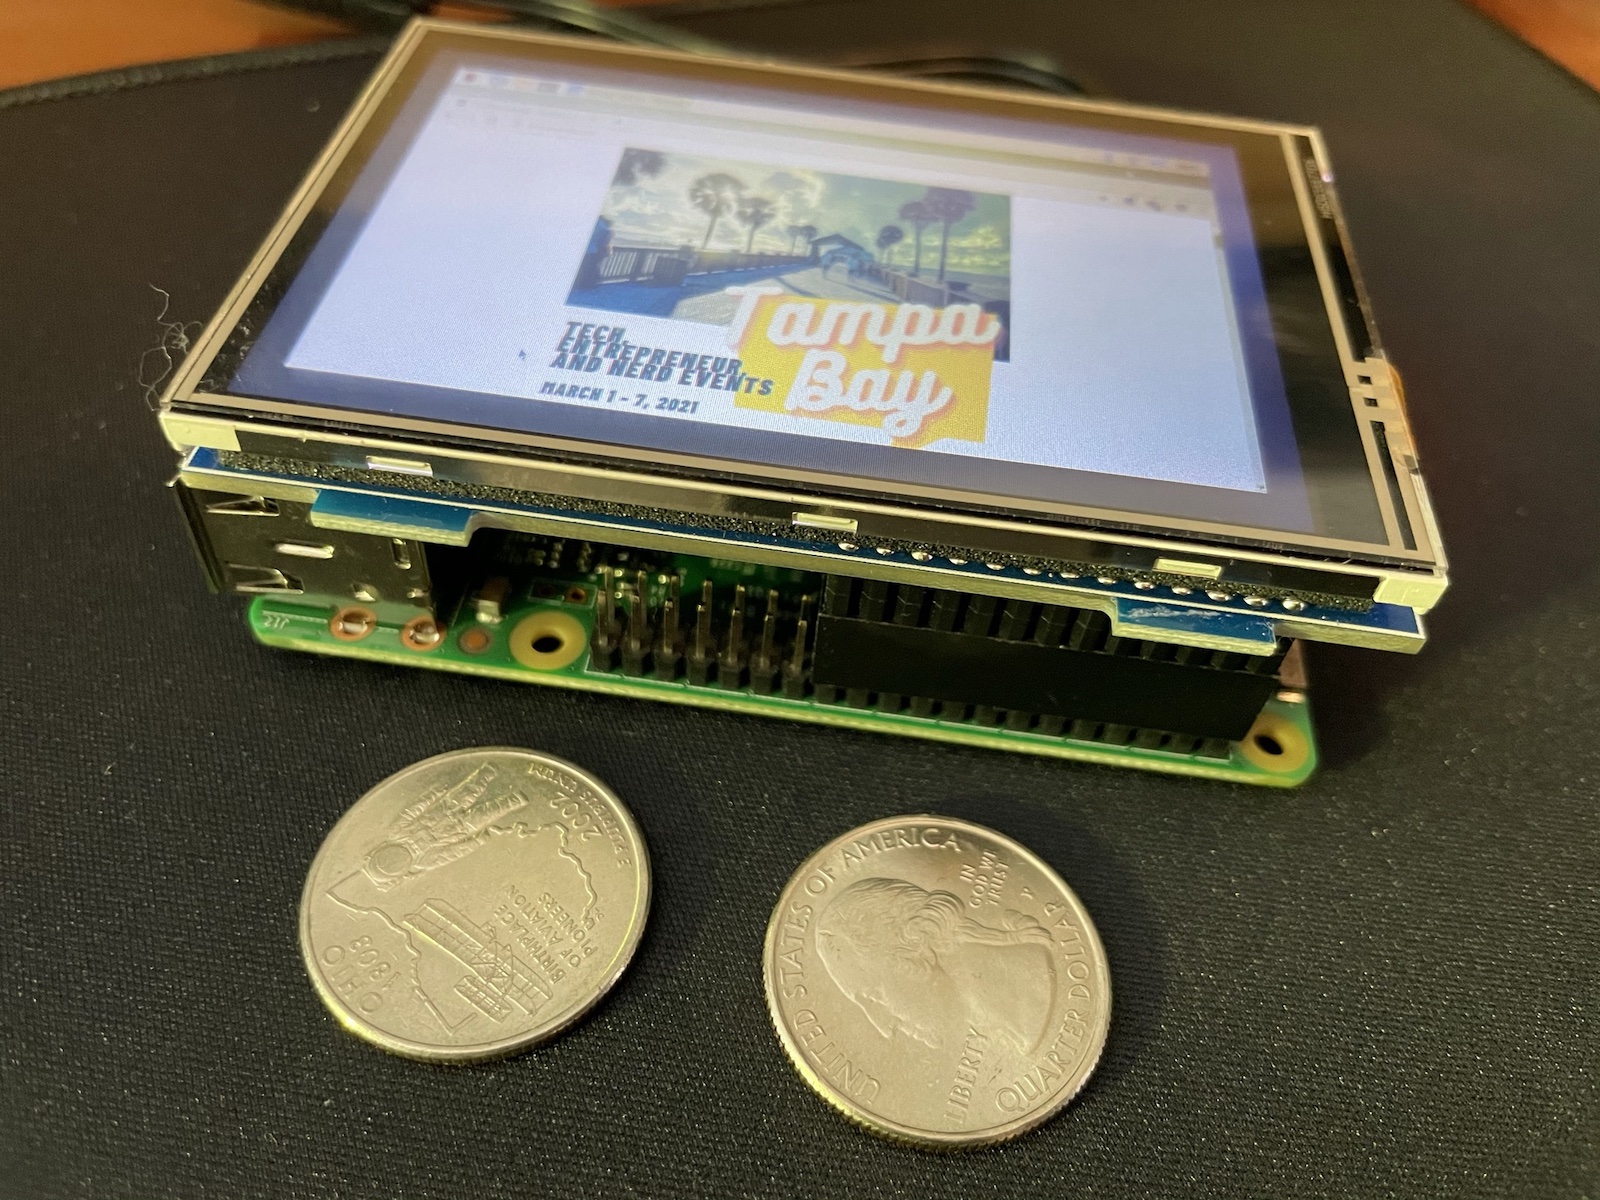
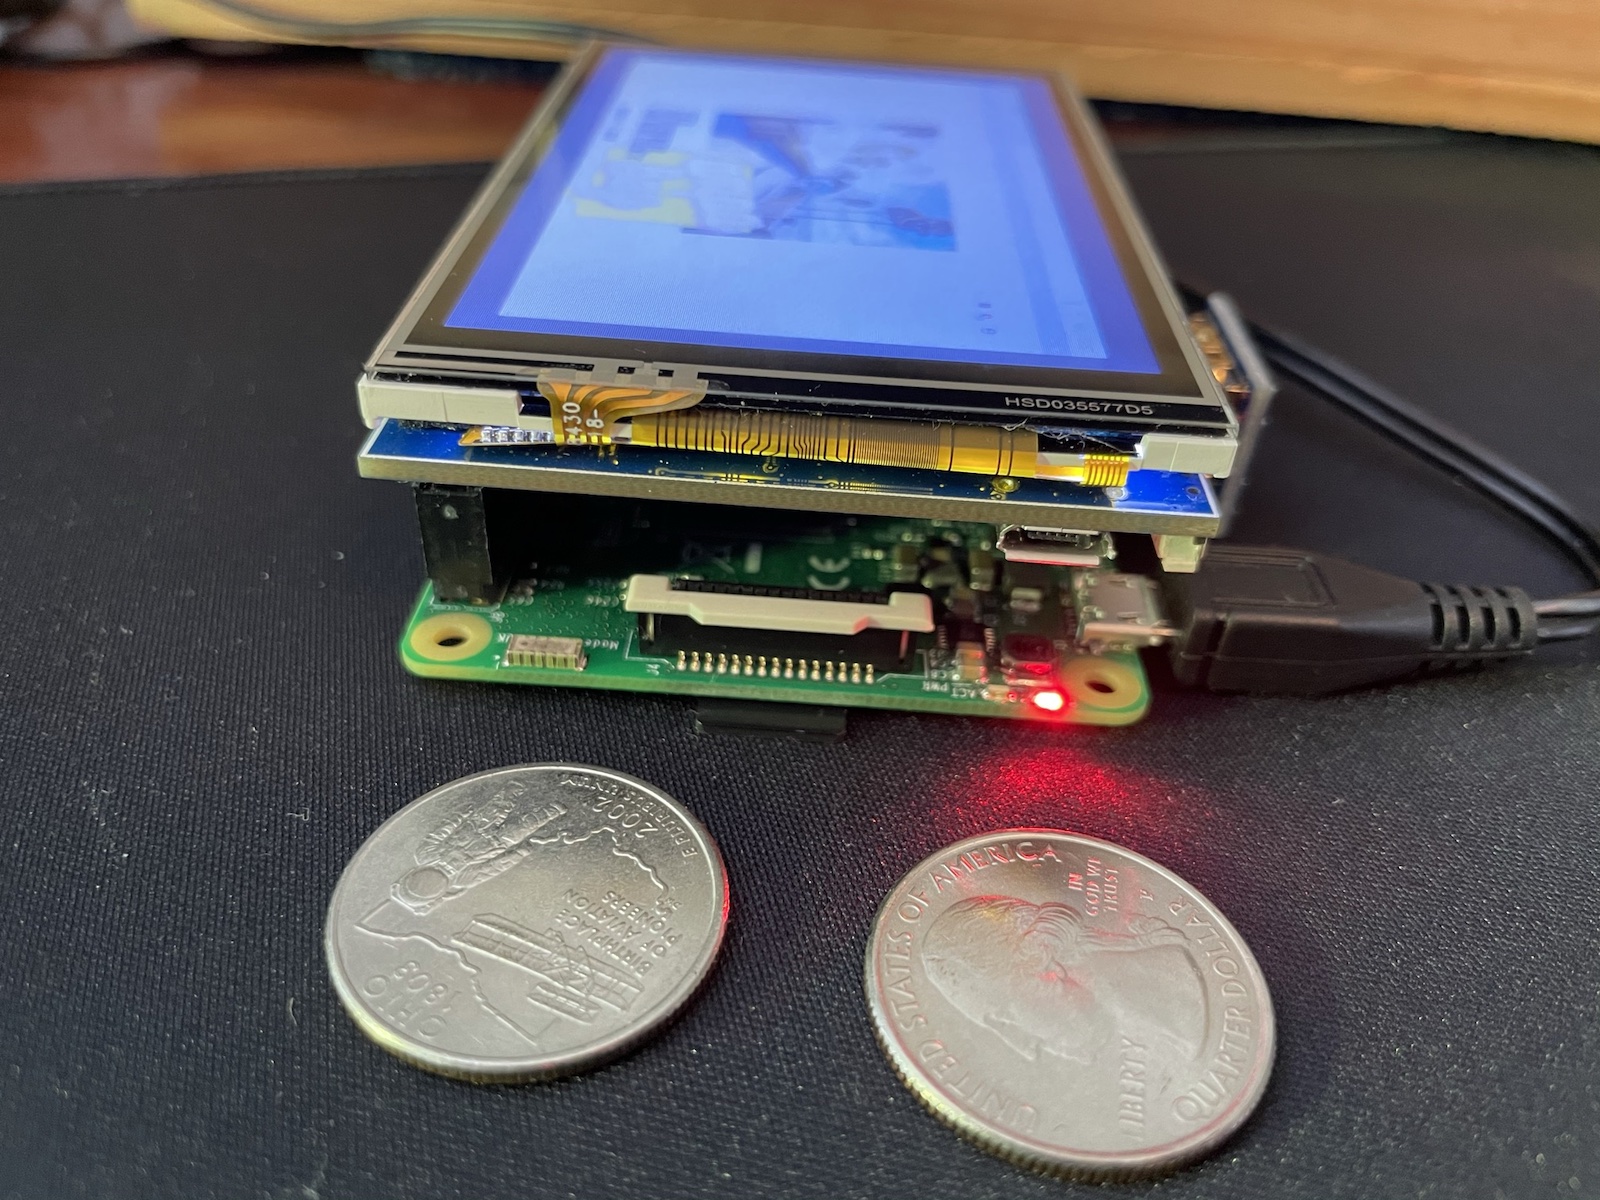
The screen plugs directly into the Pi’s GPIO (General Purpose Input/Output), a 40-pin connector located along the top edge of the board, which it uses for power. It’s also what physically holds the screen to the Raspberry Pi.
Tap to view at full size.
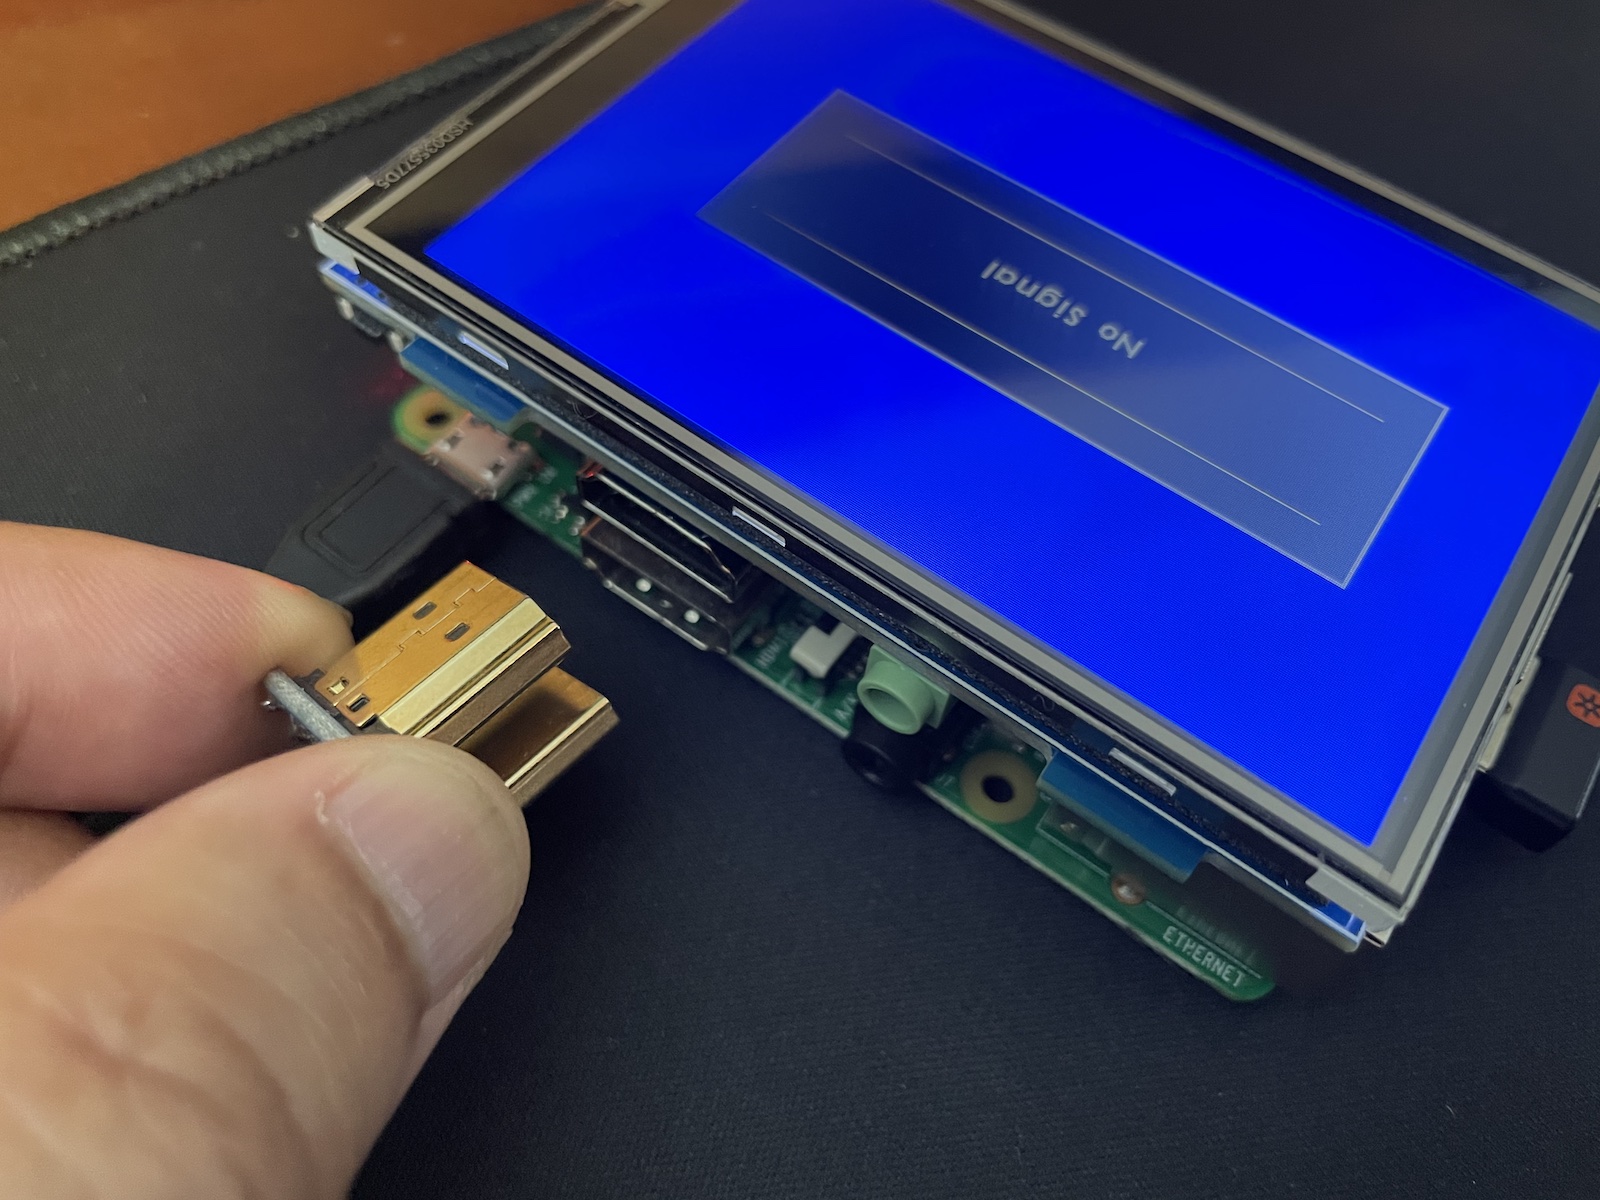
The video signal is fed to the screen through a U-shaped HDMI connector that connects the Raspberry Pi’s HDMI port to the screen’s HDMI port.
Tap to view at full size.
I’ll post the results of my noodling with this new Raspberry Pi/screen combo here on Global Nerdy. It should be interesting!