Categories
Entrepreneur Florida How To Podcasts What I’m Up To

Everything you need to know to win StartupBus is in this podcast, part 3

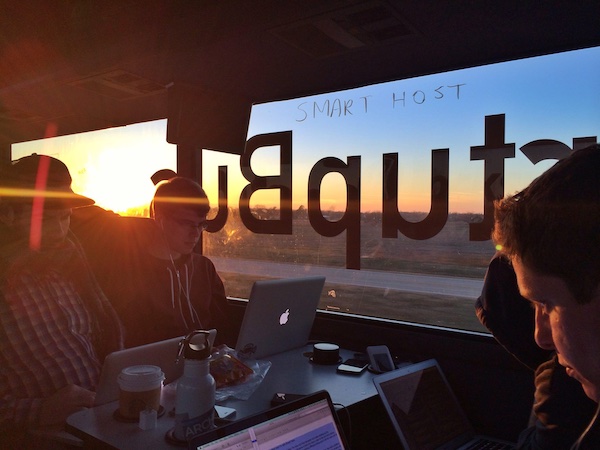
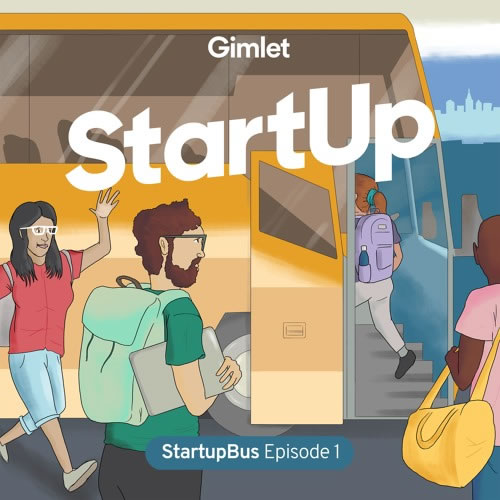
The title of this post should be a big hint: Everything you need to know in order to win StartupBus North America 2022 is contained within a podcast. This is the third in a series of posts covering the “Startup Bus” series of episodes from Gimlet Media’s Startup podcast, which covered the New York bus’ journey during StartupBus 2017.

(Did you miss the first two articles in this series? Here’s part one, and here’s part two.)

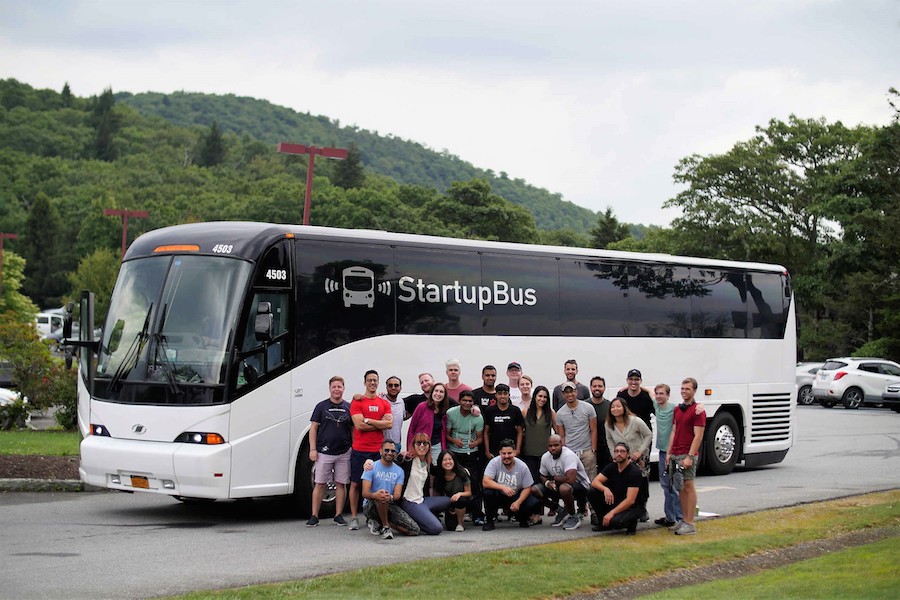
I’m posting this series as a prelude to StartupBus 2022, which takes place at the end of July. I was a contestant — a buspreneur — on the Florida bus in 2019, which made it all the way to the finals and finished as a runner-up. Now I’m a coach — a conductor — on the 2022 edition.

Here’s episode 3 of the podcast series…

…and here are the lessons I took away from this episode:

  • If you run into a difficult person in the morning, you ran into a difficult person. If you run into difficult people all day, you’re the difficult person. I don’t want to reduce Ash, one of the buspreneurs, to a single quality — difficult person — but his “hey, I’m just being real” approach to everyone and everything is one of the hallmarks of difficult person-ry. One of the challenges of being a difficult person is that people will work with you only if you provide value that outweighs your difficulty, and that’s not easy to accomplish. This episode gives us a deeper look at Ash. While he can be a difficult person, we get a better understanding of who he is. Which leads me to me to my next observation:
  • “The thing about StartupBus is that it really is like a reality TV show. It’s so intense that every interaction, every personality can feel like a caricature of real life.” In the previous episode, Eric the narrator observed that StartupBus feels a lot like one of those “reality TV” competition shows. In this episode, he takes the observation one step further by noting that in a high-pressure setup like StartupBus, it’s all too easy to reduce your busmates to the most obvious aspect of their personality. Remember that people are more than what you see on the surface.
  • Even though the company you’re creating on the bus isn’t “real,” it helps to get real users, and you either get them through your social network or through advertising. It’s more impressive to the judges at the finals when you can say “Even at this early stage, we already have x users for our product.” You may be working under a compressed timeline, but it’s still doable, and not only do users give you cred with the judges; users can also give you valuable feedback.
  • Pay attention to the details when you’re spending money. One of the teams paid for Facebook ads, but clicking on the ads took users to https://phishly.io when their site actually lived at plain old http://phishly.io. That was 65 dollars down the drain.
  • StartupBus may be the “wild card” that you need in your life. As Madelena Mak, one of the conductors on the bus says: “I think like lot of people who join the bus have that same feeling I felt, like that they want to be dealt a wildcard. That they want to be pushed to the limits so they can break out of their own old molds. Like they want to be something more than who they think they can be. It’s not about the bus. It’s about learning something about yourself.”
  • The pitching gets tougher. As the bus approaches the destination city — New Orleans in the case of StartupBus 2017, Austin in this year’s case — you’ll be pitching in front of judges who’ll ask questions that will require you to have thought through more angles. For example:
    • Team Daisy — the folks behind the funeral-planning app — were asked if they’d considered handling issues beyond just the funeral, such as death certificates.
    • Team Denari — the team with the app for sending cryptocurrency to people in need — got stuck on a question that exposed their blockchain-induced blindness. When they said that they could outdo GoFundMe because it services only 19 countries, one of the judges countered with “You are talking about now securities exchange over multiple countries. Maybe there are reasons GoFundMe only deals with 19. Which I haven’t heard you guys say. Is it cause they don’t want to? Because that’s kind of what it comes off as. It’s like, ‘GoFundMe is the largest one, they’re only in 19 countries.’ Why is that?”

Categories
Entrepreneur Florida How To Podcasts What I’m Up To

Everything you need to know to win StartupBus is in this podcast, part 2

ThinkInsideTheBus - StartupBus

As the title of this post puts it: Everything you need to know in order to win StartupBus North America 2022 is contained within a podcast. This is the second in a series of posts covering the “Startup Bus” series of episodes from Gimlet Media’s Startup podcast, which covered the New York bus’ journey during StartupBus 2017.

If you haven’t yet seen the previous post, check it out! It covers episode 1 of the Startup Bus series, which introduces you to the buspreneurs on the 2017 New York bus.

Episode 2: It’s like one of those competition TV shows!

You can listen to episode 2 on its page or use the player below:

Here are my notes from this episode:

  • Eric the narrator discovers the secret of StartupBus: it’s like a reality TV show, but in real life! “When I was growing up, my family was very into a particular kind of reality tv—competition shows… I thought I’d be reporting on a hackathon. I’d find one person, going through something interesting, and we’d just see how their week played out. Pretty simple. But when I woke up in a hotel in Raleigh, North Carolina that Tuesday morning, and I saw a giant “StartupBus” decal on the charter coach outside my window, I had this realization that would have thrilled my younger self to no end: “Holy shit. I’m not just reporting a story about a hackathon, I have landed inside a real life competition show.”

    The lesson you should take from Eric’s realization: if you think you wasted your time watching Survivor, The Amazing Race, or similar shows, guess what…you didn’t! A lot of the personal dynamics on those shows is pretty much like those on StartupBus.
  • Be prepared to pitch constantly. Eric observes: “To get the day started, each team sends one person to the front of the bus to practice their pitch over the intercom. This is something that happens a lot on StartupBus—people are practicing their pitches constantly.”
  • Be prepared for surprise challenges and surprise obstacles. StartupBus borrows a big trick from reality TV shows: surprise obstacles. When the bus pulls into Charlotte, North Carolina, the New York team finds out that they’ll be pitching against two other teams — a bus that started in Akron, Ohio and another that started in…Tampa!
  • Don’t limit yourself to just software, because there’s a chance that some team on another bus isn’t limiting itself to just software. “And the Ohio bus is impressive in its own way. It turns out they teamed up with some people from San Francisco, and they’re manufacturing physical products. So they have 3D printers and computer aided design software. The whole thing feels like that scene in “The Sandlot” when the other team shows up in their actual jerseys and matching converse sneakers, and all of a sudden you realize, ‘Oh… this is some real competition.’”
  • Try not to fall into the trap of traditional gender dynamics. On one team, there’s a good news/bad news thing going on because they’re electing one of the women to be CEO; the bad news is that it’s a job that none of them particularly want, and a lot of it will be about reining in unruly behavior.
  • Have a plan for managing conflict. On another team, a “that’s just who I am” kind of guy butts head against a woman on his team. This is a pretty big topic, and I’ll write more about it in a later post. Just know that you may have to manage conflict within the team.

Categories
Entrepreneur Florida How To Podcasts What I’m Up To

Everything you need to know to win StartupBus is in this podcast, part 1

I’ll repeat what this post’s title is telling you: Everything you need to know in order to win StartupBus North America 2022 is contained within a podcast. More specifically, the “Startup Bus” series of episodes from Gimlet Media’s Startup podcast, which covered the New York bus’ journey during StartupBus 2017.

This five-part series covered the journey from its start in New York City to the finals in New Orleans. It features reporter Eric Mennel, who “embedded” with the StartupBus New York bus in July 2017 to follow the participants, talk to them, and report on what happened. It gives you a look not just into the teams and their projects, but the people in those teams, what drives them, and the very personal reasons why they chose to go on the bus.

I participated as a “buspreneur” (their word for contestant) in StartupBus 2019 — the tenth StartupBus North America event — and our team took the Florida Bus to the finals, where our project got the runner-up position. As a way of preparing for my ride, I listened to these episodes three times, which gave me plenty of opportunity to distill a lot of knowledge from them.

I’m quite certain that this knowledge played a role in our team’s success, and I think it can play a role in yours — but only if you ride the bus!

Episode 1: Boarding and brainstorming

You can listen to episode 1 on its page or use the player below:

Here are my notes from the episode:

  • Rule number one of StartupBus is that there is no “number two” on the bus. Bus toilets aren’t as well-sealed as airplane toilets, and if you poop on the bus, it will be bad for everyone concerned — especially you, because we’ll all be giving you the stink-eye from now on.
  • You’re going to make your first pitch very soon after the bus departs. At the start of the ride, every buspreneur stands in front of the bus and makes a first pitch. This pitch will be for two things:
    • Yourself: You’ll be selling yourself to prospective teams. You’re going to need to convince people why you should be on their team or why they should be on yours. It works best if you can have your unique value proposition ready in advance.
    • Your startup idea: If you have a startup idea — that is, if you have a problem and a solution — you should be ready to pitch it. You want your fellow buspreneurs to want to work on your startup idea!
  • Be ready for chaos after the first pitches. After the pitches, people will start looking for and forming teams. Be ready to move about the bus to talk to different groups.
  • Build a balanced team. You’re going to need a variety of skills to get the job done in three days.
  • Day one of StartupBus is about coming up with and validating your idea. Your idea will be tested, and you may need to modify it slightly — or make a big pivot. Be prepared to do either.
  • There’s a difference between a technology and a solution. One of the teams that initially looks like a collection of all-stars ends up without a product idea because they were focused more on blockchain than a solving a problem with blockchain. As the saying goes: “People don’t really buy drills, they buy holes.”
  • If the technology you plan to use isn’t something laypeople are familiar with, you may need to spend some time explaining it. The blockchain team ended up spending a lot of the time allotted to their pitch explaining what a blockchain was, and why it might be essential to the problem they hadn’t quite settled on solving. Remember, this was 2017, well before the time when crypto exchanges were easy to find online and celebrities were shilling for cryptocurrency companies; in fact, it would be a little bit before “BitConneeeeeeeeeeect!”. Keep this is mind if your startup is going to be NFT-based — you’re going to spend a good chunk of your pitch explain them to the judges, which will take away from the time to pitch what your project actually does.
  • The conductors are there to help you. Not only that; all the conductors have been on StartupBus before, so we’ve gone what you’re going through now, we learned from our experiences, and we’ve internalized those lessons. Our job is to actively help you make your startup, project, and pitch be the best they can be.
  • The conductors are there to challenge you. The ride to Austin will not be direct. There will be stops, where you will face challenges. A mere 4 hours after the New York 2017 bus departed, the teams had to make their first pitch in front of a panel of judges in Washington, D.C..
  • Try to avoid talking over other team members. Day one is about initial ideas and refinement, and there’s a lot of talking and brainstorming. Your team should try to make sure that team members don’t talk over other team members.
  • Find out why your fellow buspreneurs are there. There are all sorts of reasons why someone would go on StartupBus, but there are a few particular categories of “why” that you’ll definitely see:
    • Seekers: There are always a number of buspreneurs who are participating because they’re looking for something: options for a new career path, new perspectives, new experiences, a chance to see parts of the country they otherwise wouldn’t see, and meaning. They can be great “idea” people, as they’re on the bus with the specific goal of trying new things.
    • Shakers: There are also always buspreneurs who want to “shake up” their current situation. Perhaps they’re in a job or life situation they don’t like, feel they’ve fallen into a rut, or want some experience that will set them apart from other job candidates (this is one of the reasons I went in 2019). These are great “doers,” because their reason to be on the bus is to do new things.
    • Hackathon junkies: Just as there are people who regularly compete in marathons and triathlons, there are people who regularly compete in hackathons (and remember, that’s what StartupBus is). Having one on your team is a real help — they have experience delivering a proof of concept in short order.

Watch this blog for the next episode, and my notes from that episode!

Categories
How To

I thought everyone knew these Google apps shortcuts

Tap to view at full size.

This week, in both in-person and online conversations, I found out that a lot of people don’t know these quick shortcuts for creating new documents in Google apps. They’ve been around for a while:

  • Want to quickly create a new Google document?
    Enter doc.new or docs.new into your browser’s address bar.
  • Want to quickly create a new Google spreadsheet?
    Enter sheet.new or sheets.new into your browser’s address bar.
  • Want to quickly create a new Google slide deck?
    Enter slide.new or slides.new into your browser’s address bar.

In fact, domain names that end with .new have a specific purpose: they’re shortcuts to take actions in specific web applications.

Categories
Hardware How To

What to do when the USB-C ethernet adapter for your Mac doesn’t work out of the box [UPDATED]

I recently got a Mokin 10-in-1 USB-C dongle for use with my work computer, a 2019 16″ MacBook Pro, whose only connectors are 4 Thunderbolt/USB-C ports and a 3.5 mm audio jack.

The dongle worked like a charm out of the box with the notable exception of one part: The Ethernet port. I had a pretty good guess why this was happening and how to fix it.

TL;DR: You need a driver — here it is!

Here’s the installer for version 1.0.22 of the macOS driver, which works for macOS 10.9 through 10.15. Unzip it, run it, and then go to the section titled Step 4 below.

The longer explanation

The problem and the plan

Most dongle vendors are integrators. They may manufacture the cases and simpler electronics, but they purchase lot (or all of) the fancier tech from manufacturers, such as networking chips.

Here’s a pic showing a Mokin dongle and its internals:

From Mokin’s site. Tap to view at full size.

My plan was to find the manufacturer of the networking chip inside my dongle, then find their webpage, then hopefully find a driver.

Here’s what I did.

Step 1: Identify the vendor

With the dongle plugged into my MacBook, I opened the Apple menu and selected About This Mac. This window appeared:

I clicked the System Report… button, which opened the System Report window:

This window provides a run-down of the hardware, software, and networking on your Mac. Its Hardware list provides information about the hardware in and attached to the computer. A lot of peripherals have information such as vendor IDs encoded to them, and you can use System Report to find it.

I expanded the Hardware menu and selected the USB item. The USB Device Tree list appeared in the window’s right pane.

I then went through the USB 3.1 Bus entries in the USB Device Tree list in search of an entry containing the word LAN. Once I found that entry, I clicked on it, which then caused its details to appear in the lower part of the right pane.

I found the information that I needed: the Vendor ID, and better still, an actual vendor name: Realtek.

This shouldn’t have been a surprise: Realtek, a chip manufacturer in Taiwan, has had the majority share of the ethernet controller market since the early 2000s. They also have a good chunk of the sound chip market, so I’m no stranger to their drivers or their distinctive “crab” logo.

Step 2: Search for the vendor’s site, and in particular, the page containing the driver you need

Now that I had a vendor name, I did a search with using the search term realtek lan 10/100/1000 driver mac. This was my first result:

What if you don’t have a vendor name, but just a vendor ID number?

In the case where you just have a vendor ID number and no name, you should consult a USB ID database, such as the one at The SZ Development:

I decided to see if I could find the driver using this route.

I entered the vendor ID reported by my Mac, 0x0BDA, in the Vendor ID field and the reported product ID, 0x8153, in the Product ID field. I clicked Search and got these results:

  • USB 10/100/1000 LAN
  • RTL8153 Gigabit Ethernet Adapter

The links that the site provides aren’t all that useful. You’ll get much farther if you simply include the result text with the words driver and mac as your search term.

Doing that took me to the same page as the previous method:

Step 3: Install the driver

From the Realtek page I found, I downloaded the installer that applied to me and ran it. It worked without a problem.

(They would be well-served by a team that could do a half-decent job localizing the language on their installer.)

Step 4: Enable wired networking

With the driver installed, it’s time to make wired networking happen!

Open System Preferences. To add wired networking, you’ll need to add a new networking service, which you do by clicking the + button at the bottom of the menu on the left side of the window:
You’ll be asked to select the interface and provide a name for the new networking service. Select USB 10/100/1000 LAN from the Interface menu, and enter whatever you like for in the Service Name field. I entered “Wired” for mine:

I clicked the Create button, which created the service and dismissed the dialog box. The new service, named Wired, appeared in the menu on the left side, with Not Connected as its subtitle.

I clicked the Apply button…

…and the Wired service went from Not Connected to Connected:

Success!

Now it was time to test the connection. I shut off wifi and ran Speedtest.net on my wired connection. The results shown below are for my work computer, which uses a VPN that I need to always keep on (or there will be. consequences):

That’s a good deal faster than I get on wireless, and I’m sure I’ll get better speeds on my personal computer when it’s not on a VPN.

Categories
How To What I’m Up To

How to downgrade to macOS Catalina after upgrading to Big Sur

I’ll admit it: I’ve gotten a little used to working at smaller companies, where there’s no monitoring of company computers, and it’s the Wild West as far as what you can install on them.

That’s no longer the case for me. I now work at Auth0, a company with a headcount that’s quickly approaching 800, with unicorn status and Series F funding, and it’s in the security industry. Naturally, there’s a full-fledged security team that monitors company-issued computers.

In my excitement to take the new version of macOS — Big Sur — out for a spin, I’d forgotten that the Security team hasn’t yet approved it for use. They very quickly (and I should add, nicely) contacted me and let me know that I needed to reinstall macOS Catalina as soon as possible.

There are other reasons why you might need to go back to Catalina after installing Big Sur:

For the benefit of any who need to downgrade, here’s a step-by-step guide to reinstalling Catalina after you’ve installed Big Sur. You’ll need a USB key and the better part of an afternoon.

Step 1: The preliminaries

1a: Start downloading the Catalina installer from the App store

The first thing you’ll need is the macOS Catalina installer.

Here’s the link to the Catalina installer on the App Store.

It’ll take up around 9 gigabytes of space on your hard drive, and the App Store will put in your Applications folder.

Once it’s completely downloaded from the App Store, the installer will start automatically. When this happens, close the installer. You’ll make use of it later.

The installer will take some time to download. Apple’s servers will be busier than usual, as many users are downloading Big Sur and other upgrades.

1b: Back up your files!

In the process of reinstalling Catalina, you’ll need to completely erase your Mac’s hard drive. If you have any files that you can’t live without, this is the time to back them up.

I didn’t have to worry about this, since:

  • All my work product is either code (which lives on GitHub) or content (which lives on GitHub or Google Docs), and
  • I’ve been at Auth0 less than a month, and between onboarding and offsites, there just hasn’t been that much of a chance for me to accumulate that many files on my hard drive!

1c: Get a nice fast USB key that stores at least 16 GB

The process will involve booting your Mac from a USB key containing the macOS Catalina installer, so you’ll need a key with enough space. An 8 GB USB key won’t be big enough. Because digital storage is all about powers of 2, the next size up will be 16 GB.

I strongly recommend that you use a USB 3 key, especially one with read speeds of 300 megabits/second or better, such as the Samsung Fit Plus. Doing so will greatly speed up the process. Don’t use a USB key that you got as conference swag — it may have the space, but more often than not, they tend to be slow, because they’re cheap.

If the USB key contains files that you want to keep, back them up. You’re going to erase the key in the next step.

Step 2: Make a bootable USB key containing the macOS Catalina installer

2a: Format the USB key

Plug the USB key into your Mac, then launch Disk Utility.

Select the USB key in Disk Utility’s left column, then click the Erase button:

Tap to view at full size.

You’ll be presented with this dialog box:

Enter MyVolume into the Name field, and for Format, select Mac OS Extended (Journaled). Click the Erase button. This will format the USB key with the volume name of MyVolume.

2b: Install the macOS Catalina installer onto the USB key

In Step 1a, you downloaded the macOS Catalina installer and closed it after it started automatically. In this step, you’ll transfer it to your freshly-formatted USB key.

Open a terminal window and paste the following command into it:

sudo /Applications/Install\ macOS\ Catalina.app/Contents/Resources/createinstallmedia --volume /Volumes/MyVolume

(The command above assumes that you gave the USB key the volume name MyVolume.)

Once you’ve provided sudo with your password, you’ll be asked if you want to erase the USB key. Entering Y in response will start the process of making the USB key a bootable drive and copying the macOS Catalina installer onto it:

Tap to view at full size.

The Erasing disk process will be relatively quick, but the Copying to disk process may take a while. This is where using a nice, fast USB 3 key will pay off.

Be patient and let it get to 100%, and wait for the Install media now available message to appear and the command line prompt to return.

2c: If your Mac is from 2018 or later, set it up to boot from external media

Check the year of your Mac’s manufacture by selecting About This Mac under the Apple menu:

  • If your Mac year is 2017 or earlier, you don’t need to follow the rest of this step. Proceed to Step 3.
  • If your Mac’s year is 2018 or later, you’ll need to change its security settings to allow it to boot from an external drive.

Here’s how you change the security settings:

  1. Restart your Mac and hold down the and R keys when you see the Apple logo. This puts the computer into recovery mode, which provides many setup options.
  2. In the menu bar, select Utilities, and then select Startup Security Utility from the list that appears.
  3. The Startup Security Utility window will appear:
    1. Under the Secure Boot section, select Medium Security. This will allow you to install Catalina without having to connect to a network.
    2. Under the External Boot section, select Allow booting from external media. This will allow you to install Catalina from a USB key or disk drive.

Tap to view at full size.

Step 3: Install macOS Catalina

Restart your Mac, and hold down the Option key while it restarts. Your Mac will present you with a choice of startup disks.

Choose the USB key. Your Mac will boot up and you’ll be presented with the macOS Catalina installer screen:

Go ahead and install Catalina.

Once Catalina is installed, you can proceed reinstalling your other software.

Once that’s complete:

  • If your Mac’s year is 2017 or earlier, you’re done installing Catalina. You can now go about reinstalling your software and  restoring your backed up files.
  • If your Mac’s year is 2018 or later, you’ll need to restore its original security settings. The process is described in Step 4, below.

Step 4: If your Mac is from 2018 or later, restore the original security settings

If your Mac is from 2018 or later, follow these steps to restore the original security settings once Catalina has been installed:

  1. Restart your Mac and hold down the and R keys when you see the Apple logo. This puts the computer into recovery mode, which provides many setup options.
  2. In the menu bar, select Utilities, and then select Startup Security Utility from the list that appears.
  3. The Startup Security Utility window will appear:
    1. Under the Secure Boot section, select Full Security.
    2. Under the External Boot section, select Disallow booting from external media.

Tap to view at full size.