Mike Dominick, who runs The Mad Botter — which develops automation/integration software — moved to the Tampa Bay area three years ago. It’s been my experience that Tampa Bay techies don’t do things halfway, so it shouldn’t be a surprise that in addition to the day job, he also has a technology- and open source-focused podcast named The Mike Dominick Show.
I had the privilege of being the guest for Episode 25 of the Mike Dominick Show, which we recorded yesterday afternoon (that’s its player above), and it was a fun conversation that covered:
The Toronto tech scene
Taking up the accordion
How I got into developer evangelism
Learning iOS programming via raywenderlich.com and then joining them
Remote work and the pandemic
WWDC 2020 and SwiftUI, Python and Burning Man
Windows Phone and my time as a Windows Phone Champ
What I’ve been doing while looking for work
The hidden opportunities that come with having to stay inside
Mike ends each podcast with two questions — one tough and one easy. The tough question he asked me was “What question should I have asked you that I didn’t?” You’ll have to listen to hear how I answered that one.
Don’t just listen to my episode — be sure to check out previous ones, including these ones that I’ve enjoyed on my daily bike rides:
One of the reasons I write for raywenderlich.com — the premier mobile developer tutorial site — is that they’re wonderful people to work with, because they’re such good people. And as good people, they’ve put together something to help developers during this time of pandemic and quarantine: RW Community Care. It’s a series of office hours, livestreams, bootcamps, and more, running until August 22 — and all events are 100% free!
Here’s what RW Community care offers…
Read iOS Apprentice for free!
I learned iOS programming back in 2012 by reading and doing the exercises in an earlier edition of iOS Apprentice, which was written by Matthijs Hollemans. While I’d done some mobile development as a Windows Phone Champ during my time as a developer evangelist at Microsoft, it was this book that set me on my path as a mobile developer.
I owe a lot to this book, which is why it was a big honor to co-author the eighth edition with Eli Ganim. For the summer, you can read it online for free at RW Community Care. Whether you’re completely new to programming or — like me, back in 2012, experienced at programming but new to iOS development — you should check out iOS Apprentice on RW Community Care!
RW Talks
RW Talks happen weekly, cover all sorts of topics that mobile developers will find interesting, ranging from the deeply technical to the inspiring. Upcoming talks include:
Can’t attend some of the other live events, or prefer to collaborate on discussions as a community? Or maybe you’re more the type to hash out challenges or problems with a group of like-minded developers? There’s a Discord server that you can join!
Office Hours
Not everyone has easy access to a senior mobile developer, especially when everyone seems so busy these days and our teams are more physically separate then ever before.
Want a senior member of the development community to look over your current project, run a critical eye over your professional résumé, or review some code you’ve been struggling with? This program is designed to do just that.
If you need someone to help you with deeper questions on your particular project, or to lend a critical eye to your resume or job search, you need Review My Stuff!
The current coronavirus pandemic has given me a chance to do some spring cleaning at home, which in turn led me to revive some old computers that have been sitting idly in a closet. I figure I could put them to work doing interesting things.
Compaq 610 (2009-era 4GB Core 2 Duo)
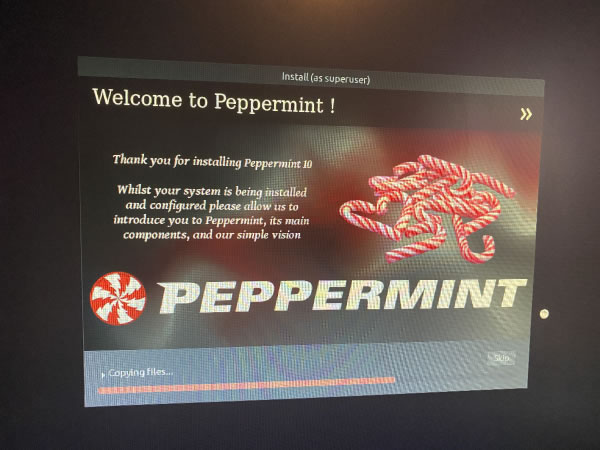
Installing Peppermint on the Compaq 610.
I’ve given an old Compaq 610 a new lease on life with Peppermint OS, a lightweight Linux distro that runs really well on old machines (the Compaq is a 2009-era machine with a Core 2 Duo processor). I also installed VS Code, Node, Anaconda, and React on it, making it a lean, mean machine for that upcoming Python course I’m teaching.
As with the Compaq, I set up the ThinkPad with VS Code, Node, Anaconda, and React. Since it’s got the processor power and 16 GB RAM, I also put Android Studio 4 and Flutter on it. Between some mobile projects in my near future, and the need to have a machine for running servers and other automated tasks, it’s going to prove to be quite useful.
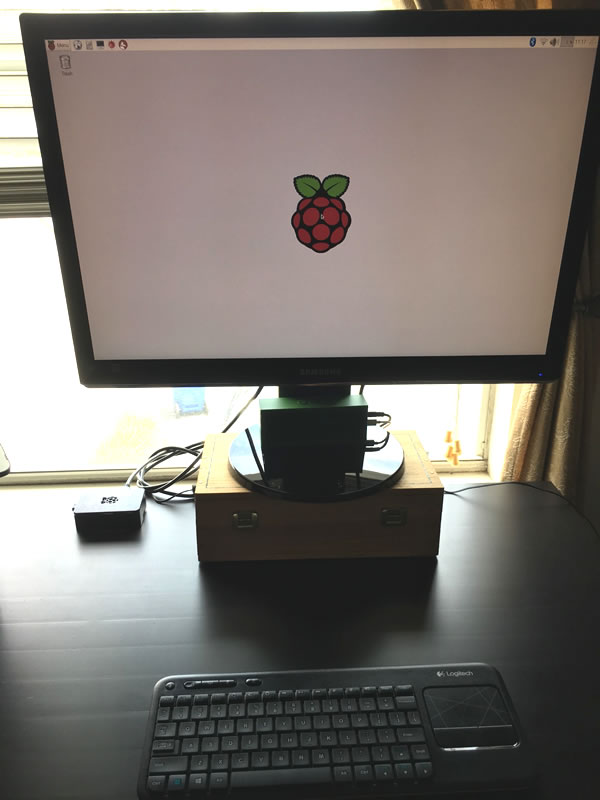
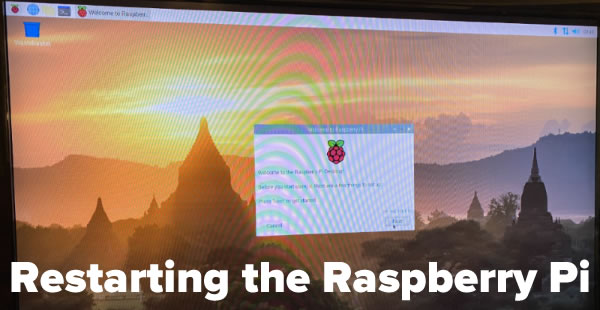
The Raspberry Pi’s “hard drive” is actually a microSD card that fits into an easily-accessed slot near one of the edges of the board. The process of updating the Pi’s OS is pretty simple: You use the Raspberry Pi imager on another computer with an SD card slot (and a microSD-to-standard SD card adapter) to rewrite its contents.
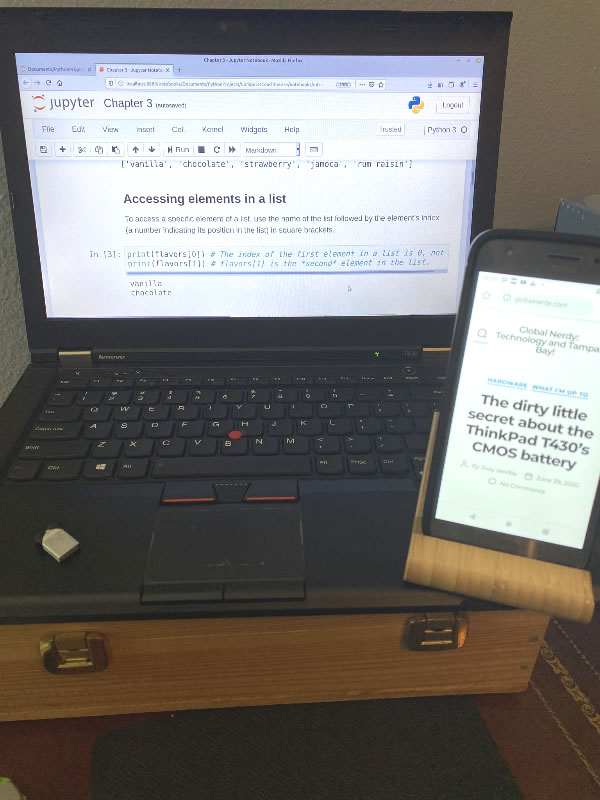
The Raspberry Pi is a pretty good Python machine, and I may end up using it while teaching that Python course, if only to show what’s possible on a computer that’s smaller than a deck of cards (when it’s not in a case) that you can get for about $50.
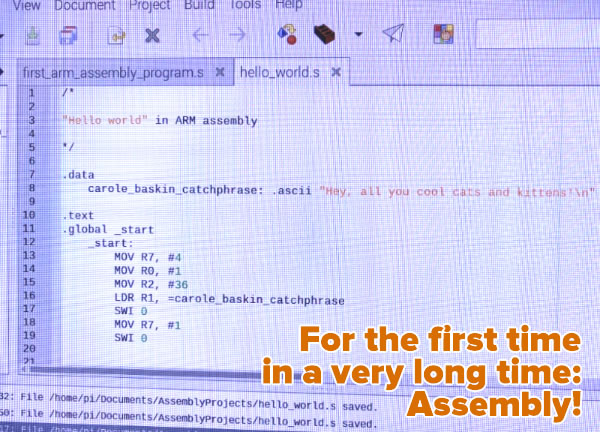
Since it’s powered by an ARM chip, it offers an opportunity for a kind of programming that most other machines don’t offer: ARM assembly programming!
The actual code from the first assembly program I wrote on my newly-reformatted Raspberry Pi: A “Tiger King”-themed version of “Hello World”.
It looks like it’s going to become an ARM-based world:
ARM-based chips power IoT devices,
Smartphones are generally powered by ARM-based chips, and
With this upcoming sea change, it doesn’t hurt to have some familiarity with ARM assembly language. Even though smartphones have ARM chips, the Raspberry Pi is a much better platform on which to learn ARM assembly, as it allows you to do development and execution in the same place.
It may have been a while since I’ve done assembly language programming — first on the 6502 in high school on Apple ][s and Commodore PETs, and later in university on NS32000 boards connected to Digital Unix machines — but I found my return pretty simple. It didn’t take long for me to cobble together a “Hello World!”-style app on the Pi.
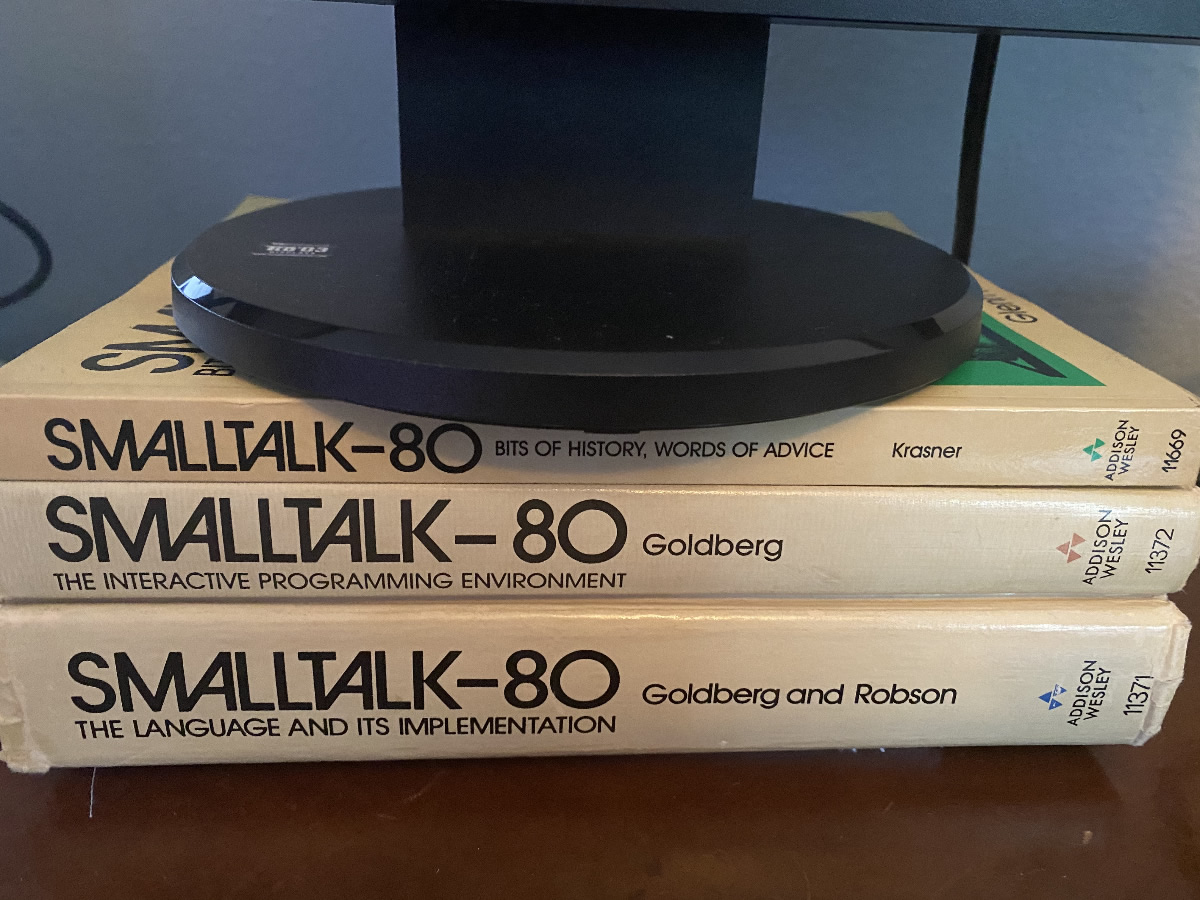
Yup, it’s the holy trinity of books for Smalltalk-80, the definitive release of original recipe Smalltalk. You probably haven’t used Smalltalk, but you probably use a programming language influenced by it: Dart, Go, Java, Kotlin, Objective-C, PHP, Python, Ruby, Swift, and Scala, to name just a few.
They were a lucky find: they were in a banker’s box in a trash pile on the east side of downtown Toronto, sometime in late 1998. It’s probably my best dumpster-dive find, beating out even that still-functional cable modem or e-Machines starter Pentium machine that I would find a few months later. (Boom times make for great dumpster diving.)
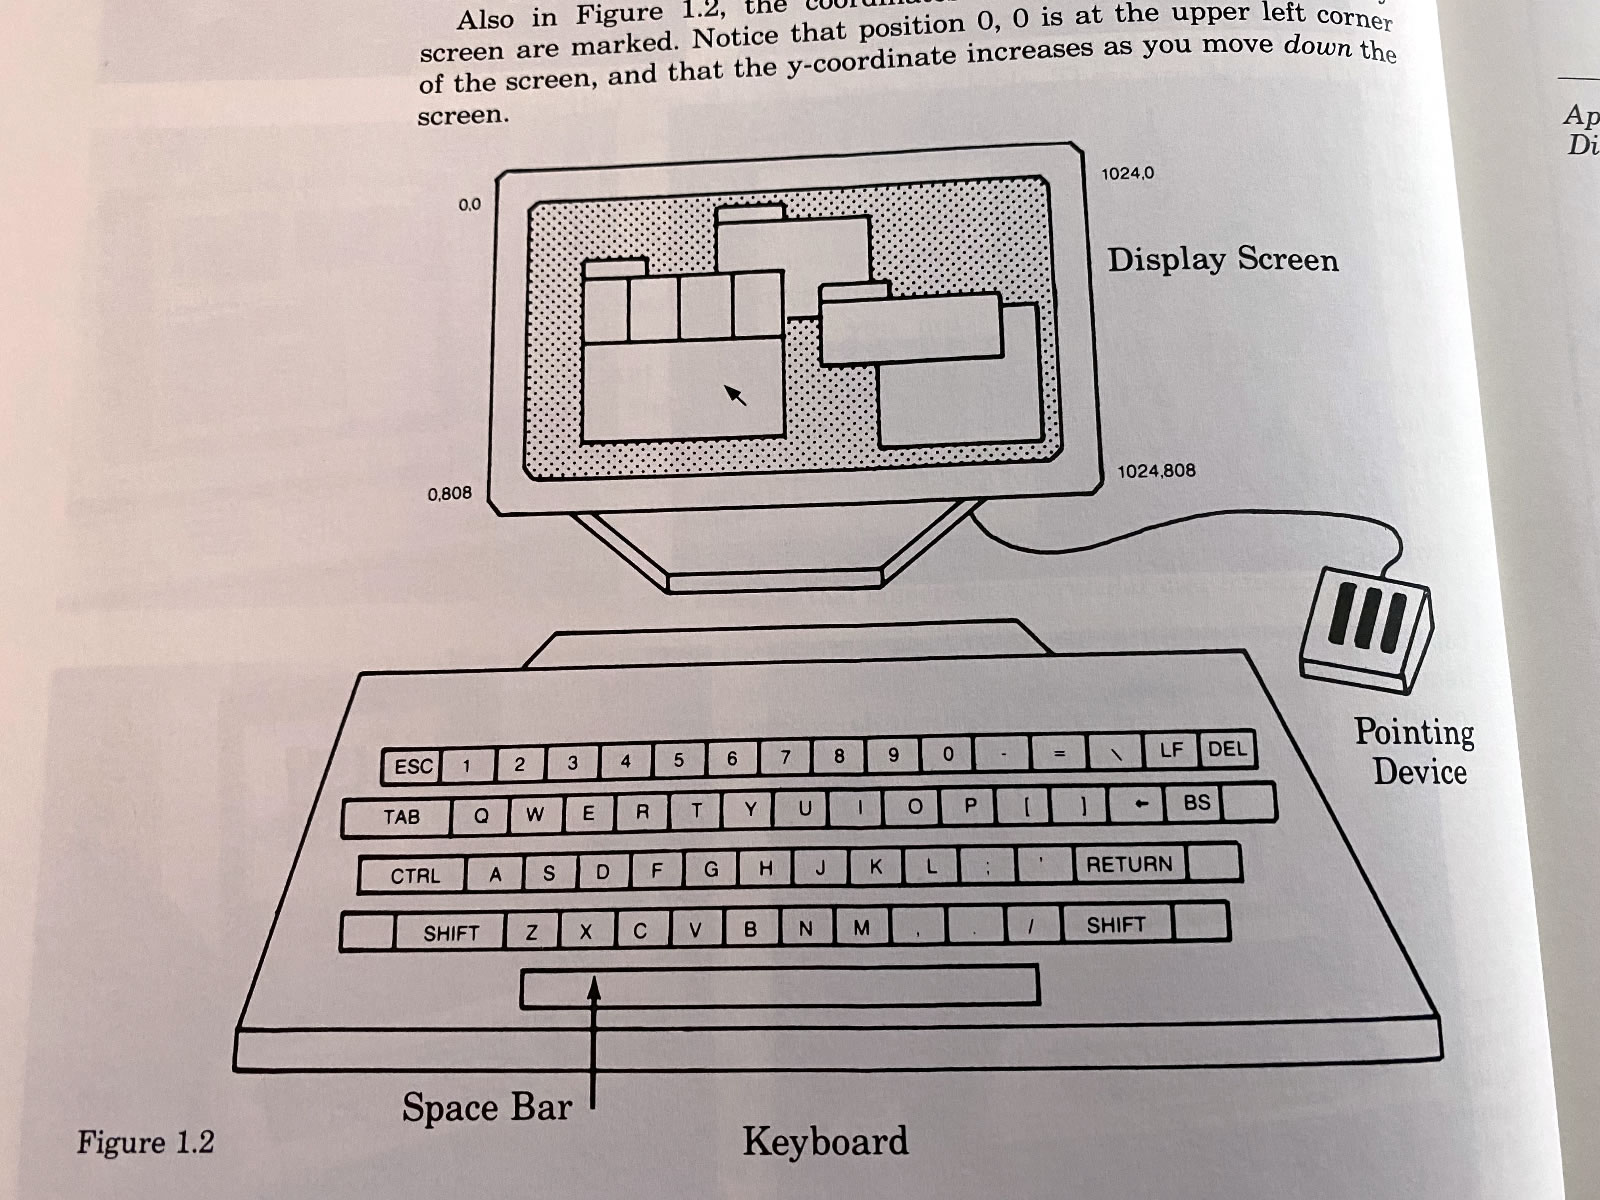
The books are historically interesting. They’re written for readers who would spent all their computing time in the command line, and probably had never seen a GUI before, and they most definitely had never used an IDE. That’s why one of the books is devoted to Smalltalk’s interactive environment, and why one of the first illustrations in that book is this one:
A mid-1980s system capable of running the Smalltalk interactive environment, from page 6 of “Smalltalk-80: The Interactive Programming Environment”. Tap the photo to see it at full size.
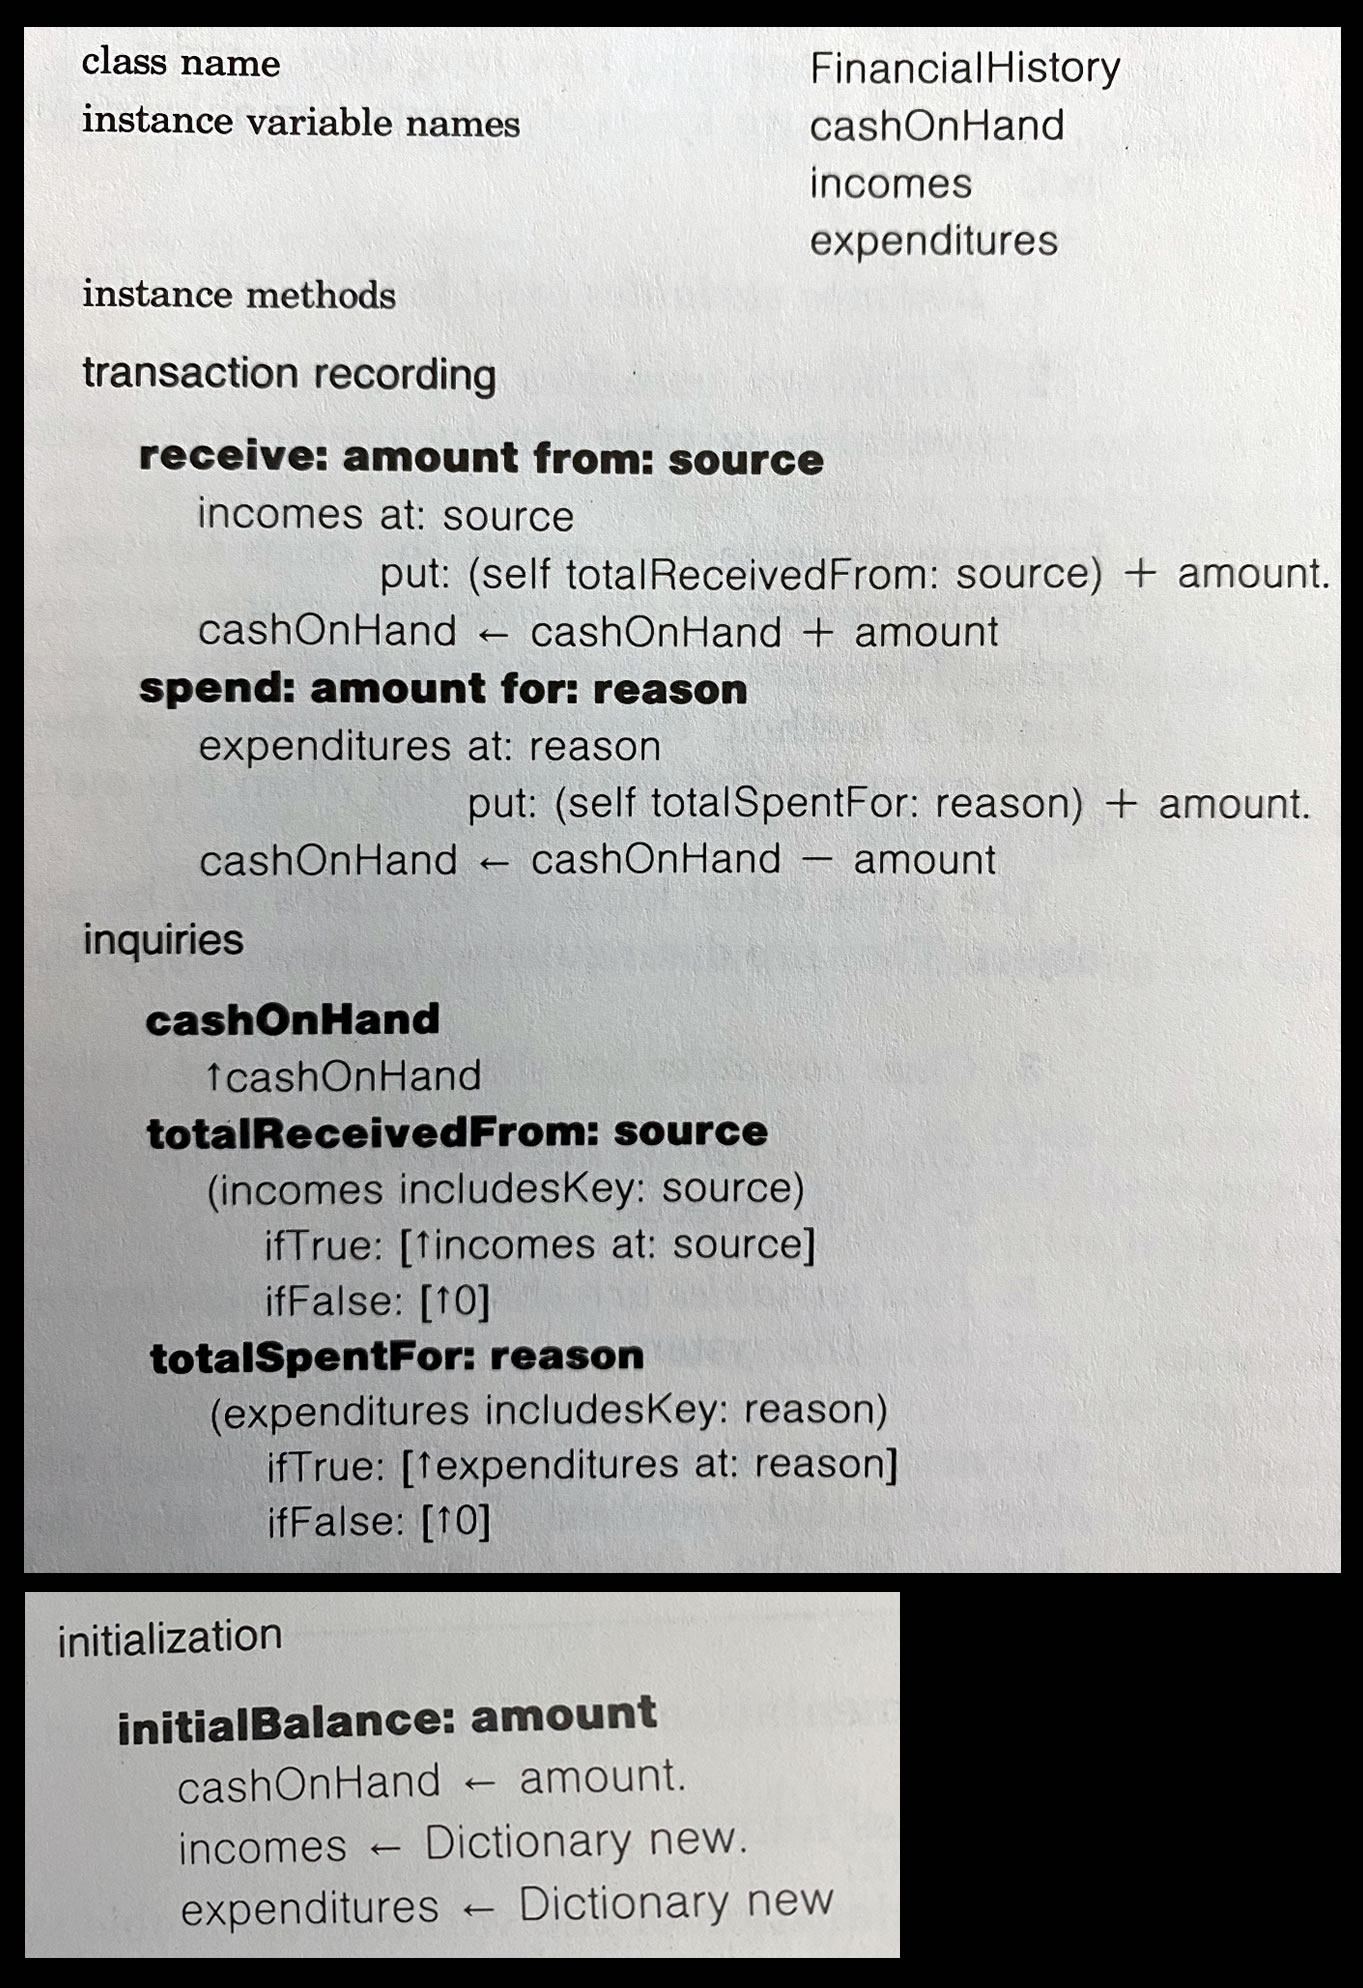
Here’s a sample from the biggest of the books: Smalltalk-80: The Language and its Implementation. It’s the definition of a class named FinancialHistory:
The “FinancialHistory” class from pages 43 and 44 of “Smalltalk-80: The Language and its Implementation”. Tap the photo to see it at full size.
To a present-day programmer, the syntax may seem a little weird (it’ll be a little less weird to Objective-C and Swift programmers; now you know where that method-calling syntax comes from!), but they’d still find it familiar. To a programmer in 1984, the year the book was published, who probably subsisted on a steady diet of structured programming, this must’ve been positively mindblowing.
For the curious, here’s how you’d create an instance of FinancialHistory named HouseholdFinances with an initial balance of $350:
HouseholdFinances ← FinancialHistory new initialBalance: 350
Once created, we’d record household spending like so:
(I just felt a disturbance in the Force, as if millions of Objective-C and Swift programmers cried out, saying “So it’s Smalltalk’s fault!”)
The smallest of the books, Smalltalk-80: Bits of History, Words of Advice, gets deep into the implementation details of Smalltalk-80. And I do mean deep: there’s a whole chapter devoted to an implementation of a Smalltalk garbage collector.
I’ll eventually return these books to their proper place on the bookshelf and replace them with a proper monitor stand, but in the meantime, they’re doing a pretty good job as the basis for my monitor, just as their content did a pretty good job as the basis for the programming languages I use.
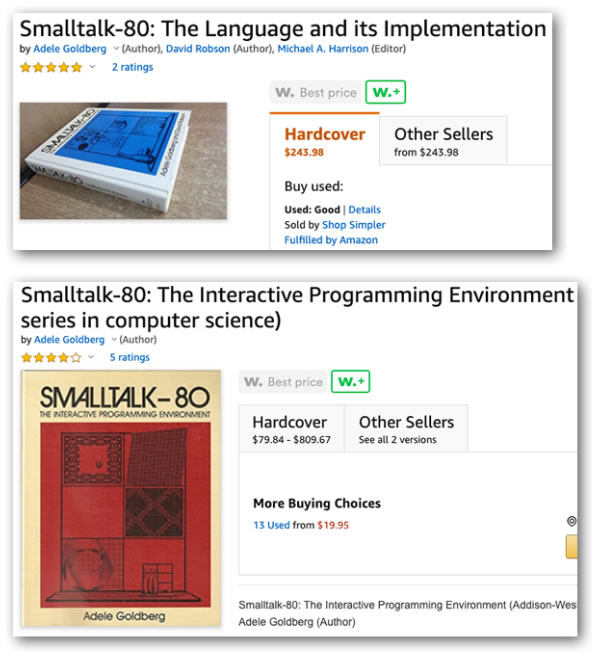
I do try to take care of these books, as their scarcity has made them a little more expensive than your standard textbook:
The current Amazon prices for the two hardcover Smalltalk-80 books.
I always keep an old computer or two around “just in case,” and it often turns out that they’re useful for all sorts of things. In an age when online access is a necessity and in a line of work where being able to put together a quick web page, application, or server is important, a spare computer — even one that’s a little bit backward by today’s standard — can be a handy resource.
Enter “tinymint,” a Compaq 610 laptop that Anitra got from her old workplace a couple of years back for $50. (You should be able to find a used one, or one with similar specs, for about $100.) We originally got it to give to her parents so that they’d have a half-decent machine on which to surf the web, but we’ve since replaced it with a Chromebook, which requires less maintenance. They gave the Compaq back to us, and I’ve since boosted its RAM to the maximum: A whopping 4 GB, which was pretty respectable in the Windows Vista era when it was manufactured.
An excerpt from the QuickSpecs manual for the Compaq 610.
In case you’re curious, here’s a quick rundown of the specs of my particular Compaq 610. Remember, this laptop is almost old enough to get its own YouTube account or Bat/Bar Mitzvah:
Chipset: Mobile Intel GME965 Express chipset with ICH8M, 800 MHz front side bus. This chipset is from around 2007.
Processor: Core 2 Duo T5870 (2.0 GHz, 2 MB L2 cache, 800 MHz FSB). This is better than the other options: The dual-core Celeron T1500 and the Celeron 560, both of which had the slower 533 MHz bus.
RAM: 4 GB. This is the maximum, which isn’t surprising for a 2009-era computer. 32-bit operating systems were the standard then (64-bit OSs were available, but at a premium), and they’re limited to accessing about 3 GB of memory. The machine originally had 2 GB, and I got replacement RAM from NewEgg for about $20.
Wired networking: Marvell Yukon 88E8042 PCI-E Fast Ethernet Controller
Webcam: 2 megapixels, so it’s 1080p.
Other goodies marking it as a 2009-era computer:
A 56K modem! I don’t think I’ve had dial-up service since 2000. Even during those rare occasions when I need to send a fax, I do it through online fax services.
Separate 1/8″ mic and headphone jacks.
VGA output. Good thing I hung onto that Acer VGA monitor.
There were a few variants of this machine, and I’m a little surprised that this turned out to be one of the better ones — normally companies go with the bottom-of-the-line configurations, especially for computers whose primary purpose was probably producing cover sheets for TPS reports.
Installing Peppermint Linux on the Compaq 610.
I like to think of “tinymint” as a Raspberry Pi with a built-in monitor, keyboard, and battery (although I need to pick up a replacement battery; this one no longer holds any charge). This means that it’s still got some years left in it, where it could function as a server, a runner of automated tasks, or as a budget Python programming machine.
I’m scheduled to teach an “Intro to programming with Python” course in July, and I may actually use this as my demo machine, just to show what’s possible even on a limited budget.
In order to get the most out of this machine, I replaced the Windows with something considerably more lightweight: Peppermint.
Peppermint is a Linux distribution based on Ubuntu, and it’s designed to run on systems with limited resources. To this end, it uses a desktop environment that’s a mix of LXDE’s lxsession session manager and Xfce’s panel and applications menu. Simply put, it’s not going to look as slick as commercial OSs or even other Linux distros, but it’ll be reasonably good-looking and run quite well.
Since Peppermint is a Linux distro, it has all the command-line goodness that a developer needs. I wanted to make “tinymint” a lean mean Python machine, so immediately after Peppermint finished installing, I installed Anaconda Individual Edition and Visual Studio Code, both of which installed and run without any issues.
I’m going to make regular use of “tinymint” and post the occasional report about my experiences with it. If you’re a developer with an older computer and a limited budget, you should look into Peppermint — you might find that it’s exactly what you need.
The current version is “Peppermint 10 Respin,” which came out in December. It’s based on Ubuntu 18.04 LTS, and if you want to know more about this release, check out their announcement.
Want to know more? Here are a couple of recent video reviews of Peppermint:
It uses those parameters to customize the function that it returns: a function that when called, does two things:
It increments its internal counter count, and
returns either word (if it’s time to say the word) or an empty string.
If you find yourself writing a lot of similar code with only minor differences — or worse, cutting and pasting code, followed by typing in those minor differences — you may be looking at an opportunity to use a function like this.
If you prefer to have your functions marked with the keyword function, you can change out the arrow notation and the code will still work:
function wordWatcher(interval, word) {
  let count = 0;
  return function() {
    count++;
    if (count === interval) {
      count = 0;
      return word;
    }
    return "";
  }
}
With wordWatcher defined, creating watchers for Fizz and Buzz is easy:
for (number of Array(100).keys()) {
  const potentialFizzBuzz = `${fizzWatcher()}${buzzWatcher()}`;
  console.log(potentialFizzBuzz ? potentialFizzBuzz : number + 1);
};
If it’s time to say Fizz, Buzz, or FizzBuzz, potentialFizzBuzz will contain that string. The calls to fizzWatcher() and buzzWatcher() will also increment their internal counters.
If potentialFizzBuzz contains anything, its contents will be printed to the console; otherwise, the current number — which has 1 added to it because array indexes start at 0 and the FizzBuzz game starts at 1 — is printed instead.
You should check out the rest of Frank’s Gist, Fizzbuzzes in many colours, which looks at FizzBuzz solutions written in several languages.
What does it mean for code to be “elegant”, anyway?
In ordinary everyday use, elegant means “pleasingly graceful and stylish in appearance or manner.” The term has been adapted by people in problem-solving fields — science, mathematics, and yes, programming — to mean “pleasingly ingenious and simple”.
And that’s what elegant code is: pleasingly ingenious and simple. This FizzBuzz implementation is elegant because it solves the problem in just over a dozen lines, is simple and concise, and even provides some new insight into programming (the use of custom-generated functions to avoid repetition).
If it fails, it is easy to identify that it is has failed, where it has failed, and why it has failed.
Its behavior (in good and bad conditions) is easy to predict
Check out the following articles — sooner or later, you’ll be interviewed by a programmer who’ll want to know if you’ve given some thought to some of programming’s more philosophical questions, and “What does it mean for code to be elegant?” is one of them:
Yeah, I agree. In fact I like “every Nth” counting problem better than the factorization problem it’s usually treated as. So I was disappointed at all the solutions that didn’t just count, like so
Int n, x
Next(){
If (x == 0) x=n
Return –x
}
— Jenniferplusplus⚧🏳️🌈👩🏻💻 (@jennplusplus) June 17, 2020
They both make a good point. If you’re playing the FizzBuzz game as the original children’s game and not as an exercise to prove that you can actually write a program, you’d do it like this:
The player designated to go first says the number 1, and each player afterwards counts one number in turn. The next player in the circle says 2, and so on.
However, for every third number, instead of calling out the number, the player whose turn it is should say “Fizz”.
…and for every fifth number, instead of calling out the number, the player whose turn it is should say “Buzz”.
The “Fizz” and “Buzz” rules, as the kids would say, stack. In other words, for every number that is both the third and fifth, the player needs to say “Fizz” followed by “Buzz”, or “FizzBuzz”.
So in the spirit of the original game, I’ve put together a FizzBuzz solution that uses “watchers” to keep track of “every xth number”, with one watcher to keep track of when it’s time to say “Fizz”, and another for when it’s time to say “Buzz”. When it’s time to say “FizzBuzz”, they’ll work in tandem.
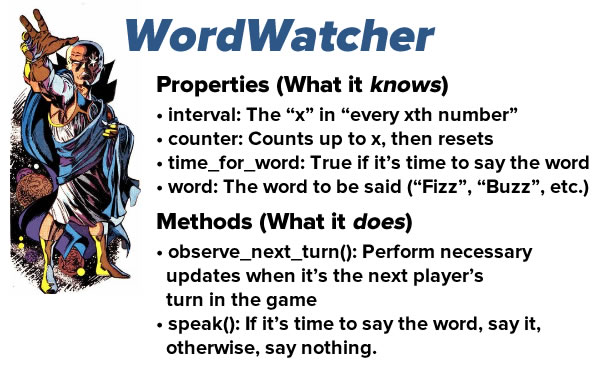
I created a class called WordWatcher, which can be summarized as shown below:
For those of you who aren’t familiar with Python’s approach to class methods, the first parameter for every method in a class is self. It’s the one parameter you don’t fill when calling a method, because Python calls it implicitly (seemingly in violation of Python’s general guideline that explicit is better than implicit). There’s a reason behind this, and it’s explained in this article: Understanding self in Python.
Also note that instance variables are declared and defined in the initializer method, __init__(), and any reference to them is always preceded by self.
The observe_next_turn() method is meant to be called as the fizzBuzz method proceeds to each new number. It updates the watcher’s internal counter and sets the time_for_word flag accordingly.
The speak() method outputs the watcher’s word if it’s time to say the word, or an empty string otherwise.
For FizzBuzz, we’ll need to create two watchers:
One to keep watch for every third turn, at which point it should say “Fizz”, and
one to keep watch for every third turn, at which point it should say “Buzz”.
With the WordWatcher class defined, we can create these two watchers like so:
It will become handy to have these two watchers in the same place. Since the “ha ha only serious” joke about Python is that everything is a list, let’s put them into a list:
word_watchers = [fizz_watcher, buzz_watcher]
Let’s define a fizzBuzz() function that makes use of this list of word watchers:
def fizzBuzz(word_watchers = [], first = 1, last = 100):
final_result = ""
for number in range(1, 101):
current_result = ""
if len(word_watchers) > 0:
# This part might need some explaining
_ = [word_watcher.observe_next_turn() for word_watcher in word_watchers]
words = map(lambda word_watcher : word_watcher.speak(), word_watchers)
current_result += functools.reduce(lambda total, next_element : total + next_element, list(words))
if current_result == "":
current_result = str(number)
final_result += current_result
if number < last:
final_result += ", "
else:
final_result += "."
return final_result
If you’ve been following the FizzBuzz series of articles, most of this code will be familiar. The part that might need explaining is the part with the comment “This part might need some explaining”.
Explaining the part that needs explaining
Let’s look at the first of the three lines of code in that part:
_ = [word_watcher.observe_next_turn() for word_watcher in word_watchers]
The _ on the left side of the = sign is a throwaway variable. It says “I don’t care about what you do on the other side of the = sign; only that you do something on the other side of the = sign”.
On the right side of the= sign is a list comprehension, which is Python’s “show, don’t tell” way of building lists. This list comprehension simply says “call the observe_next_turn() method of every object in the list”.
Let’s look at the next line:
words = map(lambda word_watcher : word_watcher.speak(), word_watchers)
This line creates a map that converts the watchers in the list into the words they should say for this turn. If the current turn means that it’s time for any one of them to speak, the watcher will be mapped to the word it’s supposed to say. Otherwise, it will be mapped to an empty string.
And now, the final line:
current_result += functools.reduce(lambda total, next_element : total + next_element, list(words))
For some reason, map() comes built into Python, but you have to import the functools library in order to use map()’s partner in crime, reduce(). Remember reduce() is a functional programming thingy that takes a collection of items, performs some kind of calculation on that collection, and returns a single value (which you might call a reduction of the collection).
The first argument that I’ve provided to reduce() is a lambda — a small function that isn’t given a name — that simply takes the current item in the list and adds it to the previous collected items. Applied over the entire list, it builds a “total”, which in this case is all the words output by the watchers’ speak() methods concatenated together.
The second argument is the words map converted into a list. This is the list that the reduce() method will operate on.
At the end of those three lines, current_result will contain one of the following:
The empty string
Fizz
Buzz
FizzBuzz
If current_result is still empty at this point, it means that it’s not time for any of the watchers’ words. If this is the case, the string version of the current number is concatenated to current_result:
if current_result == "":
current_result += str(number)
Here’s the code in its entirety:
import functools
class WordWatcher:

  def __init__(self, interval, word):
    self.counter = 0
    self.time_for_word = False
    self.interval = interval
    self.word = word

  def observe_next_turn(self):
    self.counter += 1
    if self.counter == self.interval:
      self.counter = 0
      self.time_for_word = True
    else:
      self.time_for_word = False

  def speak(self):
    if self.time_for_word:
      return self.word
    else:
      return ""
def fizzBuzz(word_watchers = [], first = 1, last = 100):
final_result = ""
for number in range(1, 101):
current_result = ""
if len(word_watchers) > 0:
_ = [word_watcher.observe_next_turn() for word_watcher in word_watchers]
words = map(lambda word_watcher : word_watcher.speak(), word_watchers)
current_result += functools.reduce(lambda total, next_element : total + next_element, list(words))
if current_result == "":
current_result += str(number)
final_result += current_result
if number < last:
final_result += ", "
else:
final_result += "."
return final_result
fizz_watcher = WordWatcher(3, "Fizz")
buzz_watcher = WordWatcher(5, "Buzz")
word_watchers = [fizz_watcher, buzz_watcher]
print(fizzBuzz(word_watchers))
You can download fizzbuzz_with_watchers.py and test_fizzbuzz_with_watchers.pyhere (2KB, zipped folder with 2 Python files).
That’s a lot of fuss for Fizzbuzz. Why did you do all that?
Reginald asked me to, and I’ve known and respected him for ages, and JenniferPlusPlus seconded the request.
Wait until you see what customers ask you to do.
Did any of this stuff fly over your head?
Don’t feel bad. I had the same trouble when I first learned functional programming, and that was back in 1991, when the computers that ran functional language interpreters were in labs. I spent a lot of time in Queen’s University’s DEClab, which was full of machines that were cutting edge at the time made by a vendor that no longer exists. Computer time, as well as info on any kind of programming, never mind functional programming, was a lot harder to come by. (In case you were wondering, the language we learned was Miranda.)
If you’ve never worked in Python, some of it can be quite weird. It does eventually make sense.
Let me know, either via email or in the comments, if there’s anything you’d like me to cover in greater detail.
Do you have an alternate solution?
I’ve love to hear about it and present it here! Again, let me know via email or in the comments.
 Mike ends each podcast with two questions — one tough and one easy. The tough question he asked me was “What question should I have asked you that I didn’t?” You’ll have to listen to hear how I answered that one.