Update: You’ll also want to see this follow-up article — Fix the ChromeDriver 103 bug with ChromeDriver 104.
If you run applications or scripts that use Selenium to control instances of Chrome via ChromeDriver, you may find that they no longer work, and instead provide you with error messages that look like this:
Message: unknown error: cannot determine loading status
from unknown error: unexpected command response
  (Session info: chrome=103.0.5060.53)
Stacktrace:
0   chromedriver                        0x000000010fb6f079 chromedriver + 4444281
1   chromedriver                        0x000000010fafb403 chromedriver + 3970051
2   chromedriver                        0x000000010f796038 chromedriver + 409656
3   chromedriver                        0x000000010f7833c8 chromedriver + 332744
4   chromedriver                        0x000000010f782ac7 chromedriver + 330439
5   chromedriver                        0x000000010f782047 chromedriver + 327751
6   chromedriver                        0x000000010f780f16 chromedriver + 323350
7   chromedriver                        0x000000010f78144c chromedriver + 324684
8   chromedriver                        0x000000010f78e3bf chromedriver + 377791
9   chromedriver                        0x000000010f78ef22 chromedriver + 380706
10  chromedriver                        0x000000010f79d5b3 chromedriver + 439731
11  chromedriver                        0x000000010f7a147a chromedriver + 455802
12  chromedriver                        0x000000010f78177e chromedriver + 325502
13  chromedriver                        0x000000010f79d1fa chromedriver + 438778
14  chromedriver                        0x000000010f7fc62d chromedriver + 828973
15  chromedriver                        0x000000010f7e9683 chromedriver + 751235
16  chromedriver                        0x000000010f7bfa45 chromedriver + 580165
17  chromedriver                        0x000000010f7c0a95 chromedriver + 584341
18  chromedriver                        0x000000010fb4055d chromedriver + 4253021
19  chromedriver                        0x000000010fb453a1 chromedriver + 4273057
20  chromedriver                        0x000000010fb4a16f chromedriver + 4292975
21  chromedriver                        0x000000010fb45dea chromedriver + 4275690
22  chromedriver                        0x000000010fb1f54f chromedriver + 4117839
23  chromedriver                        0x000000010fb5fed8 chromedriver + 4382424
24  chromedriver                        0x000000010fb6005f chromedriver + 4382815
25  chromedriver                        0x000000010fb768d5 chromedriver + 4475093
26  libsystem_pthread.dylib             0x00007ff81931a4e1 _pthread_start + 125
27  libsystem_pthread.dylib             0x00007ff819315f6b thread_start + 15
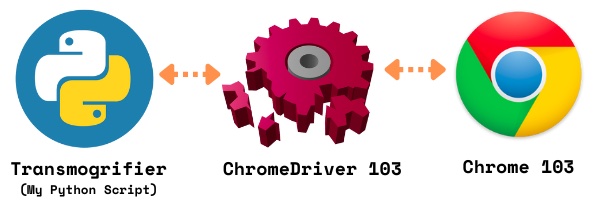
It turns out that there’s a bug in version 103 of ChromeDriver, which works specifically with version 103 of Chrome. This bug causes commands to ChromeDriver, such as its get() method, which points the browser to a specific URL, to sometimes fail.
The quick solution
While this bug exists, the best workaround — and one that I’m using at the moment — is to do the following:
- Uninstall version 103 of Chrome.
- Install version 102 of Chrome.
- Install version 102 of ChromeDriver.
- Disable Chrome’s auto-update and don’t update Chrome.
How I encountered the bug
This happened to me on Wednesday. Earlier that day, I saw the “Update” button on Chrome change from green to yellow…

…and my conditioned-by-security-training response was to click it, updating Chrome to version 103.
Later that evening, I started assembling the weekly list of tech, entrepreneur, and nerd events for the Tampa Bay area. You know, this one:

When I started putting this list together back in early 2017, I did so manually by doing a lot of copying and pasting from Meetup and EventBrite pages. However, as the tech scene in Tampa grew, what used to be an hour’s work on a Saturday afternoon starting growing to consume more and more of that afternoon. I’d watch entire feature-length films in the background while I put them together. It became clear to me that it was time to add some automation to the process.
These days, I put together the list with the help of “The Transmogrifier,” my name for a collection of Python scripts inside a Jupyter Notebook. Given a set of URLs for Meetup and Eventbrite pages, it scrapes their pages for the following information:
- The name of the group organizing the event
- The name of the event
- The time of the event
In the beginning, scraping Meetup was simply a matter of having Python make a GET request to a Meetup page, and then use BeautifulSoup to scrape its contents. But Meetup is a jealous and angry site, and they really, really, really hate scraping. So they employ all manner of countermeasures, and I have accepted the fact that as long as I put together the Tampa Bay Tech Events list, I will continually be playing a “move / counter-move” game with them.
One of Meetup’s more recent tricks was to serve an intermediate page that would not be complete until some JavaScript within that page executed within the browser upon loading. This means that the web page isn’t complete until you load the page into a browser, and only a browser. GETting the page programmatically won’t execute the page’s JavaScript.
Luckily, I’d heard of this trick before, and decided that I could use Selenium and ChromeDriver so that the Transmogrifier would take control of a Chrome instance, use it to download Meetup pages — which would then execute their JavaScript to create the final page. Once that was done, the Transmogrifier could then read the HTML of that final page via the browser under its control, which it could scrape.
Creating an instance of Chrome that would be under the Transmogrifier’s control is easy:
# Python

from selenium import webdriver
from selenium.webdriver.chrome.service import Service
from webdriver_manager.chrome import ChromeDriverManager

driver = webdriver.Chrome(service=Service(ChromeDriverManager().install()))
The single line of code after all the import statements does the following:
- It launches an instance of Chrome that can be programmatically controlled.
- It has ChromeDriver check to see if it is compatible with the Chrome instance. If not, it installs the compatible version of ChromeDriver.
This is where my problem began. ChromeDrive saw that I’d updated to Chrome 103, so it updated itself to version 103.
Here’s the code where the bug became apparent:
print(f"Processing Meetup URL: {url}")
driver.get(url)
About one time out of three, this code would do what it was supposed to: print a message to the console, and then make Chrome load the page at the given URL.
But two out of three times, it would end up with this error:
Message: unknown error: cannot determine loading status
from unknown error: unexpected command response
  (Session info: chrome=103.0.5060.53)
Stacktrace:
0   chromedriver                        0x000000010fb6f079 chromedriver + 4444281
1   chromedriver                        0x000000010fafb403 chromedriver + 3970051
2   chromedriver                        0x000000010f796038 chromedriver + 409656

(...and the stacktrace goes on from here...)
This happens when executing several driver.get(url) calls in a row, which is what the Transmogrifier does. It’s executing driver.get(url) for many URLs in rapid succession. When this happens, there are many times when Chrome is processing a new ChromeDriver command request after a previous ChromeDriver session (a previous web page fetch) has already concluded and detached. In this case, Chrome responds with a “session not found” error. ChromeDriver gets this error while waiting for another valid command to complete, causing that command to fail. (You can find out more here.)
In the end, my solution was to downgrade to Chrome 102, use ChromeDriver 102, and keep an eye open for Chrome/ChromeDriver updates.


