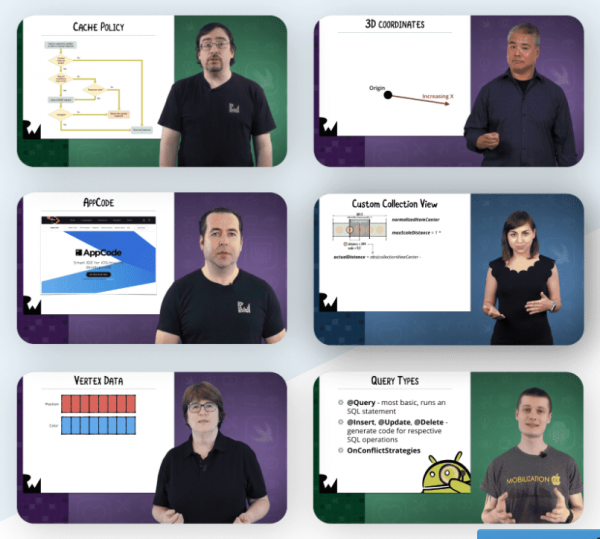
Native mobile development skills are rare. Being able to point to apps in the store and say “I made those” can really help you stand out. And you can learn how — at half price, if you hurry!
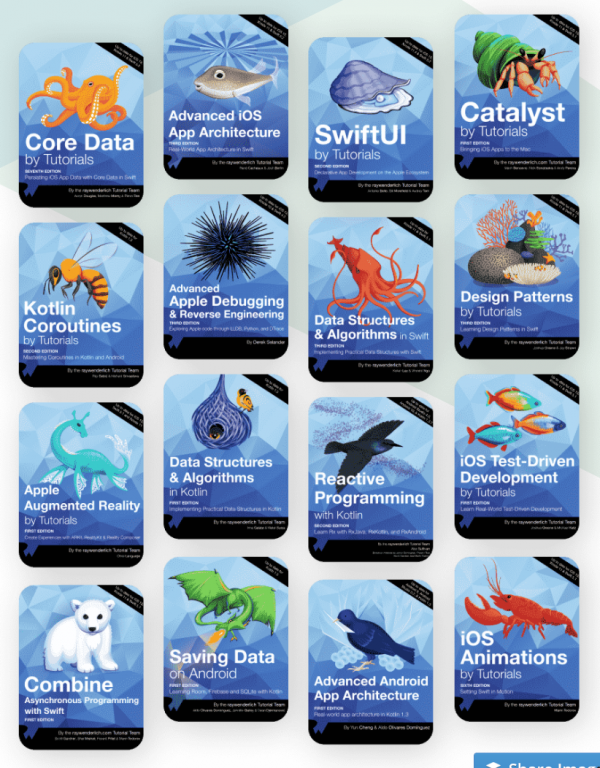
raywenderlich.com is the premier mobile development tutorial subscription site, and right now, everything in their store is 50% off!
Ultimate Beginner plan ($12.42/month on sale, normally 29.99/month):
Access beginner courses
Access beginner books
iOS & Android learning paths
Stream via iOS/Android app
Hands-on challenges
Download source code
Forum membership
Ultimate Professional plan ($24.92/month on sale, normally 49.99/month):
Access every book in our library
Access advanced ‘Pro’ courses
Download & watch courses offline
Access beginner courses
iOS & Android learning paths
Stream via iOS/Android app
Hands-on challenges
Download source code
Forum membership
These deals last only until Monday, November 30th, so if you want to save some money and pick up or sharpen your mobile dev skills, you should act quickly!
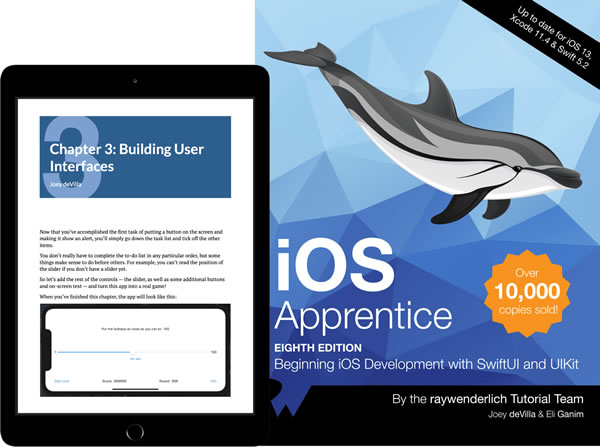
I learned iOS development through RayWenderlich.com’s book, iOS Apprentice, back when Objective-C was the only option, and the iPhone 4S was the hot new device. I became a regular reader of the site, and over time, got to know the team and even joined, going on to write articles, a video, and even co-author a book! I can’t think of a better place or a better group of people to learn from.
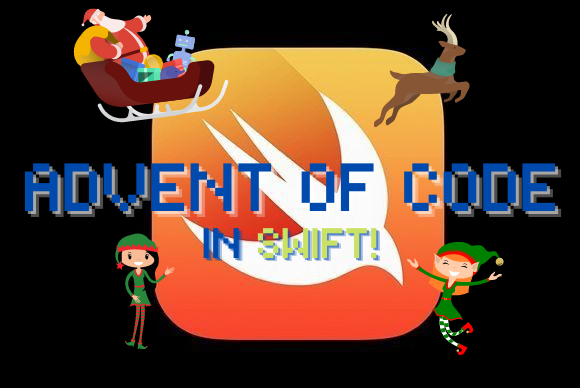
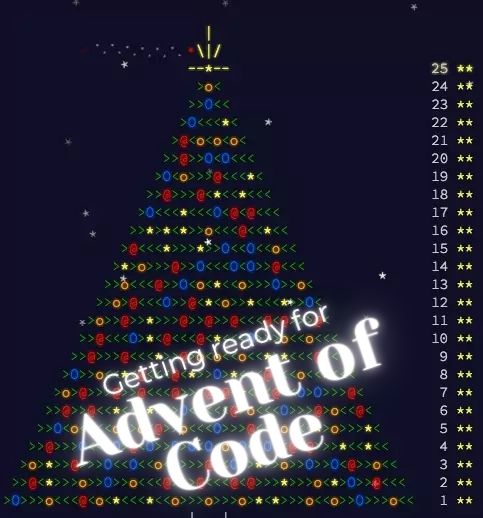
As I wrote in the previous post, the Advent of Code is happening soon — it start on Tuesday, December 1st and runs all the way to December 25th. If you want to give your programming skills a good workout or test, you’ll want to try out Advent of Code’s challenges!
The Elves quickly load you into a spacecraft and prepare to launch.
At the first Go / No Go poll, every Elf is Go until the Fuel Counter-Upper. They haven’t determined the amount of fuel required yet.
Fuel required to launch a given module is based on its mass. Specifically, to find the fuel required for a module, take its mass, divide by three, round down, and subtract 2.
For example:
For a mass of 12, divide by 3 and round down to get 4, then subtract 2 to get 2.
For a mass of 14, dividing by 3 and rounding down still yields 4, so the fuel required is also 2.
For a mass of 1969, the fuel required is 654.
For a mass of 100756, the fuel required is 33583.
The Fuel Counter-Upper needs to know the total fuel requirement. To find it, individually calculate the fuel needed for the mass of each module (your puzzle input), then add together all the fuel values.
What is the sum of the fuel requirements for all of the modules on your spacecraft?
While the problems in the Advent of Code are the same for every participant, the data for each participant is different (there’s a sign-up process, which gives you an account, your own progress tracker, and your own data). This prevents participants from simply sharing the solution.
Here are the module masses that were provided for my account:
I used the Python REPL for my Python-based solution. For my Swift-based solution, I used the closest analogue: an Xcode Playground.
Swift, like Python uses the three quotes to denote multiline strings. I used them to define a multiline string constant, rawInput, into which I pasted the data:
With rawInput defined, it’s time to convert it from a multiline string into an array of strings, with each line getting turned into its own array element. The String class’ split method does this quite easily, and the result was the splitInput string array:
let splitInput = rawInput.split(separator: "\n")
The next step was to convert splitInput’s numbers-in-string-form into actual numbers. This process would involve applying the same function — the Int struct’s “init from string” method — to all the elements in an array, which is exactly what the map method is for:
let masses = splitInput.map {Int($0)!}
Swift’s map method takes a closure containing a function as its argument and applies that function to every item in the given array, creating a new array as its result.
In this case, the function in question is:
Int($0)!
Parameters passed into the closure begin with the $ character, which is then followed by a number specifying which parameter it is. The first parameter is $0, followed by the second parameter, $1, followed by the third parameter, $2, and so on.
Only one parameter is passed to the closure: $0, which represents the current element of the splitInput array. It’s fed into the init method of Int that takes a string and attempt to produce an integer. Since it’s possible that this method will be given a string that can’t be converted into an integer, the method’s return type is the optional type Int?.
Since I’m quite certain that all the strings in the splitInput array convert to integers, I used the ! operator to force unwrap the resulting Int? values.
The end result is masses, an array of integers. Each element in the array represents the mass of a component in the ship, and we need to calculate the fuel necessary to propel each component to the final destination.
This calculation involves applying a function to every element in masses, and that function is:
Divide the mass by 3, rounding down.
Subtracting 2 from the result above.
Once again, I used map:
let fuelRequirements = masses.map { mass in
    mass / 3 - 2
}
In the function above, mass and 3 are both integers, so mass / 3 is an integer division, which automatically rounds down.
The result of this mapping is fuelRequirements, an array of integers containing the fuel requirements for each module.
The result is the sum of all the values in fuelRequirements. Unfortunately, Swift doesn’t have a built in method for getting the sum of an array, so we’ll need to roll our own:
let totalFuel = fuelRequirements.reduce(0, +)
For my data, the result was 3454942. This turned out to be correct, so it was time to tackle part two.
Day one challenge, part two
Part two involved recalculating the fuel requirements when also taking into account the mass of the added fuel:
During the second Go / No Go poll, the Elf in charge of the Rocket Equation Double-Checker stops the launch sequence. Apparently, you forgot to include additional fuel for the fuel you just added.
Fuel itself requires fuel just like a module – take its mass, divide by three, round down, and subtract 2. However, that fuel also requires fuel, and that fuel requires fuel, and so on. Any mass that would require negative fuel should instead be treated as if it requires zero fuel; the remaining mass, if any, is instead handled by wishing really hard, which has no mass and is outside the scope of this calculation.
So, for each module mass, calculate its fuel and add it to the total. Then, treat the fuel amount you just calculated as the input mass and repeat the process, continuing until a fuel requirement is zero or negative. For example:
A module of mass 14 requires 2 fuel. This fuel requires no further fuel (2 divided by 3 and rounded down is 0, which would call for a negative fuel), so the total fuel required is still just 2.
At first, a module of mass 1969 requires 654 fuel. Then, this fuel requires 216 more fuel (654 / 3 - 2). 216 then requires 70 more fuel, which requires 21 fuel, which requires 5 fuel, which requires no further fuel. So, the total fuel required for a module of mass 1969 is 654 + 216 + 70 + 21 + 5 = 966.
The fuel required by a module of mass 100756 and its fuel is: 33583 + 11192 + 3728 + 1240 + 411 + 135 + 43 + 12 + 2 = 50346.
What is the sum of the fuel requirements for all of the modules on your spacecraft when also taking into account the mass of the added fuel? (Calculate the fuel requirements for each module separately, then add them all up at the end.)
This called for a recursive function, the Swift code for which is below:
func fuelRequired(mass: Int) -> Int {
    let result = mass / 3 - 2

    if result <= 0 {
        return 0
    } else {
        return result + fuelRequired(mass: result)
    }
}
I used this function to map the values in the masses array from part one onto a new array, updatedFuelRequirements…
let updatedFuelRequirements = masses.map { fuelRequired(mass: $0) }
…and the sum of its the elements was the answer for part two:
let updatedTotalFuel = updatedFuelRequirements.reduce(0, +)
We’re only a few days from December, which means it will soon be time for the great programming exercise known as the Advent of Code!
Think of it as an Advent calendar, but chocolates (or cheese, or wine), you’re presented with a new programming puzzle every day between the start of December and Christmas Day, in which you try to save Santa’s mission. You can use whatever programming language you want, and you don’t need to be an expert — as the site says, “just a little programming knowledge and some problem solving skills will get you pretty far.”
Not only do I plan on participating in this year’s Advent of Code, but I might even use a couple of the challenges in the Python class I’m currently teaching on behalf of Computer Coach.
Solving Advent of Code 2019’s day one challenge
Here’s the premise of the 2019 Advent of Code’s challenges: Santa is stuck at the edge of the solar system, and you have to rescue him. Each day’s challenge, which has two parts, gets you closer to bringing him home and saving Christmas.
The Elves quickly load you into a spacecraft and prepare to launch.
At the first Go / No Go poll, every Elf is Go until the Fuel Counter-Upper. They haven’t determined the amount of fuel required yet.
Fuel required to launch a given module is based on its mass. Specifically, to find the fuel required for a module, take its mass, divide by three, round down, and subtract 2.
For example:
For a mass of 12, divide by 3 and round down to get 4, then subtract 2 to get 2.
For a mass of 14, dividing by 3 and rounding down still yields 4, so the fuel required is also 2.
For a mass of 1969, the fuel required is 654.
For a mass of 100756, the fuel required is 33583.
The Fuel Counter-Upper needs to know the total fuel requirement. To find it, individually calculate the fuel needed for the mass of each module (your puzzle input), then add together all the fuel values.
What is the sum of the fuel requirements for all of the modules on your spacecraft?
While the problems in the Advent of Code are the same for every participant, the data for each participant is different (there’s a sign-up process, which gives you an account, your own progress tracker, and your own data). This prevents participants from simply sharing the solution.
Here are the module masses that were provided for my account:
Now that I had the data in a string, I could split the string into an array, using the newline character as the delimiter. I named the array split_input:
split_input is an array of strings which needed to be converted into integer values.
In many other languages, I’d do this by using the map function to apply a “convert a string to its integer value” function to every item in the array, creating a resulting array called masses. Here’s the Python version of that approach:
It works, but from a Python programming point of view, it just doesn’t feel right.
The Pythonic approach would involve using a list comprehension instead of map (and then using the resulting iterator into a list). It just seems more readable:
Once I had the masses, I could then calculate the fuel requirements for each mass. This may be the only time I’ve ever made use of Python’s floor division operator, which performs an integer division, rounding down:
I entered the value for total_fuel into the solution text field, and Advent of Code immediately told me that I had solved part one of the day one challenge! So far, so good.
Day one challenge, part two
Christine Darden, one of the “Hidden Figures” mathematicians who helped land the astronauts on the Moon.
Part two of the challenge was a refinement of part one:
During the second Go / No Go poll, the Elf in charge of the Rocket Equation Double-Checker stops the launch sequence. Apparently, you forgot to include additional fuel for the fuel you just added.
Fuel itself requires fuel just like a module – take its mass, divide by three, round down, and subtract 2. However, that fuel also requires fuel, and that fuel requires fuel, and so on. Any mass that would require negative fuel should instead be treated as if it requires zero fuel; the remaining mass, if any, is instead handled by wishing really hard, which has no mass and is outside the scope of this calculation.
So, for each module mass, calculate its fuel and add it to the total. Then, treat the fuel amount you just calculated as the input mass and repeat the process, continuing until a fuel requirement is zero or negative. For example:
A module of mass 14 requires 2 fuel. This fuel requires no further fuel (2 divided by 3 and rounded down is 0, which would call for a negative fuel), so the total fuel required is still just 2.
At first, a module of mass 1969 requires 654 fuel. Then, this fuel requires 216 more fuel (654 / 3 - 2). 216 then requires 70 more fuel, which requires 21 fuel, which requires 5 fuel, which requires no further fuel. So, the total fuel required for a module of mass 1969 is 654 + 216 + 70 + 21 + 5 = 966.
The fuel required by a module of mass 100756 and its fuel is: 33583 + 11192 + 3728 + 1240 + 411 + 135 + 43 + 12 + 2 = 50346.
What is the sum of the fuel requirements for all of the modules on your spacecraft when also taking into account the mass of the added fuel? (Calculate the fuel requirements for each module separately, then add them all up at the end.)
Upon reading this, my first thought was:
The trick to writing recursive functions is to solve the “escape” case first — that is, the case where you stop the recursion and just return a value.
For this problem, the “escape” case is when the repeated fuel calculation gives a result of 0 or less:
if result <= 0:
  return 0
Otherwise, take the result, and apply the fuel calculation to it again. That’s what gives us the recursive part. Here’s the resulting if statement:
if result <= 0:
  return 0
else:
  return result + fuel_required(result)
And finally, we have to handle the initial calculation. The end result is the fuel_required function:
def fuel_required(mass):
  result = mass // 3 - 2
  if result <= 0:
    return 0
  else:
    return result + fuel_required(result)
Now that we have the fuel_required function, we can apply it to every item in the masses array from part one:
Once again, here’s the weekly list of events for events for Tampa Bay techies, entrepreneurs, and nerds. Every week, on GlobalNerdy.com and on the mailing list, I scour the announcements for events that are interesting to or useful for those of you who are building the future here in “The Other Bay Area, on The Other West Coast”.
This list covers events from Monday, November 23 through Sunday, November 29, 2020.
I’ve opted to list only those events that I can confirm are happening online. I’m not yet listing in-person events, as we’re still in the middle of a pandemic in one of the hardest-hit states (875,000 cases, which is an increase of 31,000 since last week, and 17,488 deaths, which is up 1,572 from last week) in one of the hardest-hit countries in the world (11 million cases, which is an increase of 1 million from last week, and 245,000 deaths, which is up 7,000 from last week).
Events — especially virtual, online ones — can pop up at the last minute. I add them to the list as I find out about them. Come back and check this article from time to time, as you might find a new listing that wasn’t there before!
It’s the week of Thanksgiving, which is one of the least productive weeks of the year. You might want to double-check with event organizers that events that appear on the schedule are actually happening this week!
It’s Thanksgiving day! You might want to double-check with the event organizers that these events — which were listed on Meetup and EventBrite — are actually happening on this day.
It’s Black Friday! You might want to double-check with the event organizers that these events — which were listed on Meetup and EventBrite — are actually happening on this day.
If you’d like to get this list in your email inbox every week, enter your email address below. You’ll only be emailed once a week, and the email will contain this list, plus links to any interesting news, upcoming events, and tech articles.
Join the Tampa Bay Tech Events list and always be informed of what’s coming up in Tampa Bay!
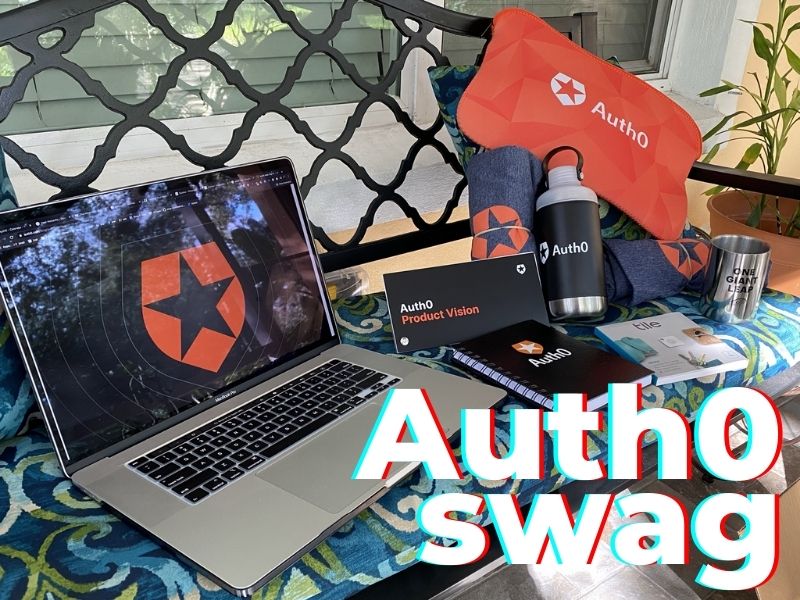
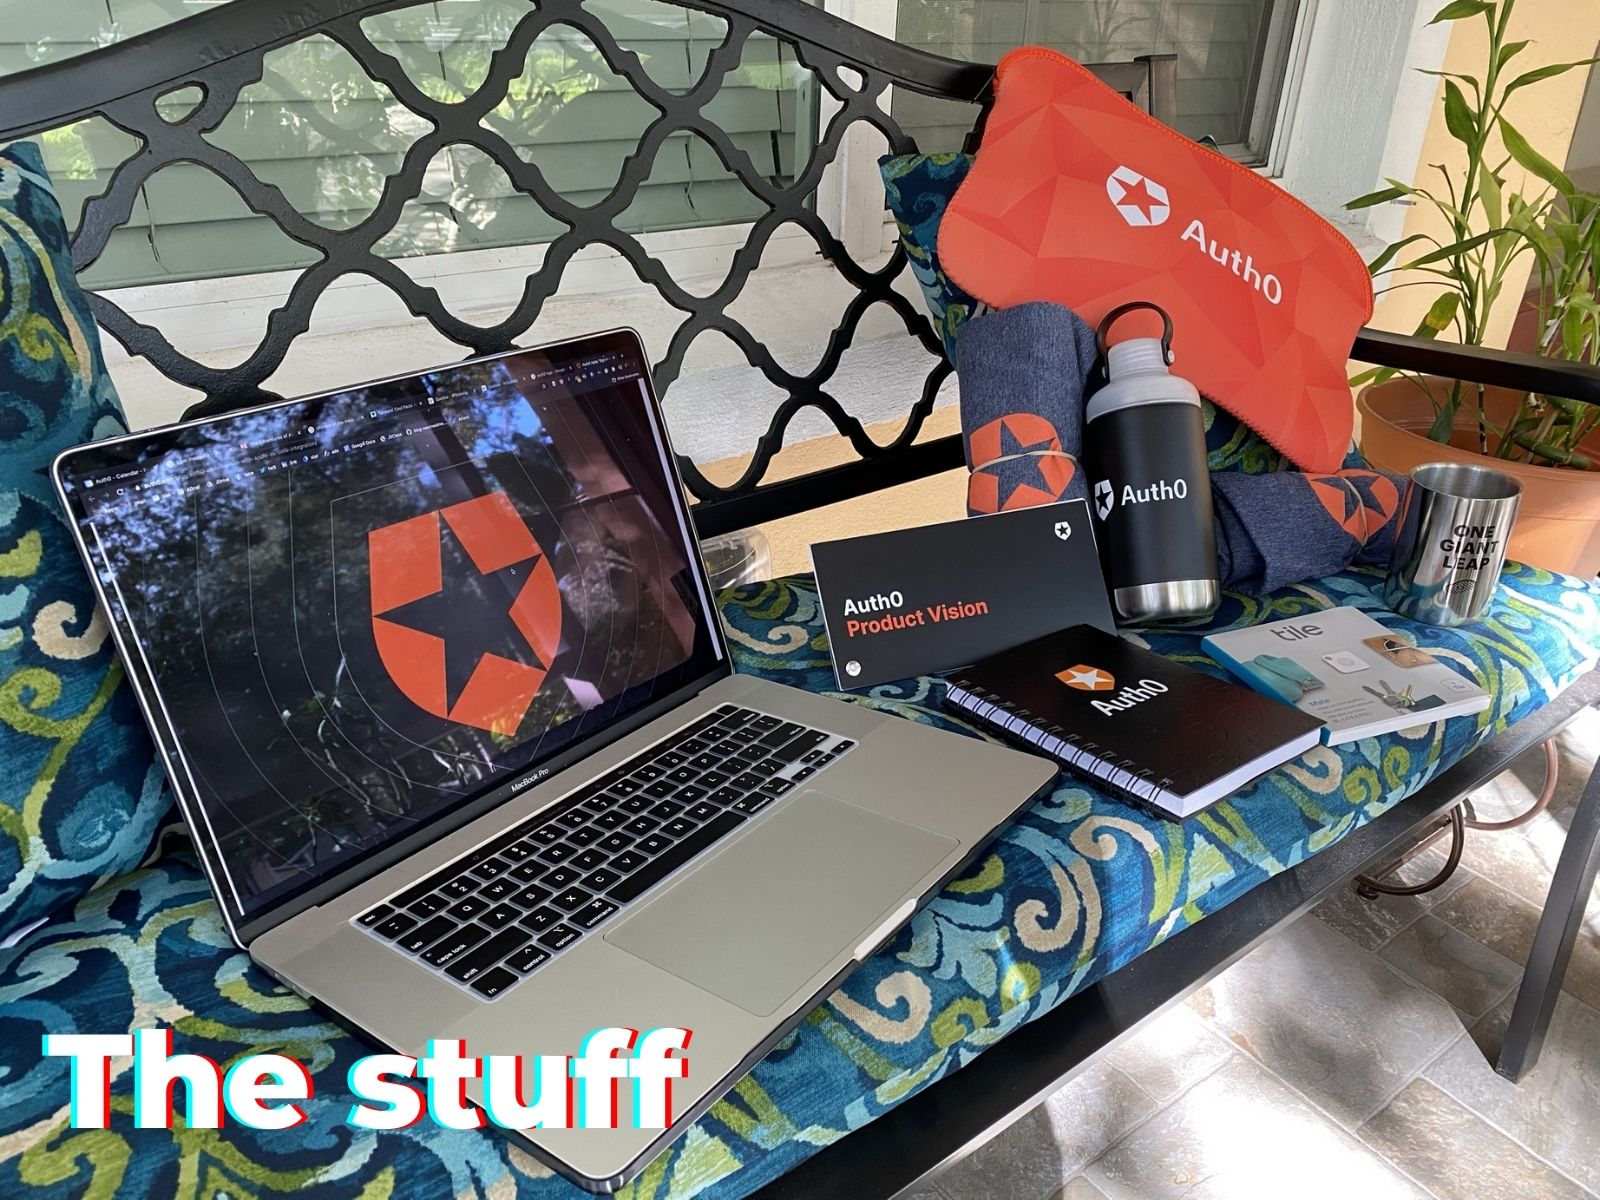
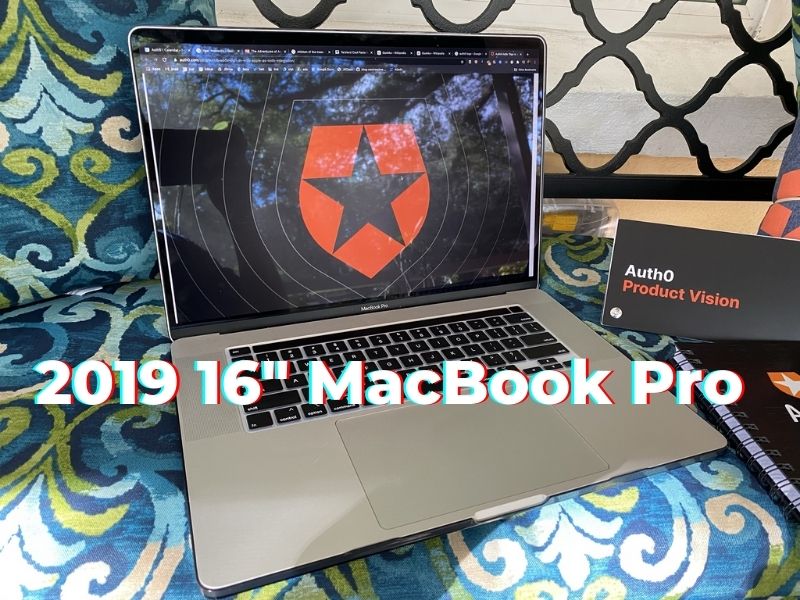
My Auth0 swag arrived today! This means I can finally partake in the techie tradition of making the traditional “Look at the stuff I got when I joined the company!” post.
The laptop arrived on the Friday of my first week, and it’s a nice one:
When I got hired, incoming Auziros — that’s the internal term for “Auth0 employee” — got the choice of either a 13″ or 16″ MacBook Pro.
Many developers I know prefer to go with a smaller, lighter notebook. As a person who carries an accordion to social events, conferences, and bars (or at least, I used to, before the plague), I have a distorted sense of what “lightweight” is, and consider a 16″ laptop dainty. I don’t mind the extra weight, and I appreciate the extra processing power, screen real estate, USB ports, and battery size.
The swag arrived in a box at noon, and most of it is Auth0-branded and in the official colors.
The goodies are:
2 Auth0 t-shirts
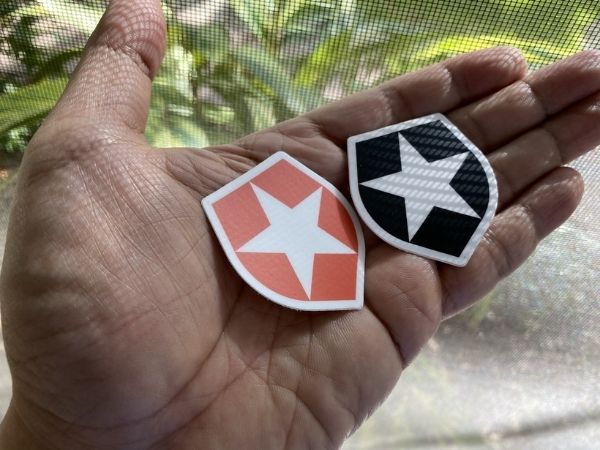
2 Auth0 stickers
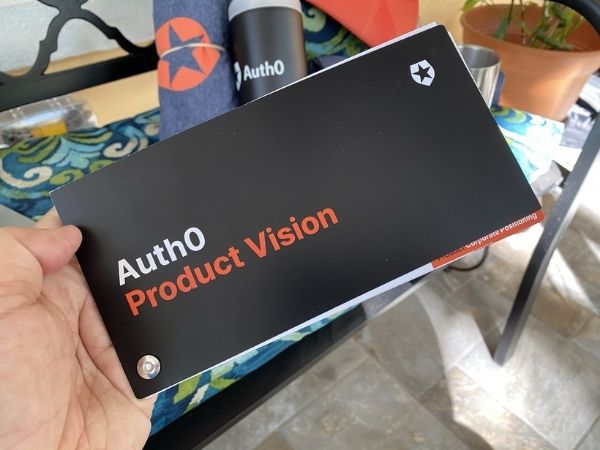
A reversible booklet, which reads “Auth0 Product Vision” on one side, and “Auth0 Brand Vision” on the other
An Auth0 water bottle
A metal cup, labeled “One giant leap”, and below it, a lunar footprint with the Auth0 “shield” logo in the middle
An Auth0 spiral-bound notebook
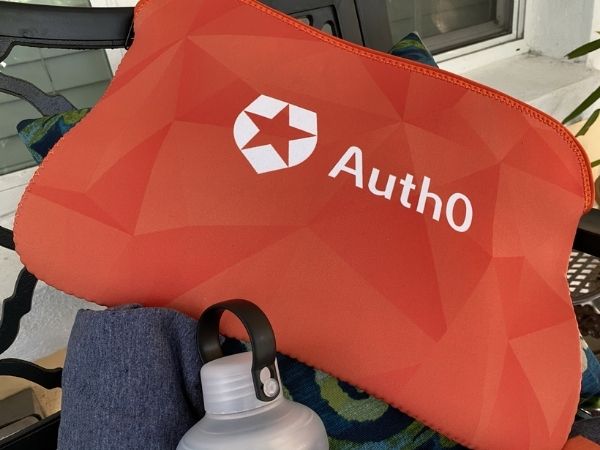
An Auth0 laptop zip-pouch
A Tile Mate bluetooth tracker
The laptop pouch can hold the 16″ MacBook Pro, and it certainly stands out. It’s a good thing that orange is one of my favorite colors:
I’m going to have to ask an Auziro who’s been around longer what the “One Giant Leap” promotion was all about. It is a nice mug:
Companies function better when their people can actually tell the story of the company and articulate what the company’s all about. And for the people who work at a company, knowing the company’s vision and the image it wants to project to the world can help give a sense of meaning and purpose to the work they do.
That’s why I think one of the best things in the box o’ swag was the double-sided booklet, with Auth0’s product vision on one side…
…and Auth0’s brand vision on the other:
It’s not unusual for a tech company to provide swag like branded bottles, bags, mouse pads, mugs, and stickers. In my more recent experience, I’ve been fortunate to get a really nice “welcome” package from Shopify, Smartrac, and Sourcetoad.
Some companies stand out by providing something a little more unusual with the welcome swag. Auth0 is one of those companies, as they didn’t just include a Tile Bluetooth tracker, but also put the box in a sleeve with nice messages. They could’ve just thrown it in with the rest of the stuff, but they took the trouble to make it a little more personal:
I’ll admit it: I’ve gotten a little used to working at smaller companies, where there’s no monitoring of company computers, and it’s the Wild West as far as what you can install on them.
That’s no longer the case for me. I now work at Auth0, a company with a headcount that’s quickly approaching 800, with unicorn status and Series F funding, and it’s in the security industry. Naturally, there’s a full-fledged security team that monitors company-issued computers.
In my excitement to take the new version of macOS — Big Sur — out for a spin, I’d forgotten that the Security team hasn’t yet approved it for use. They very quickly (and I should add, nicely) contacted me and let me know that I needed to reinstall macOS Catalina as soon as possible.
There are other reasons why you might need to go back to Catalina after installing Big Sur:
It’s still very new, and very new versions of operating systems always have some set of issues, whose effects can run the gamut from mildly annoying to catastrophic. If you can’t afford to lose time dealing with these issues, you should wait for the updates.
For the benefit of any who need to downgrade, here’s a step-by-step guide to reinstalling Catalina after you’ve installed Big Sur. You’ll need a USB key and the better part of an afternoon.
Step 1: The preliminaries
1a: Start downloading the Catalina installer from the App store
The first thing you’ll need is the macOS Catalina installer.
It’ll take up around 9 gigabytes of space on your hard drive, and the App Store will put in your Applications folder.
Once it’s completely downloaded from the App Store, the installer will start automatically. When this happens, close the installer. You’ll make use of it later.
The installer will take some time to download. Apple’s servers will be busier than usual, as many users are downloading Big Sur and other upgrades.
1b: Back up your files!
In the process of reinstalling Catalina, you’ll need to completely erase your Mac’s hard drive. If you have any files that you can’t live without, this is the time to back them up.
I didn’t have to worry about this, since:
All my work product is either code (which lives on GitHub) or content (which lives on GitHub or Google Docs), and
I’ve been at Auth0 less than a month, and between onboarding and offsites, there just hasn’t been that much of a chance for me to accumulate that many files on my hard drive!
1c: Get a nice fast USB key that stores at least 16 GB
The process will involve booting your Mac from a USB key containing the macOS Catalina installer, so you’ll need a key with enough space. An 8 GB USB key won’t be big enough. Because digital storage is all about powers of 2, the next size up will be 16 GB.
I strongly recommend that you use a USB 3 key, especially one with read speeds of 300 megabits/second or better, such as the Samsung Fit Plus. Doing so will greatly speed up the process. Don’t use a USB key that you got as conference swag — it may have the space, but more often than not, they tend to be slow, because they’re cheap.
If the USB key contains files that you want to keep, back them up. You’re going to erase the key in the next step.
Step 2: Make a bootable USB key containing the macOS Catalina installer
2a: Format the USB key
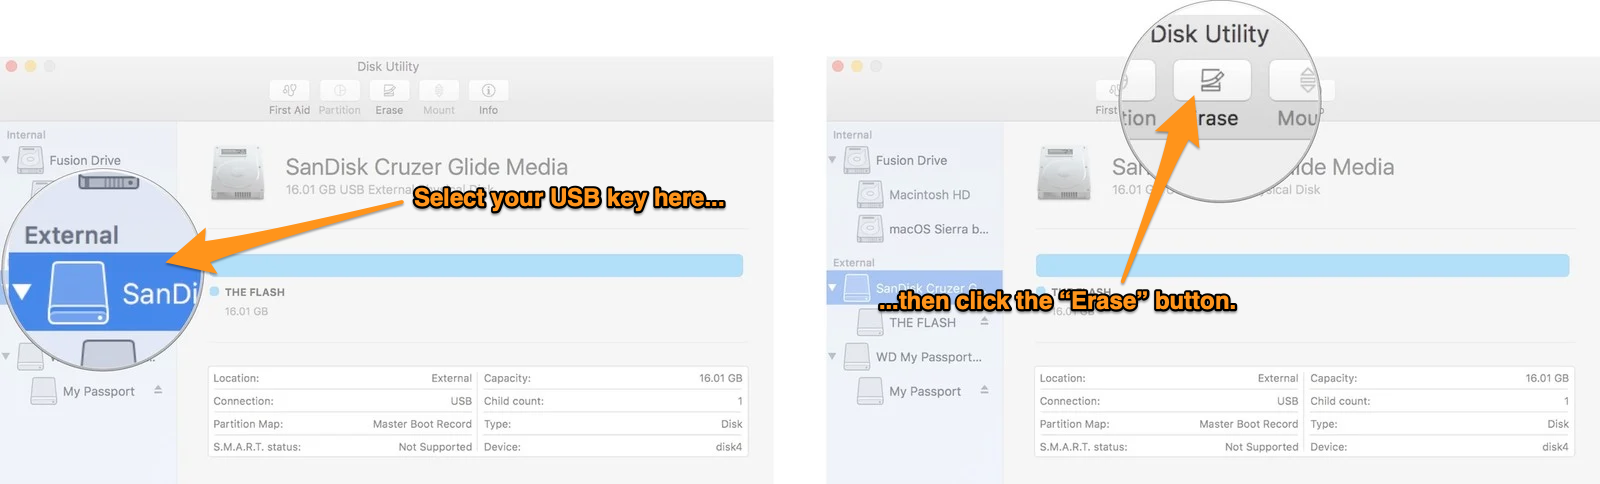
Plug the USB key into your Mac, then launch Disk Utility.
Select the USB key in Disk Utility’s left column, then click the Erase button:
Tap to view at full size.
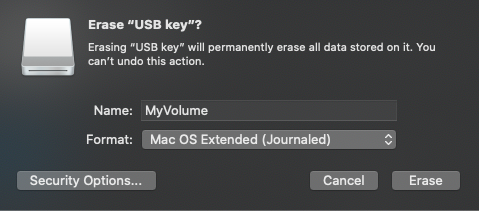
You’ll be presented with this dialog box:
Enter MyVolume into the Name field, and for Format, select Mac OS Extended (Journaled). Click the Erase button. This will format the USB key with the volume name of MyVolume.
2b: Install the macOS Catalina installer onto the USB key
In Step 1a, you downloaded the macOS Catalina installer and closed it after it started automatically. In this step, you’ll transfer it to your freshly-formatted USB key.
Open a terminal window and paste the following command into it:
(The command above assumes that you gave the USB key the volume name MyVolume.)
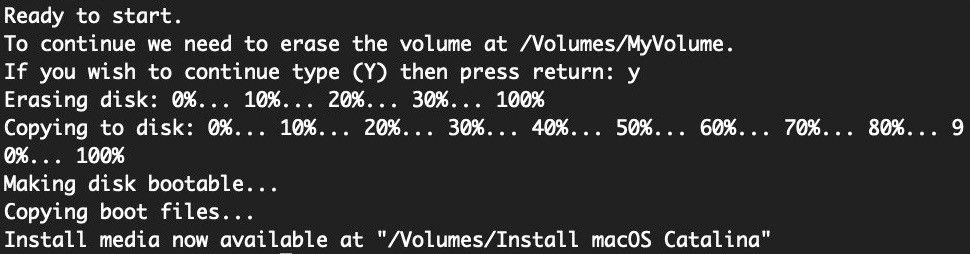
Once you’ve provided sudo with your password, you’ll be asked if you want to erase the USB key. Entering Y in response will start the process of making the USB key a bootable drive and copying the macOS Catalina installer onto it:
Tap to view at full size.
The Erasing disk process will be relatively quick, but the Copying to disk process may take a while. This is where using a nice, fast USB 3 key will pay off.
Be patient and let it get to 100%, and wait for the Install media now available message to appear and the command line prompt to return.
2c: If your Mac is from 2018 or later, set it up to boot from external media
Check the year of your Mac’s manufacture by selecting About This Mac under the Apple menu:
If your Mac year is 2017 or earlier, you don’t need to follow the rest of this step. Proceed to Step 3.
If your Mac’s year is 2018 or later, you’ll need to change its security settings to allow it to boot from an external drive.
Here’s how you change the security settings:
Restart your Mac and hold down the ⌘ and R keys when you see the Apple logo. This puts the computer into recovery mode, which provides many setup options.
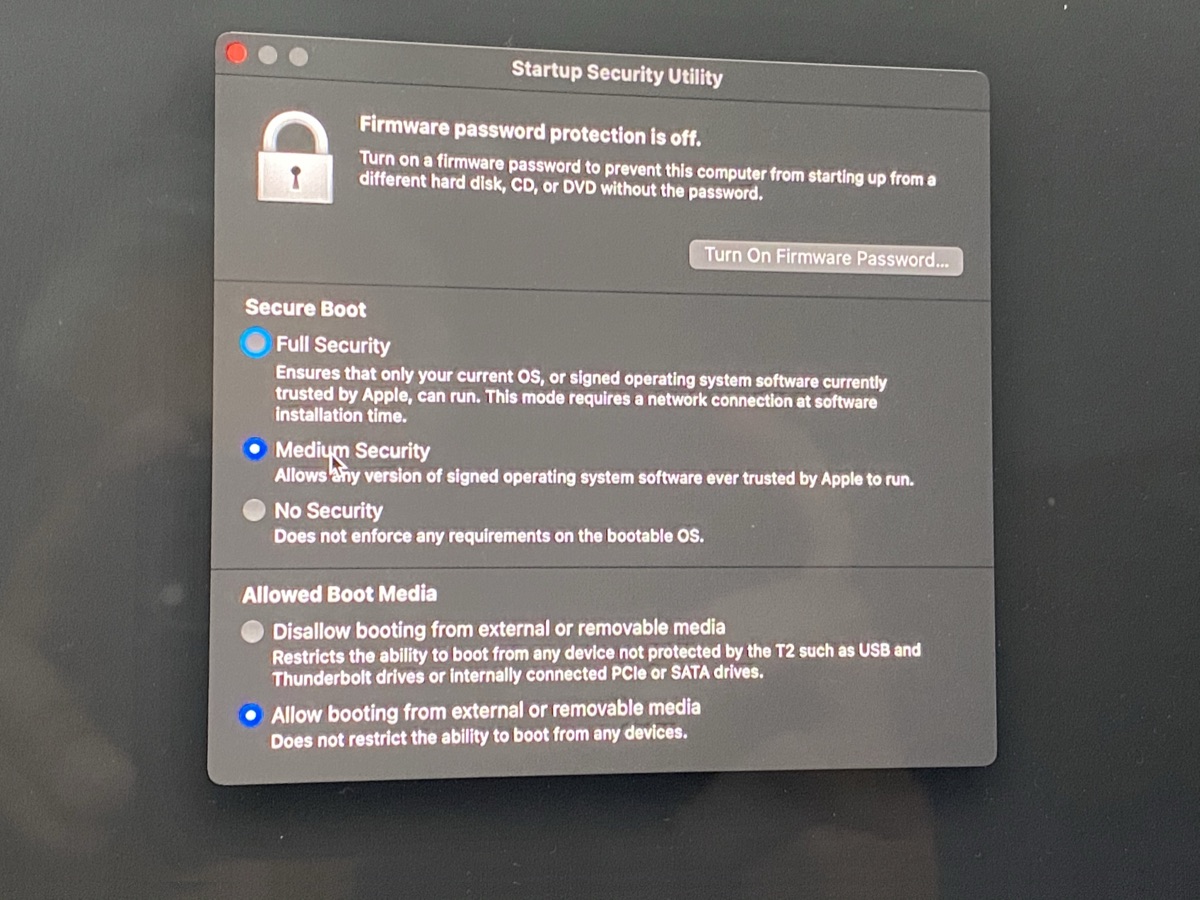
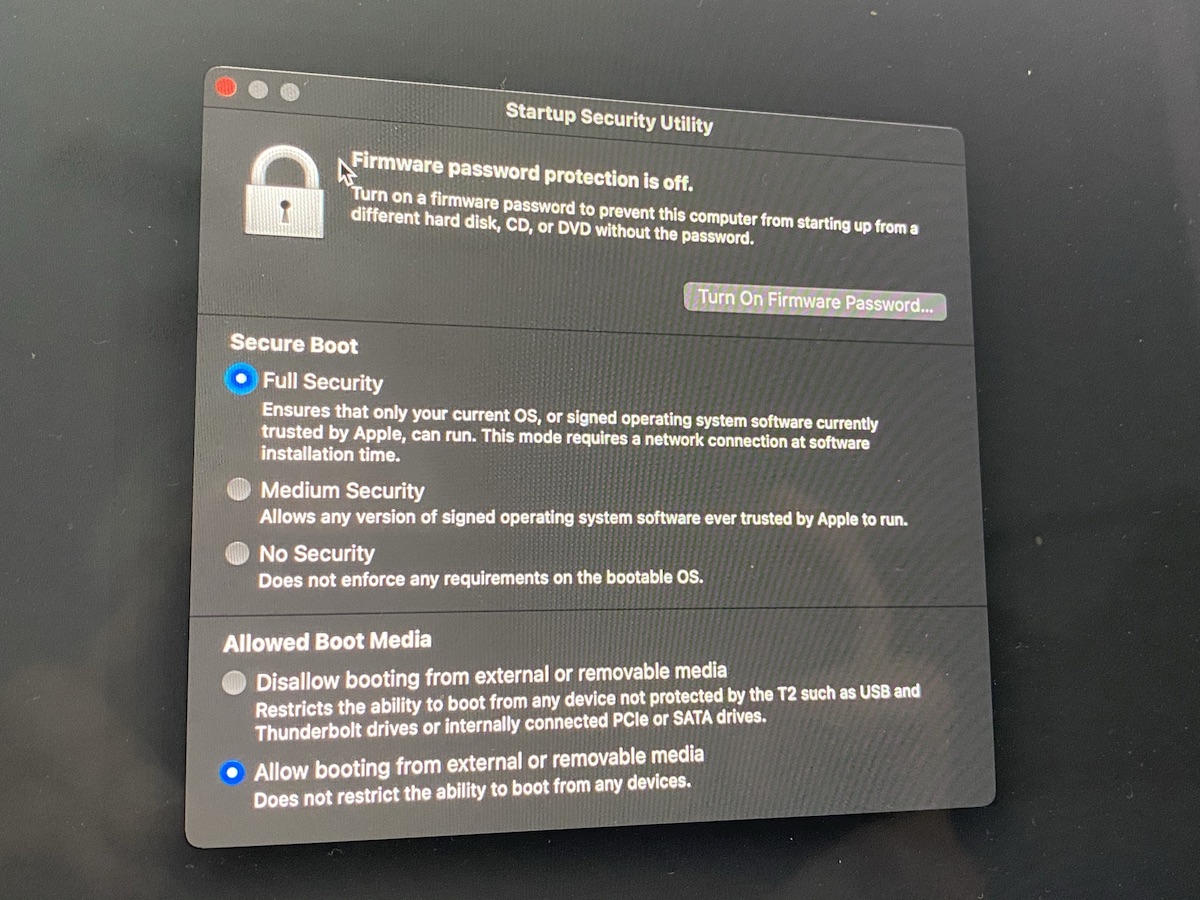
In the menu bar, select Utilities, and then select Startup Security Utility from the list that appears.
The Startup Security Utility window will appear:
Under the Secure Boot section, select Medium Security. This will allow you to install Catalina without having to connect to a network.
Under the External Boot section, select Allow booting from external media. This will allow you to install Catalina from a USB key or disk drive.
Tap to view at full size.
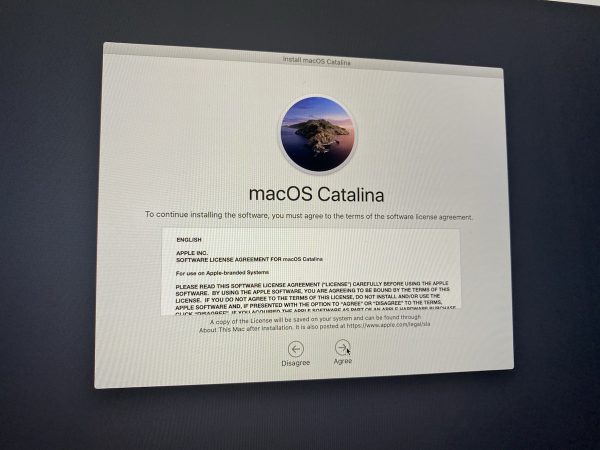
Step 3: Install macOS Catalina
Restart your Mac, and hold down the Option key while it restarts. Your Mac will present you with a choice of startup disks.
Choose the USB key. Your Mac will boot up and you’ll be presented with the macOS Catalina installer screen:
Go ahead and install Catalina.
Once Catalina is installed, you can proceed reinstalling your other software.
Once that’s complete:
If your Mac’s year is 2017 or earlier, you’re done installing Catalina. You can now go about reinstalling your software and restoring your backed up files.
If your Mac’s year is 2018 or later, you’ll need to restore its original security settings. The process is described in Step 4, below.
Step 4: If your Mac is from 2018 or later, restore the original security settings
If your Mac is from 2018 or later, follow these steps to restore the original security settings once Catalina has been installed:
Restart your Mac and hold down the ⌘ and R keys when you see the Apple logo. This puts the computer into recovery mode, which provides many setup options.
In the menu bar, select Utilities, and then select Startup Security Utility from the list that appears.
The Startup Security Utility window will appear:
Under the Secure Boot section, select Full Security.
Under the External Boot section, select Disallow booting from external media.
Once again, here’s the weekly list of events for events for Tampa Bay techies, entrepreneurs, and nerds. Every week, on GlobalNerdy.com and on the mailing list, I scour the announcements for events that are interesting to or useful for those of you who are building the future here in “The Other Bay Area, on The Other West Coast”.
This list covers events from Monday, November 16 through Sunday, November 22, 2020.
I’ve opted to list only those events that I can confirm are happening online. I’m not yet listing in-person events, as we’re still in the middle of a pandemic in one of the hardest-hit states (875,000 cases, which is an increase of 31,000 since last week, and 17,488 deaths, which is up 1,572 from last week) in one of the hardest-hit countries in the world (11 million cases, which is an increase of 1 million from last week, and 245,000 deaths, which is up 7,000 from last week).
Events — especially virtual, online ones — can pop up at the last minute. I add them to the list as I find out about them. Come back and check this article from time to time, as you might find a new listing that wasn’t there before!
If you’d like to get this list in your email inbox every week, enter your email address below. You’ll only be emailed once a week, and the email will contain this list, plus links to any interesting news, upcoming events, and tech articles.
Join the Tampa Bay Tech Events list and always be informed of what’s coming up in Tampa Bay!