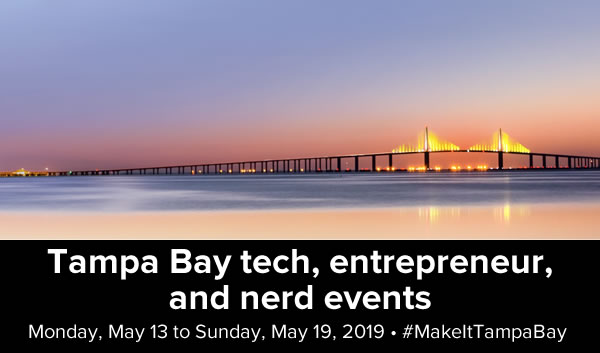
Every week, I compile a list of events for developers, technologists, tech entrepreneurs, and nerds in and around the Tampa Bay area. We’ve got a lot of events going on this week, and here they are!
This weekly list is posted as a voluntary service to the Tampa tech community. With the notable exception of Tampa iOS Meetup, which I run, most of this information comes from Meetup.com, EventBrite, and other local event announcement sites. I can’t guarantee the accuracy of the dates and times listed here; if you want to be absolutely sure that the event you’re interested in is actually taking place, please contact the organizers!
Monday, June 3
- Tampa Bay Professionals (IT, Sales, HR & more) — NEW LEADERS – Dale Carnegie “Develop Your Leadership Potential” 3-Day Meetup @ Presidents Plaza – Dale Carnegie Training , Monday 8:30 AM to Wednesday, 5:30 PM
- Tampa Bay Connections — Monday Referal Partners! Wrights Gourmet House & Deli @ Wright’s Gourmet House, 11:30 AM to 1:00 PM
- America’s TriviAddiction — ROOKIES SPORTS BAR – SPRING HILL – LIVE TEAM TRIVIA !!! @ 6:00 PM to 8:00 PM
- Florida Center for Creative Photography — FREE Lightroom Class at Ross Norton Community Center — Class 3 of 8 @ Ross Norton Recreation Complex, 6:30 PM to 8:30 PM
- Cool ‘n Confident Toastmasters @ SPC – St. Petersburg/Gibbs Campus, 6:30 PM to 8:00 PM
- America’s TriviAddiction — 3 DAUGHTERS BREWING – ST. PETERSBURG – LIVE TEAM TRIVIA @ 7:00 PM to 9:00 PM
- Tampa Bay Blockchain Developers Meetup / Ethereum Tampa Bay — FullStack Fast: DevOps with IBM Cloud @ Tampa Bay Wave, 7:00 PM to 9:00 PM
- St. Petersburg Photography Group — LIGHTROOM DEVELOP MODULE @ 7:00 PM to 8:30 PM
- South Tampa Toastmasters @ Unity of Tampa, 7:00 PM to 8:15 PM
- Pen Turning Class (Day 1 of 2) @ Tampa Hackerspace West, 7:00 PM to 9:00 PM
Tuesday, June 4
- Business Game Changers Group — Leads and Coffee @ Belleair Coffee Company, 8:00 AM to 9:00 AM
- Florida Center for Creative Photography — Coffee & Photography Meeting at The Portico in Tampa @ The Portico, 9:00 AM to 11:00 AM
- St. Petersburg Photography Group — Salvage Yard Photography Practice – Indoors! @ 10:00 AM to 12:00 PM
- Young Professionals of Tampa Bay Networking Group — Carrolwood Networking Lunch @ McAllisters Deli, 11:30 AM to 1:00 PM
- Westshore Toastmasters @ FIVE Labs, 12:00 PM to 1:00 PM
- Game Club Tampa Meetup — Board Game Tuesdays (Always looking for more players) @ Grand Arena of Mind Expansion, 5:00 PM to 11:00 PM
- Brandon Boardgamers — Tuesday Night Gaming @ Cool Stuff Games, 5:00 PM to 8:00 PM
- Entrepreneurs & Startups – Bradenton Networking & Education — Network & Learn – Getting to the Heart of Your Business: a lesson in messaging @ Station 2 Innovation Center, 5:30 PM to 7:30 PM
- Bradenton JPI Photo Group — Beyond Camera Basics @ 6:00 PM to 8:00 PM
- THS Member Meeting @ Tampa Hackerspace, 6:00 PM to 7:00 PM
- WordPress St. Petersburg — LEGO® Serious Play: Must Have Ingredients for Killer WordPress Websites @ Suncoast Developers Guild, 6:30 PM to 8:30 PM
- Anime, Nerds & Geeks — AMC $5 MOVIES – GODZILLA KING OF THE MONSTERS @ 6:30 PM to 9:15 PM
- Qlik Meetup – Tampa @ QZar Laser Tag, 6:30 PM to 9:00 PM
- West Pasco Toastmasters Club #2824 — Weekly Meeting @ West Pasco Board of Realtors, 6:30 PM to 8:00 PM
- Game Club Tampa Meetup — Tuesday Nite Roleplayers (RPGs) [Full] @ Grand Arena of Mind Expansion, 6:30 PM to 10:30 PM
- America’s TriviAddiction — WESTSHORE PIZZA – BELLEAIR BLUFFS – LIVE TEAM TRIVIA !!! @ 6:30 PM to 8:30 PM
- Tampa Bay Young Professionals Group — $5 Movie Night & Happy Hour: Aladdin & Tampa Joe’s @ 6:30 PM to 10:30 PM
- St. Pete .NET Meetup — Cortana *IS A THING* with Kelvin McDaniel @ Bank of the Ozark’s Innovation Lab, 7:00 PM to 9:00 PM
- Pen Turning Class (Day 2) @ Tampa Hackerspace West, 7:00 PM to 9:00 PM
- Florida Center for Creative Photography — Photo 101 – Ask Me Anything! — Related to Photography, Computers and Software @ O’Keefe’s Family Restaurant, 7:00 PM to 9:00 PM
Wednesday, June 5
- Open/FREE Coworking for Latino Tech Entrepreneurs @ FirstWaVE Venture Center, 8:00 AM to 11:00 AM
- 1 Million Cups St. Pete — Bees Learning, Inc. / Drive Planning @ St. Peterburg Greenhouse, 9:00 AM
- 1 Million Cups Tampa — Boss Life Coaching & Consulting LLC / creative LEAPS / Hulogix, Inc, 9:00 AM
- Young Professionals of Tampa Bay Networking Group — Bernini of Ybor Lunch Networking @ Bernini (innovative italian cuisine), 11:30 AM to 1:00 PM
- Tampa Bay Business Intelligence and Data Analytics — Monthly Meeting @ AgileThought, Inc, 6:00 PM to 8:00 PM
- Tampa Bay Scrum Masters Guild @ Grow Financial Federal Credit Union, 6:00 PM to 8:00 PM
- Bradenton Toastmasters @ Manatee Unitarian Universalist Fellowship, 6:15 PM to 7:30 PM
- Tampa Artificial Intelligence Meetup — RAPIDS: Accelerating the Data Science Ecosystem @ Entrepreneur Collaborative Center, 6:30 PM to 8:00 PM
- Tampa Bay Ableton Addicts — Monthly Ableton Meeting at Guitar Center @ Guitar Center, 6:30 PM to 8:00 PM
- Tampa Writers Alliance — Satisfying Endings: A Crucial but Overlooked Element of Great Fiction @ Barnes & Noble Carrollwood, 6:30 PM to 8:30 PM
- Learn to Code | Thinkful Tampa — Free Crash Course | Build a Web App with JavaScript & jQuery @ Tampa Bay Wave, 6:30 PM to 8:00 PM
- Crypto Investors Club (5 STAR RATED) @ Hawthorne Bottle Shoppe, 6:30 PM to 8:30 PM
- Design St. Pete — A product managers perspective. Working better with Designers. @ Gypsy Souls Coffeehouse, 6:45 PM to 8:45 PM
- Florida Center for Creative Photography — Night PhotoWalk in Tarpon Springs @ Tarpon Springs Sponge Docks, 7:00 PM to 9:00 PM
- Japanese Classes at Oblivion Games: Week 13 Lesson 2 @ Oblivion Games, 7:00 PM to 8:00 PM
- Laser Cutter Orientation @ Tampa Hackerspace, 7:00 PM to 9:00 PM
- Cryptocurrency Tampa Meetup — Bitcoin/Cryptocurrency Meetup: Networking, News, Q&A @ Coastal Cantina and Grill, 7:00 PM to 9:00 PM
- Carrollwood Toastmasters @ Jimmie B. Keel Regional Library, 7:00 PM to 8:30 PM
- Nerdbrew Events — Games & Grog @ Peabody’s, 7:00 PM to 11:00 PM
Thursday, June 6
- Creativity – it’s not just for artists anymore — Beach Mandala Making with Zing @ Coquina Beach, 8:00 AM to 10:00 AM
- Florida Center for Creative Photography — Thursday Morning Photowalk at Honeymoon Island State Park @ Honeymoon Island State Park, 8:00 AM to 10:00 AM
- Tampa# – C# and .NET — Coffee & Code @ Pour House at Grand Central, 11:15 AM to 1:15 PM
- Tampa Bay Connections — MELLOW MUSHROOM THURSDAY’S NETWORKING LUNCH @ Mellow Mushroom, 11:30 AM to 1:00 PM
- Ignite Tampa Bay 2019 @ Palladium Theater St. Petersburg, 6:00 PM to 9:00 PM
- Tampa Bay Power BI User Group — From a Million to a Billion Rows + Python Tabular Automation @ CCG Analytics Solutions & Services, 6:00 PM to 8:00 PM
- Tampa Bay Business Networking Happy Hour- Meet Up — Cocktails and Connections ~ 1st Thursday of the Month @ Cafe Delanie, 6:00 PM to 8:00 PM
- Brandon and Seffner area D&D Meetup — 1st ed AD&D Barrowmaze Campaign @ 6:00 PM to 10:00 PM
- Public Speakers Community of Tampa Bay — How to Build a Successful Public Speaking Business @ 6371 Business Blvd, 6:00 PM to 8:00 PM
- America’s TriviAddiction — CRESCENT OAKS COUNTRY CLUB – TARPON SPRINGS – LIVE TEAM TRIVIA !!!, 6:00 PM to 8:00 PM
- America’s TriviAddiction — CAPTAIN’S CORNER – BROOKSVILLE – LIVE TEAM TRIVIA !!!, 6:00 PM to 8:00 PM
- America’s TriviAddiction — BAYSCAPE BISTRO AT HERITAGE ISLES – NEW TAMPA – LIVE TEAM TRIVIA !!!, 6:30 PM to 8:30 PM
- WordPress Tampa — Amateur to Amazing, using Coding Katas, and Test Driven Development @ Charles J. Fendig Public Library, Charles J. Fendig Public Library, 6:30 PM to 8:30 PM
- Dunedin Beers & Board Games — Beers and Board Games at Cueni Brewing in Dunedin (Every Thursday) @ Cueni Brewing Co., 6:30 PM to 10:00 PM
- Books, Brews & Bags! — June – Eleanor Oliphant is Completely Fine @ If I Brewed the World, 7:00 PM to 10:00 PM
- Drupal User Group of Tampa Bay — Minimal Drupal: Easiest Ways to Start with Drupal @ Panera Bread, 7:00 PM to 8:30 PM
- St Pete Business Builder Meetup @ Suncoast Developers Guild, Suncoast Developers Guild @ Suncoast Developers Guild, 7:00 PM to 8:00 PM
- Shopbot Safety and Usage (Members Only) @ Tampa Hackerspace West, 7:00 PM to 9:00 PM
- Hyperledger Tampa — Partnering with IBM as a startup to monetize data @ BlockSpaces, 7:00 PM to 9:00 PM
Friday, June 7
- Lean Coffee for All Things Agile (Carrollwood) @ Maple Street Biscuit Company, 7:30 AM to 8:30 AM
- Lean Coffee for All Things Agile (St Petersburg) @ Panera Bread, 7:30 AM to 8:30 AM
- Tampa Bay DevOps — DevOpsDays Tampa Bay @ Nielsen, 8:00 AM to 4:00 PM
- Trinity Odessa Toastmasters @ Holiday Inn Express Trinity, 8:00 AM to 9:00 AM
- Tampa Bay Professionals (IT, Sales, HR & more) — SALES PROS – Dale Carnegie Sales Advantage: Free Meetup @ Presidents Plaza – Dale Carnegie Training, 9:00 AM to 10:30 AM
- Florida Center for Creative Photography — FCCP Friday Morning Photowalk at the Florida Botanical Gardens @ Florida Botanical Gardens, 9:00 AM to 11:00 AM
- West Coast Photo Group — Online Challenge Subject: Cats @ 10:00 AM to 12:00 PM
- Speaking and Presentation Skills Success — Organizing Your Presentation @ Sheryl’s place, 11:30 AM to 1:00 PM
- Young Professionals of Tampa Bay Networking Group — Friday Business Introductions @ 3 C’s Catering, 11:30 AM to 1:00 PM
- Digital 1st Friday Meetup, St. Petersburg, FL — 6/7 St. Pete’s Digital 1st Friday Meetup…sponsored by iSOCRATES @ Rising Tide Innovation Center, 5:00 PM to 7:00 PM
- The Pinellas County Young Professionals — Bi-Weekly Friday Night Volleyball @ North Shore Park, 5:00 PM to 7:00 PM
- Digital Photo Artists — Myakka Light – A Photographic Exhibit in Infrared – Frank Bibbins @ 6:00 PM to 9:00 PM
- Gulf Coast Makers: First Fridays at the Fab Lab: Car Care for the Clueless with Pam Oakes @ AMRoC Fab Lab, 6:30 PM to 8:30 PM
- St. Petersburg Board Game Night FIRST FRIDAY Game Night (June) @ Overflow Brewing Company, 7:00 PM to 11:59 PM
- Tampa Japanese Meetup — FL JETAA Tsudoi @ Jason’s Deli, 7:00 PM to 10:00 PM
- The Pinellas County Young Professionals — Classy as F*ck First Friday **Sunset at the Canopy Edition @ The Birchwood, 7:00 PM to 10:00 PM
- Geekocracy! — Dark Phoenix at AMC Veterans @ AMC Veterans 24, 7:15 PM to 10:15 PM
Saturday, June 8
- Tampa Bay Area – Bootstrappers Breakfast @ The Portico Cafe, 8:15 AM to 10:15 AM
- R-Ladies Tampa — R Markdown @ The Entrepreneur Collaborative Center, 10:00 AM to 12:00 PM
- Toastmasters District 48 — The Order of Smedley .. Advanced Club @ 10:30 AM to 12:30 PM
- Nerd Night Out — NNO Book Club: The Calculating Stars @ Yummy House China Bistro, 1:00 PM to 3:00 PM
- St. Pete Makers — Open Make Night / Open House @ St. Pete Makers, 6:00 PM to 8:00 PM
- Geekocracy! — Geekocracy Family Feud! @ 7venth Sun Brewery, 7:30 PM to 10:30 PM
Sunday, June 9
- Florida Center for Creative Photography — FCCP Sunday Morning Photowalk to Kapok Park @ Kapok Park, 8:30 AM to 10:30 AM
- Brandon Drones Meetup — Open Fly @ 9:00 AM to 11:00 AM
- Geekocracy! — Paintball! @ Orbital Paintball, 10:00 AM to 1:00 PM

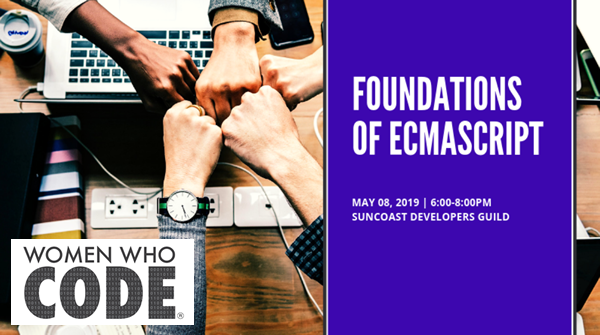
 It’s 2019, and if you’re writing code in JavaScript/ECMAScript, you should be doing it in ES6 (a.k.a. ES2015) at the very least.